Cheetah Pads FAQ’s
Q: How long does a cheetah pad last?
A: On Average the cheetah pad can last up to 5000 sq ft. Step one will obviously wear faster due to its aggressive nature. Step 4 will last much longer. Flat leveled even smooth surfaces tend to give a much longer lifespan to the Cheetah pads up to 20,000sqft. Rough textured, uneven surfaces with lippage will wear the pads faster.
Q: What types of surfaces can you use the Cheetah Pads on?
A: Marble, travertine, limestone, terrazzo and polished concrete. Many types of polishing equipment can only be used on certain types of marble, Cheetah Pads however, work effectively on extremely soft and extremely hard types of marble, even on the most difficult of marbles such as the green serpentine and still achieve extremely high gloss meter readings.
Q: How much do the new Cheetah Pads cost?
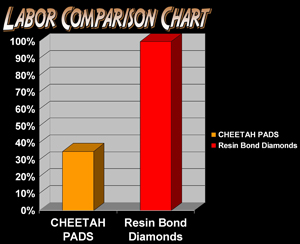
A: The 17″ Cheetah Pads are $125.00 each. If you compare the Cheetah pad with these other types of products that you’d need to do the same job, the Cheetah is by far the most cost-effective process available today. For example the Cheetah pad step 1 replaces the need to use 50,100,200 & 400 grit resin bond diamond. So, in essence, step 1 the pad is $125.00 compared to the 24 resin diamonds required at $480.00. That’s a savings of over 70%!!!
Q: How fast do cheetah pads work?
A: Taking into consideration the fact that FOUR Cheetah Pads replace eight of the traditional steps of resin bond diamond pads and also the place of marble polishing compounds & crystallizers. The Cheetah is by far faster, you can save as much as 70% on labor when compared to any other traditional marble grinding and polishing systems.
Q: How much weight should the floor machine carry in order for the Cheetah Pad to work at maximum efficiency?
A: Cheetah Pads were designed to be used with even the lightest weight floor machine possible. A heavy duty stone grinding and polishing machine is not required. You can use a machine that weighs as little as 70 lbs to 180lbs. Keep in mind the more weight you use the faster the pad will wear, the ideal weight is approximately 110lbs, that maximizes lifespan and the effectiveness of the pad.
Q: How much training is involved in being able to use the Cheetah pad effectively to offer professional results on marble, travertine, limestone, terrazzo and polished concrete?
A: The traditional methods for stone restoration require years of on-the-job training, thousands of hours practicing and learning because of the complexity of marbles and the thousands of different types of stone make these methods very difficult. The Cheetah four step methods are extremely effective and easy to use on all surfaces mentioned before. In as little as 30min of practice you will be able to offer professional results that are beyond factory polish without worry of risking damage to the surface. The Cheetah is designed to create perfect uniform results on every type of marble, travertine, limestone, terrazzo and polished concrete and do not require extensive training or any high level of skill to produce a fantastic finish.
Q: Is it possible to use them in showers, on counter tops, corners and edges or small areas?
A: YES, Cheetah pads are available from a small 5″ to a 20″ pad size and can be used on a wide variety of different machines in order to achieve professional results on floors, walls and counter tops.
Q: What type of machine do I need to be able to use the Cheetah Pads?
A: The pads were designed to be able to use on all major types of machines for grinding, polishing and resurfacing floors. Walls and counter tops are for the hand held buffer or polisher. The medium size pads can be used on all different types of rotary floor scrubbers or orbital floor polishers and planetary head machines. They also can be used on a cimex as well.
Q: How do I use the Cheetah pad?
A: The simplest description is, in heavily damaged areas the process would be;
1. Put pad on machine, whichever one you are using.
2. Clean surface of any debris laying on surface.
3. Wet the surface where you will be working on and around it.
4. Move the machine in a left to right pattern at a slow steady speed back and forth.
5. Repeat the 4th process 4 to 8 times till damage is removed for light damage if its heavier then check work and if needed do a few more passes.
6. Rinse and vacuum area thoroughly leaving nothing from previous step before moving on to the next also making sure damage is gone.
7. Repeat process 3, 4 & 5 for cheetah pad # 2, 3 & 4. The process is identical to step one except for the fact that all of those extra passes are not necessary. Most situations you only need to do four overlapping passes for each area first. However there are exceptions to these rules, for example some softer stones such as limestone may not require so many passes, harder stones such as the green serpentine marble may require a few more passes and possibly additional weight to help speed the process.
An important point to remember.
Removal of any abrasive debris or soil prior to starting with any grinding or polishing is an absolutely critical process to the success of the job. Be sure to clean vacuum and sweep extremely well before doing anything. Not performing these tasks will just prolong the job and create a tremendous amount of extra work and have adverse results.
Q: Do I have to use all four steps of the Cheetah pads on every job?
A: Absolutely not. You only need to use the steps to achieve the finish you desire. For instance a marble floor that is in very bad condition with extremely heavily worn traffic areas and possible chemical damage to the surface will require a full restoration. This means you would use steps 1-4 to remove the damage and prep the surface before final polishing with the 11,000 grit monkey Pad. If you like using polishing compounds instead of pads, even on extremely worn circumstances you would only need to use step 1 and 2 before polishing with your compounds.
For situations where the customer only desires a slightly glossy surface such as semi-gloss and you have extremely worn or damaged surface use steps 1-2 Cheetah pads then follow the process with 800 or 1500grit Monkey Pads to smooth surface out and give it the semi-gloss look your customer was looking for. If there is an extremely worn surface but customer doesn’t want any shine at all then you would only use Cheetah Pad step1 to remove the damage and give the surface a dull finish then follow that with a 200 grit Monkey Pad to smooth out the surface for a uniform dull honed look.
Q: How much can I charge for the types of services the Cheetah Pads do because they work so fast and cost so little? Does that mean I have to charge less for my services?
A: No, in most cases the customer will find more value in the fact that you can achieve a better result in less time, therefore even though Cheetah Pads are far faster and cost far less than traditional methods you can charge more for the convenience to your customer of being able to use their surfaces faster than it normally would be. Depending on the region of the country you are in and the level of damage and what type of surface you’re working on you can expect to get between two dollars and eight dollars per square foot for complete restoration of stone surfaces. Counter tops and showers should be charged at a much higher rates due to the fact that they are small in square foot size and require extensive work with hand tools typically you would charge double or triple what you would charge for the same type of work on a floor.
Q: Can Cheetah Pads remove lippage?
A: No, Cheetah pads were designed to be the most efficient most effective and easiest to use method for complete restoration of all stone types even in the worst condition and also to produce an extremely high level of gloss. Cheetah pads were not meant for lippage removal. If your customer wants a perfectly flat floor you would need to use metal bond diamond pads to flatten and remove lippage prior to restoration with Cheetah pads.
The Cheetah pads are rated by step1, step2, step3 and step4, what grit level do those steps represent?
Cheetah pads actually contain multiple types of abrasives and multiple grit levels in each pad; therefore there is no simple answer to that question. That is why we have rated them as “step 1” for removal of heavy damage, “step 2” is made for removal of moderate to light damage and steps 3 & 4 are our preparation steps for final polishing with the Monkey pads.
Q: How do I know when the Cheetah pad is worn out?
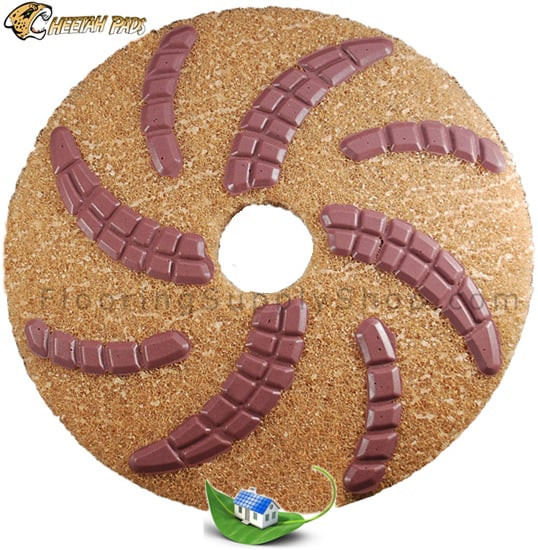
A: When you see no trace of the spiral left on the pad that is when its worn out. Typically the pad itself wears out long before the spiral containing the abrasives wears out.
* Please take a close look at the cheetah pad instructional chart on the TECH INFO page for more detailed examples of what pads are necessary to achieve what level of finish on variety of different surfaces. This will tell you when to start and what steps are required to give you the finish you need.


You sound like a professional. Pleasant weblog and good writing expertise.
Oh my goodness! a tremendous article dude. Thanks Nonetheless I am experiencing problem with ur rss . Don’t know why Unable to subscribe to it. Is there anyone getting equivalent rss drawback? Anybody who is aware of kindly respond. Thnkx