How to Achieve Lippage Free Tile Floors and Walls
For many homeowners, once fall hits, it becomes prime time to shift their focus from the outdoors to indoors – primarily to their interior design, or lack of it, in some cases. With cooler weather, you’ll be spending more and more time inside, and who wouldn’t want to make their interiors as stylish and welcoming as possible when the weather outside is anything but? Plus, with all that time spent cooped up indoors, you might as well make the most of it and add value to your home at the same time!
A much overlooked aspect of almost every home is the floors. While they cover less area, and aren’t quite as visible or immediately noticeable as your walls, they make just as much of an impact on the overall look and feel of a home. They also take much more of a beating than walls do, particularly in heavily trafficked areas like an entryway or the kitchen. That’s why more and more homeowners are looking to implement stable, stylish, and durable materials for their flooring in these areas, such as tile. With tile, you don’t have the same concerns as you would with carpet or hardwood, and the floors will be significantly easier to clean and care for.
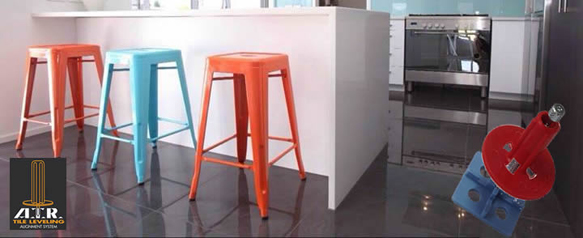
However, many homeowners view the installation of an attractive tile floor as a costly and labor intensive practice, particularly if they’re doing it on their own. That’s where the ATR Tile Leveling system comes in handy. Not only does it help you to get the job done easily, it requires no additional tools, and it uses only 1/3 of the spacer a normal system would take in order to do the same job. The system also cuts the installation time by 75 percent when compared to more traditional methods. For those who want a relatively quick project that isn’t going to take weeks upon weeks to complete, but had previously counted tile out, your answer is in the ATR Tile Leveling system.
The ATR system allows you to not only get the tile floors or walls you want, but makes it much easier and quicker to do so. It only takes three easy steps and afterwards, you’re done! The first step is to spread the mortar over the area you want to tile, then put the tile in place. After this, you’ll need to screw the provided spindle into the spacing plate, which you’ll then need to slide under the tile before placing the adjacent tiles down. From there it’s as easy as screwing in the spindle until all the tiles are aligned and level. Afterwards, you simply let the mortar dry before you screw it out. (For a visual demonstration of this straightforward process you can check out this video).
Think of all the possibilities and looks you can create by easily installing tile. This glossy glass tile would create a fantastic backsplash in a modern kitchen, particularly since it’s moisture impervious, resists fading, and is fire resistant. And these aqua pebble glass mosaic tiles would give any bathroom a tranquil, spa-like atmosphere. For a chic and classic entryway, the classic (but far from boring) tumbled travertine octagonal tiles make the right statement to welcome guests to your home. The possibilities are really endless with such an easy, cost efficient, and time saving installation system at your disposal.
Spencer Blohm is a freelance lifestyle and pop culture blogger for www.albertaenergyproviders.ca. When he’s not busy working he’s usually plotting his next home improvement project.
Copyright © 2014 FlooringSupplyShop.com


Oh, I really like the idea of this tile system! 🙂 It makes it easier for DIY entusiasts 🙂
Amazing guide and the system used is just so good!