Difficulty of Installation
When using the thinset method in residential areas, installing ceramic tile is rather simple. To put it in better perspective, it is easier to install than wood or vinyl sheet goods and slightly more difficult than vinyl tile.
Actually, the subfloor preparation, layout, and installation is very similar to that of vinyl tile.
The only major difference is grouting. With proper planning and a little common sense, practically anyone can install ceramic tile using the thinset method.
Steps of Installation
If you are installing a new underlayment, it’s recommended that you staple polyethylene plastic on top of the subfloor before you install the underlayment to ensure protection from water penetrating down to the subfloor.
Subfloor Preparation
This is the most important step in accomplishing
a satisfactory installation.
The subfloor must be structurally sound, rigid, smooth, flat, and free of curing compounds and waxy or oily films.
Floor Layout
In this step, the room is squared off and measured, and the chalk lines are snapped. Once the chalk lines are in place, the installer will verify the floor in both directions to balance the room.
Preparing the Tiles
Slight tone variations are to be expected from tile to tile. A good installer will prevent this from becoming a problem by mixing the tiles from several cartons before installation.
This blends the tiles together, and any shade variations add to the character of the floor.
Spreading the Thinset
Using the chalk lines as a guide, the installer will begin applying the thinset in one section at a time.
He will spread one coat using the flat side of the trowel and then immediately come back with a second coat, using the notched side of the trowel.
Laying the Tiles
The tiles are then placed one at a time in the thinset by twisting and pressing while allowing appropriate spacing for the grout.
A straight edge or spacers may be used to align the tile.
Grouting
The installer will generally begin grouting the following day. It is important to allow the thinset enough time to set up before applying the grout.
The grout is applied over one small section at a time and is spread by means of a rubber float or a squeegee.
Pulling the grout firmly over the surface will both push the grout into the joints and clean off most of the excess grout.
Then the tile is rinsed using a damp sponge. Very little water is applied.
After approximately ten minutes the surface of the tile is cleaned again with a damp sponge (even drier this time), or on some shiny tiles, just buff with a dry towel.
Step 1. – Use the grouting float diagonally across the tiles at an angle to prevent dragging grout from joints.
Step 2. – Clean float in clear water. Change water in pails often to keep clean.
Step 3. – Go back over grout holding float at a 90 degree angle.
Step 4. – Use damp (not wet) sponge to clean grout off tile surface. Clean sponge and keep repeating until section is clean. NOTE: Always use clean cool water.
Step 5.- Buff film off tile with a soft towel after grout dries to the touch.
Step 6. – Keep people off newly grouted floor for about 12-24 hours.
INSTALLATION METHODS
It is important for you and your customers to understand that the installation of ceramic tile is not a one-day job, like most carpet and vinyl installations.
Scheduling a time for the installation becomes much easier when everyone involved knows how long the job will take.
A. Estimated Timetable
The following guide is an approximate time table for completion of a job.
| 50 sq. ft. and under |
One Day |
| 51-175 sq. ft |
Two Days |
| 76-350 sq. ft |
Three Days |
| 351-500 sq. ft |
Four Days |
| each additional 200 sq. ft |
Add one day |
The installation of tile takes longer because the installer must wait 10-14 hours before grouting. If he tries to rush it, he will break the bond between the tile and mortar.
The moisture from the mortar may also wick into the grout, causing discoloration.
B. Substrate
Preparing a good substrate is the most important step to insure a beautiful installation. There are six general requirements.
1. New concrete subfloors must be left to cure 28 days before tiling.
2. All floor and wall substrates must be rigid.
Excessive movement in the substrate may crack or loosen the tile and grout.
3. All substrates, particularly floors, must be structurally sound. Rotting or deteriorating subfloors must be corrected prior to installing
ceramic tile.
4. All substrates should be flat. The ceramic tile will contour to minor subfloor irregularities.
5. Any oil or wax on the substrate needs to be removed to assure strong adhesion.
6. The substrate must be free of curing compounds.
C. Suitable Subfloors
All subfloors that are structurally sound and free of excessive movement are suitable for tiling over.
They include:
1. Concrete
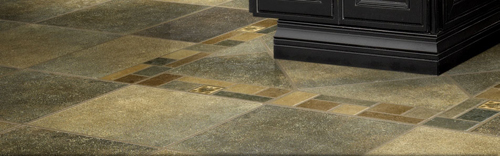
2. Terrazzo or natural stone
3. Fiber cement boards
4. Cement backer boards
5. Non-cushioned vinyl and linoleum
(Properly prepared)
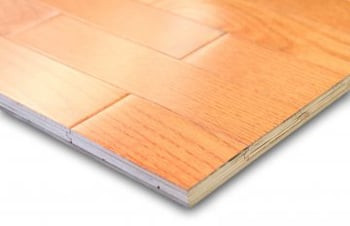
6. Properly supported 1-1/4” plywood
D. Unsuitable Subfloors
These subfloors are not suitable because they tend to flex, expand and contract, or warp.
Any excessive movement will loosen the tile and pop the grout.
These subfloors must be replaced or covered with a suitable underlayment.
1. Perimeter installed or heavily cushioned vinyl and linoleum
2. Composite woods
a. Particle board
b. Flake board
c. Chipboard
d. OSB (Orient Strand Brand)
e. Luan
f. Strip wood
E. Selecting the Right Installation Method
Caution: Poorly prepared substrates and the use of improper setting materials are the cause of practically all major installation failures.
Certain types of substrates and job conditions require special treatment. These treatments are neither expensive, time consuming, nor complicated.
To ignore or deviate from them would be the equivalent of playing Russian roulette.
Installation materials described
• Floor set mortar is a promotionally priced thinset packaged in 50 lb. bags, in gray and white colors. It should be used only over clean, solid, unsealed concrete that is fully
• Fortified Thinset mortar is a special formula of thinset mortar enhanced by pre-blended latex additives to ensure the proper mixture for ceramic installations over concrete. This product comes in 50 lb. bags and covers approximately 50-65 sq. ft. per bag.
• Multi-Set is a specially formulated premium thinset that has a flexible acrylic additive. The acrylic gives the mortar flexibility and additional bonding strength. The flexibility is required when going over substrates that may experience minor movement. The additional adhesion is needed when setting tile over hard-to-bond surfaces, such as plywood and terazzo floors. Multi-Set is packaged in 50 lb. bags in gray and white colors. (When installing tile over a plywood substrate, we always recommend installing cement backer-board first for a more secure installation).
Coverage per bag is approximately 50 to 60 square feet per bag, depending on trowel size.
F. Special Preparation Requirements
• Wood subfloors – must be covered with one of the following overlays for additional support.
1. A cement backer board
2. 1-1/4”-inch plywood – acceptable when using MULTISET 917 Thinset.
3. Wire mesh and mortar system (mud job) – minimum thickness of 1-1/2” (mud only)
• Note: We recommend the cement backer board. It is much easier and less costly to install than the wire mesh and mortar coat. It is also much more stable over plywood base floors.
• Non-porous – subfloors include sealed concrete, terrazzo, or any other non-absorptive surface. For extra bonding strength and a more successful installation, use Multi-Set Thinset.
• Vinyl over subfloors – require the use of a cement backer board and Multi-Set. Interflex or perimeter glued floors must be removed.
• Although the moisture in wet areas will not affect the tile itself, it will effect certain substrates. If drywall or plywood are used in wet areas, they will eventually buckle or deteriorate, causing the tile to fall off. To prevent this we recommend a cement backer board as a substrate. It was developed for wet areas.
• When going over floors, the backer board is adhered first with thinset and secured with nails or screws recommended by the manufacturer. It is necessary to cover the floor joints. The joints will be filled as the installer spreads the mortar and tapes with fiberglass mesh.
• Important: Nail or screw cement backer board using 1-1/4”-long (minimum) galvanized (to prevent rusting) ring-shanked nails or screws. Space fasteners every 6” on center.
Step 1 Apply Multi-Set Thinset to a fully adhered and structurally stable base floor with a 1/4” x 1/4” notched trowel.
Step 2 Cut panels by scoring and snapping like drywall. Use carbide tipped scoring tool.
Step 3 Place panels over thinset while it is wet. Stagger end joints and fasten on all marks for screws and on and between marks for nails.
Step 4 Fill joints with Multi-Set and cover all joints with Cement board Tape.
Step 5 Apply Multi-Set with 1/4” x 1/4” notched trowel to set tile
• Note: Thinset mortar must be given 12 to 24 hours to set up before grouting.
G. Substrate Repairs
• Stress cracks – Tile should never be installed directly over cracks.
Stress cracks are generally caused by seasonal movement and will continue to open and close. If the tile is installed over a crack, it will also crack as the substrate moves.
A crack suppression membrane (C-Cure Curelastic 949) may be used to bridge the stress crack.
• All minor cracks must be filled with thinset mortar prior to continuing with the installation. Back filling with the flat side of the trowel during the spreading process is the simplest way of correcting minor cracks.
• Irregular Substrates – Very few substrates are perfectly flat, level, or plumb. Generally, the installer will have to touch up the surface before and during tiling.
• Minor high and low spots are smoothed easily with thinset in very little time and at no extra cost.
• Deep depressions over 1/4” sometimes may be patched with a mixture of thinset and a latex additive. Additional floor preparation cost may apply.
• If the substrate’s surface is marked with mounds larger than 1/4”, get your manager involved so that he can consult with your tile contractor for pricing.
• Note: Ceramic tile will contour to the existing floor condition in the same way vinyl and carpet do. Do not over-promise floor corrections to your customers who are buying ceramic tile. Remember, ceramic tile does not level a customer’s floor.
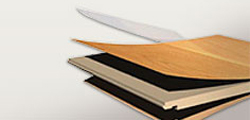
H. Cement Backer Boards
• The cement backer board is an all-purpose underlayment that was originally developed for use on walls. It is a lightweight portable cement slab that requires no curing time and is used extensively in wet areas because it is not affected by moisture. It is also used to cover wood subfloors. Its strength and rigidity reduce the movement inherent in wood. Therefore, it helps protect the tile from damage.
• The backer board sheets look and handle like gypsum board. They are 1/4” or 1/2” thick and come in 4’ x 4’ or 3’ x 5’ panels. They are produced using reinforced fiber to prevent breakage or crumbling when handled. The backer boards also require no special skills to install. They score and snap as easily as gypsum board.
• When going over floors, the backer board is adhered first with thinset and secured with nails or screws recommended by the manufacturer. It is necessary to cover the floor joints.
The joints will be filled as the installer spreads the mortar and tapes with fiberglass mesh.
• Important: Nail or screw cement backer board using 1-1/4”-long (minimum) galvanized (to prevent rusting) ring-shanked nails or screws. Space fasteners every 6” on center.
Step 1. – Apply Thinset to a fully adhered and structurally stable base floor with a 1/4” x 1/4” notched trowel.
Step 2. – Cut panels by scoring and snapping like drywall. Use carbide tipped scoring tool.
Step 3. – Place panels over thinset while it is wet. Stagger end joints and fasten on all marks for screws and on and between marks for nails.
Step 4. – Fill joints with Thinset and cover all joints with Durock Tape.
Step 5. – Apply Thinset with 1/4” x 1/4” notched trowel to set tile.
• Note: Thinset mortar must be given 12 to 24 hours to set up before grouting.
I. Sound Reduction Systems Many multi-level buildings today require that a sound barrier be applied to the subfloor prior to tiling. This is particularly true with condominiums. You should always ask the customer to check the condominium association’s by-laws on sound reduction. Some customers may not be aware of these by-laws and risk having to replace a new job.
Four common sound reduction systems
1. With a combination of cement backer boards and mat, the mat is adhered to the subfloor and the cement backer board is adhered to the mat.
2. A mortar type system containing sound deadening materials is floated on the subfloor and left to cure overnight. Once cured, it serves as a base to spread your thinset
3. Cork is a thin, high density cork that is specially treated for use with ceramics. Although many contractors use it, because of its flexibility, the cork presents a higher risk for improper adhesion than the other systems.
4. Perlag Sound Reduction uses a mortar additive and does not raise the height of the installation as other sound reduction systems do.
Note: When using any sound reduction system, make sure the material you select has been tested and approved, and make sure you follow the manufacturer’s installation procedures.
J. Adhesives
There are two types of adhesives recommended for installing residential tiles: organic mastics and thinset mortars.
• Organic mastics are pastes similar to floor covering adhesives.
• Type I mastic is used for wet areas such as bath walls and countertops.
• Type II mastic is used on dry walls.
• Thinset mortar is a combination of sand and portland cement that is mixed with either water or latex. Thinset mortar is routinely used on floors when installing tile and concrete backer board.
• Note: Thinset mortar must be given 12 to 24 hours to set up before grouting
K. Grouts
Grout is a cement-based powder that is mixed with water to fill in the joints between the tiles. There are two basic types of grouts: unsanded and sanded.
• Unsanded grouts are used for wall tiles.
• Sanded grouts are used for floor tiles where the joints are 1/8” and larger.
• On wider joints, it is necessary that a sanded grout be used. The sand prevents the grout from shrinking and cracking during the drying process.
• Grouts come in a variety of colors with the standard size floor grout bag being 25 lbs.
• Grout joints in floor tiles should rarely be smaller than 3/16” because tiles vary slightly in size. The installer will not be able to keep a straight line if the grout is too narrow.
• The standard size grout joint for walls is 1/16″ wide
• Although all of our grouts are very dense and denser grouts resist staining, there is no such thing as a stain-proof grout. Do not oversell the product.
• Grouts in general are dense, polymer latex enhanced, and have a flexible formula. This customized mixture is clearly the best sanded grout available today.
L. Sealers
Sealers are used to protect some unglazed tiles from absorbing stains. There are several types of sealers; two of them are discussed below.
• Penetrating sealers are absorbed into the tile forming a stain-resistant shield just below the surface. Some penetrating sealers will darken or change the appearance of the tile. Resealing every 12-18 months is required with most penetrating sealers.
• Surface sealers are coated on the top of the tile forming a non-porous, stain-resistant barrier. The surface sealer will add a slight sheen. Resealing every 6-12 months is required with most surface sealers.
• Some unglazed tiles must be sealed with a penetrating sealer prior to grouting. This is particularly important when a dark-colored grout is being used with a light-colored tile. Naturally, this is to prevent the grout from staining the tile.
• Highly absorptive tiles such as handmade Mexican tiles need to be constantly sealed with either a penetrating, surface, or a permanent epoxy type finish. The permanent epoxy type finish is the best for this purpose,
• Note: None of the unglazed products in our line require a sealer, nor would they accept one. The porosity is so low that sealers would virtually peel off. They only require the damp mopping also used with glazed ceramic tile.
M. Floor Trim
The trim pieces serve two purposes. First, the beveled edge conceals the factory edge, thereby finishing off the job. Second, they protect the exposed edge of the tile from chipping. An example
of an area that requires a trim piece would be one where the tile meets a wood floor at a doorway. In this case some people use a marble threshold or vinyl cap.
• One of the most common types of trim used for residential floors is a marble threshold.
• Thresholds are used in doorways when making a transition from ceramic to another type of floor. Marble thresholds are common at bathroom doors.
• Bullnose (finished edge tile) is not produced by all manufacturers. When confronted with this situation, one of the following alternatives can be used:
Cut-tile base – The installer will cut the tile base from the field tile being used on the job. The tile’s factory edge, which is generally beveled, is always the exposed side.
Vinyl caps – These are vinyl trim pieces that come in a variety of colors made specifically for ceramic tile. They slip right over the exposed edge of the tile to give it a finished look.
• Note: The vinyl caps may be used in many ways, including: To cap off the top of a cut-tile base. To cap off the edge of a floor tile next to carpet, wood and lower floor coverings like vinyl and vinyl tile
Large Vinyl Cap Use Large Vinyl Cap when installing ceramic tile over a wood subfloor or when using a cement backer board underlayment. It can be installed straight, on angles or used to contour to a free form.
Small Vinyl Cap Use Small Vinyl Cap when installing ceramic tile over concrete or on a wall as a baseboard. It can be installed straight, on angles, or used to contour to a free form.
Vinyl Stair Cap Use Nosing/Stair Vinyl Cap when a finished edge at step down or open stair is required. It may be used on both concrete and wood subfloors
Vinyl Reducer Use Reducer Vinyl Cap when a wider trim or more gradual reduction is needed. It can be used straight or on angles. It may be used with or without a cement backer board underlayment.
ESTIMATING
In this section we are going to cover the procedures for estimating the material needs and installation costs. Although some of the terminology and job requirements may be new to you, estimating for ceramic tile is no more difficult than for wood or vinyl. The key factors in figuring a job’s needs are the same, no matter what product you are installing. They are:
• taking proper measurements
• determining material and labor needs
• applying the costs
A. Facts About Estimating
1. Ceramic Tile is always ordered in full cartons.
When the square footage of the job is determined,
the salesperson must round it off to the next full
carton.
2. The square foot coverage per carton will vary from product to product. Once the tile is selected, the salesperson will refer to the specification area on the front of the board indicating square foot coverage per carton.
3. It is necessary to increase the square footage of a job in order to compensate for breakage and tile cuts. Add 10% for waste laying tile on a straight line pattern. Add 13% waste when laying a pattern on diagonal installation. This percentage is mandatory on each job.
4. After a job is complete, it is customary to leave the customer with several pieces of tile to assure a perfect match in the event future repairs are needed.
5. The trim pieces such as vinyl cap are ordered by the piece. Each vinyl piece comes 4 l/f.
6. Normal floor prep such as minor patching is considered part of the job and is not billed as an extra charge.
7. Other leveling of a floor is a chargeable labor item. Your installation contractor may need to see the job conditions prior to establishing the customer’s cost.
8. Most ceramic installers do not carry the tools necessary to stretch carpet. If the ceramic meets carpet in an area, the re stretch will be done by a carpet installer. This is called carpet finishing.
ESTIMATING DATA SHEET
A. Square Footage Formulations
Multiply the length by width to calculate the square footage (S/F) of area.
2. Add 10% for waste laying tile on a straight line pattern. Add 13% waste when laying a pattern on diagonal installation.
3. Divide net S/F by S/F in box to determine the full and partial number of cartons.
4. Round off to the next full box for exact number of full cartons required.
5. Multiply the number of full cartons by S/F per box to determine the total S/F.
Example: Facts: Area is 20’ long and 15’ wide. Tile is packed 16.0 S/F to a carton.
Answers:
1. 20’ x 15’ = 300 S/F of area.
2. 300 S/F x 1.10 = 330 S/F.
3. 330 divided by 16.0 S/F = 20.63 cartons.
4. Round off 20.63 cartons to 21 total cartons.
5. 21 cartons x 16.0 S/F = 336.0 total S/F.
B. Cut-tile Base Formulation
Length of wall divided by 2 = number of S/F
Example: 1 piece per standard 3 foot door.
C. Marble Thresholds Formulation
Measure linear feet of doorway and calculate in 3’-intervals. Each threshold comes 3’ (36”).
Note: Installer will take the larger size (36”) and cut to fit.
D. Measuring for Door Clearance Formulation
Door should clear height of two tiles. Lay one tile on top of another.
Example: Ceramic over concrete 1/2”, ceramic over wood 1”.
Note: Inform customers so that they may have the door cut prior to installation
E. Steps and Risers (Combined) Formulation
Multiply the width of steps x number of steps = linear feet
Example: 3 feet in width, 3 steps = 9 linear feet
F. Cement Backer Board & Seam Tape Formulation
Area S/F divided by 15 S/F or 16 S/F = number of sheets
Note: Sheet size is 3’ x 5’ x 1/2” = 15 S/F or 4’ x 4’ x 1/4” = 16 S/F
Use 1 bag of Multi-Set Thinset to adhere approximately 4 sheets of cement backer to plywood subfloor.
Use 1 roll of cement backer seam tape for 50 linear feet of cement backer board.
G. Thinset
1 bag of thinset will cover approximately 50 to 65 square feet of ceramic tile or cement backer board.
Example: 100 S/F ceramic tile installation, 2 bags needed.
Example 2: 100 S/F ceramic tile and cement backer board installation, 4 bags needed.
H. Grout
Check our Flooring Calculator
Coverage’s of grout will vary by size of tile. The coverage for a 25 lb. bag of either sanded or unsanded grout is:
| Tile Size- Sanded |
Approx. Grout – Coverage Per Bag |
Tile Size- Unsanded |
Approx. Grout – Coverage Per Bag |
| 2” x 2” |
125 sq. ft. |
4-1/4” x 4-1/4” |
250 sq. ft. |
| 4” x 8” (quarry) |
50 sq. ft. |
6” x 6” |
300 sq. ft |
| 6” x 6” (quarry) |
55 sq. ft. |
8” x 10 ” |
525 sq. ft |
| 8” x 8” (quarry) |
60 sq. ft. |
|
|
| 6” x 6” |
65 sq. ft. |
|
|
| 8” x 8” |
80 sq. ft. |
|
|
| 10” x 10” |
90 sq. ft. |
|
|
| 12” x 12” (Mexican) |
30 sq. ft. |
|
|
| 12” x 12” |
125 sq. ft |
|
|
| 13” x 13” |
130 sq. ft |
|
|
| 13” x 20” |
170 sq. ft |
|
|
| 16” x 16” |
170 sq. ft |
|
|
| 17” x 17” |
190 sq. ft |
|
|
| 18” x 18” |
225 sq. ft |
|
|
J. Floor/Wall Adhesive 1 – 3-1/2 gallon pail of adhesive will cover approximately 130 sq. ft. of ceramic tile.
For more information visit our web site at www.flooringsupplyshop.com
Important Links about our Ceramic Tiles
Step by Step Tile Installation – Ceramic Tile Flooring Care and Maintenance – Ceramic Installation Guidelines