Satisfaction guaranteed. Call us anytime at 323-731-8453.
Home Improvement General | Flooring Supply Shop Blog - Part 2

Can you put Vinyl flooring over tile?

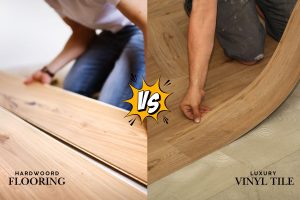
What is vinyl tile flooring?

Vinyl tile flooring is a type of resilient flooring made from synthetic materials designed to mimic the appearance of natural materials like stone or wood. It comes in individual tiles or planks and is known for its durability, ease of maintenance, and water resistance. Vinyl tile flooring is also often chosen for its affordability, making it a super common material used for both residential and commercial applications.

Can you put vinyl flooring over tile?

Putting vinyl flooring over tile is a method that’s quickly becoming more popular among home and business owners. This is because it’s cheaper, transforming, and possesses minimal disruption. Simply clean, dry, and level the existing tile surface and it’s ready for vinyl flooring installation.

Types of vinyl flooring

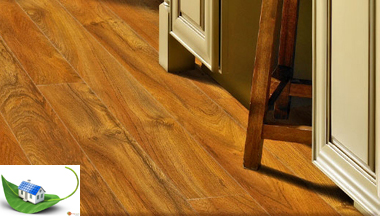
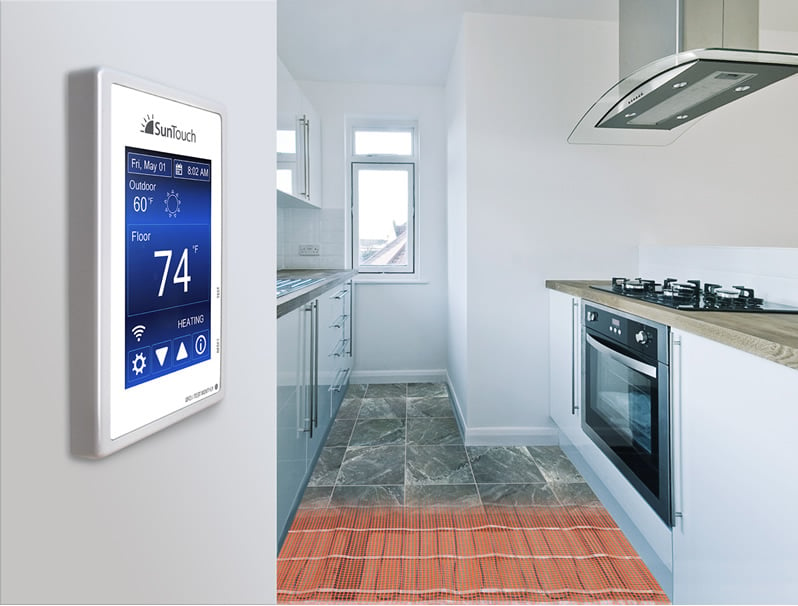
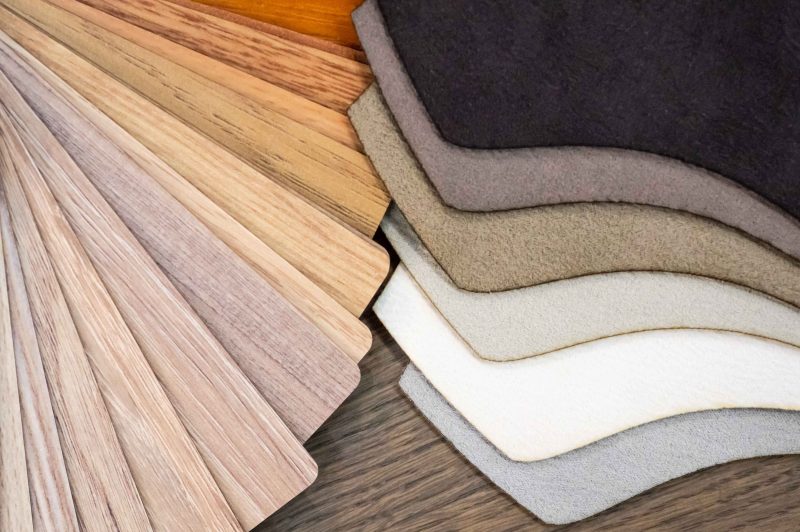
Vinyl flooring comes in various styles, including patterns that mimic natural materials like wood and stone, with options such as luxury vinyl tile flooring for a high-end finish. For enhanced performance, you might consider waterproof vinyl tile flooring, which is ideal for moisture-prone areas like kitchens and bathrooms. Additionally, adhesive floor vinyl tiles can provide a secure bond, ensuring durability and longevity. All of these options provide a wide range of design possibilities so that you can explore your aesthetic preferences.

Benefits of covering floor tiles

Covering floor tiles with new flooring offers several benefits. Vinyl floor tiles, for instance, can provide an updated look and improved functionality without the need for extensive demolition.

Moreover, opting for vinyl tile flooring patterns allows you to enhance your space using a variety of designs. With adhesive floor vinyl tiles simplifying the installation process and luxury vinyl tile flooring offering a high-end appearance, your space will feel refreshed regardless of what you choose. Additionally, waterproof vinyl tile flooring is particularly advantageous in moisture-prone areas, so this will add long-term protection as a top-feature.

Fitting Vinyl Tiles on Floor Tiles

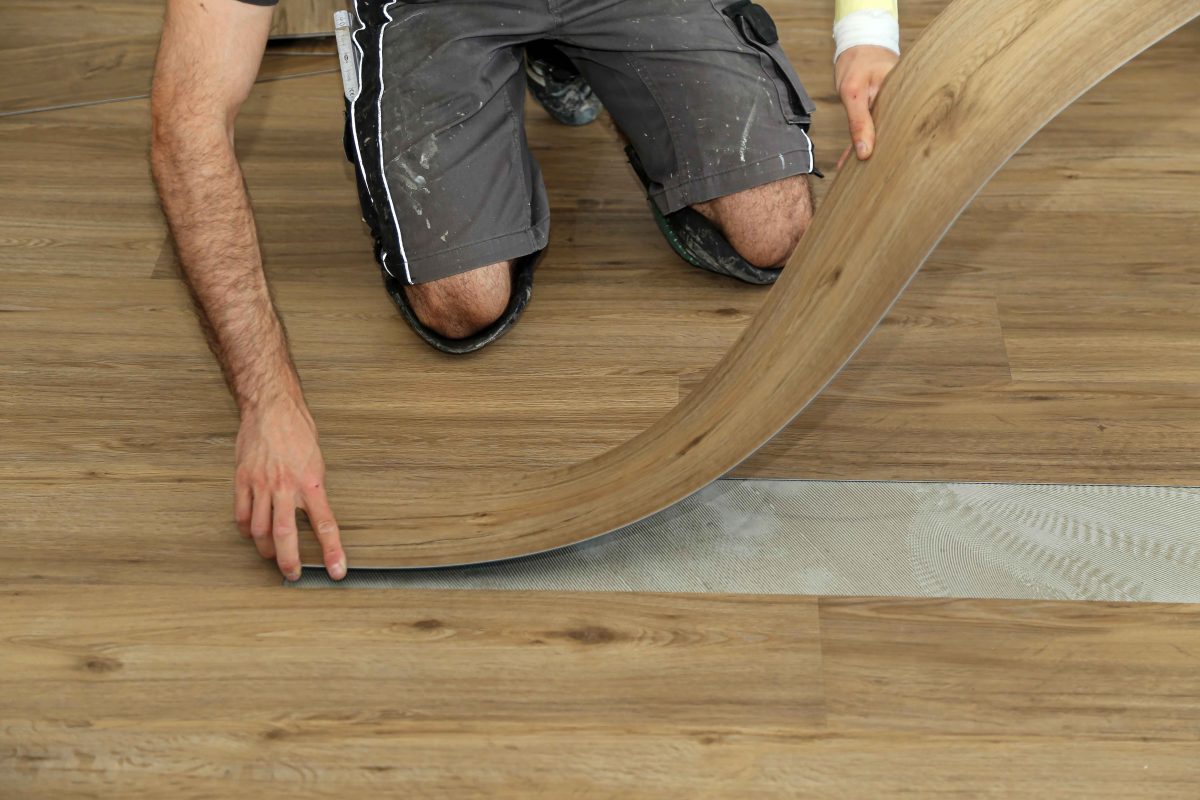
How to perfectly fit vinyl floor tiles to fit the room

Fitting vinyl floor tiles perfectly requires precision and careful preparation to ensure a seamless and durable installation.

Follow these steps to achieve a flawless result:

  1. Prepare the surface: Clean the floor thoroughly, removing any debris. Ensure it’s also dry.
  2. Measure and plan: Measure the room to determine how many vinyl floor tiles you need. This will allow you to better plan the layout to ensure symmetry.
  3. Cut the tiles: Using a utility knife or tile cutter, carefully cut the vinyl floor tiles to fit your dimensions. Make sure the cuts are straight for that snug fit.
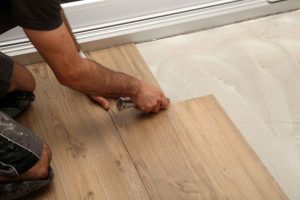
  4. Apply adhesive: Apply adhesive evenly onto the floor surface.
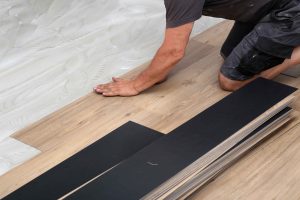
  5. Lay the tiles: Begin laying the tiles according to your planned layout. Press each tile firmly in place.
  6. Seal the edges: After all tiles are in place, seal the edges with a waterproof sealant to prevent water infiltration.

Cleaning Vinyl Floor Tiles

Maintenance tips after laying vinyl floor tiles over a tile

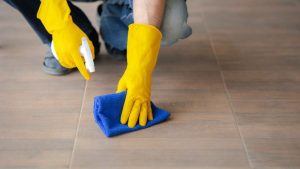
After laying vinyl floor tiles over existing tile you will use your new flooring as expected. However, we recommend that you clean your floor regularly, avoid harsh chemicals, use floor mats or rugs to minimize wear and tear, and address spills promptly. All of the above suggestions will ensure the longevity of your new floor.

Frequently Asked Questions

1. How to clean vinyl floors?

To clean vinyl floors, use a soft broom or vacuum followed by a damp mop with a mild detergent. We also recommend that you avoid using any harsh chemicals or the use of excessive water when cleaning vinyl flooring.

2. How to install vinyl plank flooring?

To install vinyl plank flooring, prepare the subfloor, lay out and fit the planks in your desired pattern, and secure them in place—usually this is done via click-lock or adhesive method.

3. Can you lay vinyl flooring over tile?

Yes, you can lay vinyl flooring over tile by ensuring the tile surface is clean, dry, and level to provide a stable base for the new vinyl.

4. How to cut vinyl floor tiles?

To cut vinyl floor tiles, measure and mark the designed cut line, then use a utility knife or a vinyl tile cutter to score the tile along the line.

5. How to polish vinyl floor tiles?

To polish vinyl floor tiles, first clean the floor thoroughly, then apply a vinyl floor polish using a clean mop. Allow it to dry for that glossy finish.

6. Does vinyl flooring scratch easily?

Vinyl flooring is generally resistant to scratches, but it can still be scratched by sharp and/or heavy objects. Be sure to use protective pads under your furniture and avoid dragging heavy items across your floors.

7. Where to buy vinyl flooring tiles online?

You can buy vinyl flooring tiles online at Flooring Supply Shop, which offers a diverse selection of styles and prices to suit various applications and aesthetics.

How to Clean Tile in Swimming Pool?

Maintaining a sparkling and inviting swimming pool goes beyond just skimming the surface and balancing the water. Over time, swimming pool tiles can become dull and stained due to the accumulation of calcium deposits, mineral buildup, and organic debris. These unsightly marks not only detract from the beauty of your pool but can also cause long-term damage if not properly addressed. Regular cleaning of your pool tiles is essential to preserve their appearance and prolong their lifespan.

This guide will walk you through the step-by-step process of how to clean tile in a swimming pool, using a variety of methods and materials that cater to different types of stains and buildups. Whether you prefer eco-friendly natural cleaners or more robust chemical solutions, you’ll find the right approach to keep your tiles looking pristine. With the right tools and techniques, you can restore the gleam to your swimming pool tiles and ensure that your pool remains a beautiful and safe place for everyone to enjoy.

Cleaning Swimming Pool Tiles

Disclaimer

This article offers thorough cleaning instructions, but be aware that some processes and chemicals, like muriatic and sulfamic acid, can be hazardous. Always use caution, wear protective gear, and work in a well-ventilated area. If you’re unsure or encounter difficulties, seek professional help. Additionally, consult local authorities to ensure chemical use complies with regulations. Prioritize safety by taking these precautions and considering professional assistance when needed.

Water in the City Swimming Pool

Understanding Pool Tile Stains and Buildup

Before diving into the cleaning process, it’s essential to understand the common types of stains and buildup that can occur on pool tiles:

  1. Calcium Deposits: Calcium carbonate and calcium silicate are the most common types of calcium deposits found on pool tiles. These appear as white, crusty layers on the tile surface.
  2. Mineral Deposits: Minerals in the pool water, such as magnesium and iron, can leave unsightly stains on tiles.
  3. Organic Matter: Leaves, algae, and other organic debris can stain and dirty pool tiles over time.

Swimming Pool Tile Materials for Cleaning

Tools and Materials You’ll Need

To effectively clean your pool tiles, gather the following tools and materials:

  • Pumice Stone: Ideal for scrubbing away calcium deposits and stubborn stains.
  • Scrub Brush (Stiff-Bristled): A stiff-bristled brush is necessary for scrubbing the tiles effectively, especially in tough-to-reach areas.
  • Muriatic Acid: A strong acid that can break down tough stains and buildup.
  • Sulfamic Acid: A safer alternative to muriatic acid, effective for removing mineral deposits.
  • Tile Cleaner: Available at most home improvement stores, these cleaners are specifically designed for pool tiles.
  • Natural Cleaners: Baking soda and a quarter cup of dishwashing liquid can be used as gentler, eco-friendly cleaning options.
  • Circular Motion: Using a circular motion when scrubbing ensures even cleaning and avoids damage to the tile surface.

A man cleaning swimming pool

Step-by-Step Guide to Cleaning Pool Tiles

1. Initial Rinse and Inspection

Start by lowering the water level in the pool so that the tiles are exposed. Use a hose to rinse off loose dirt and debris from the tile surface.

2. Choosing the Right Cleaner

  • For Calcium Buildup and Mineral Deposits: If you notice white, crusty layers on your tiles, it’s likely calcium buildup. Use a pumice stone to scrub away these deposits. For tougher stains, apply muriatic acid or sulfamic acid to the affected areas. Always wear gloves and follow the manufacturer’s instructions when using these acids.
  • For Organic Matter and Light Stains: Mix a quarter cup of dishwashing liquid with warm water and use a stiff-bristled scrub brush to clean the tiles. Natural cleaners like baking soda can also be effective for this type of cleaning.

3. Scrubbing the Tiles

Apply your chosen cleaner to the tile surface and begin scrubbing in a circular motion. This technique helps to lift stains evenly without scratching the tile. Pay special attention to any stubborn spots, and reapply cleaner as necessary.

4. Using Natural Cleaners

For those who prefer eco-friendly options, baking soda is an excellent choice. Create a paste by mixing baking soda with water, then apply it to the tiles using a stiff-bristled scrub brush. Scrub the tiles in a circular motion until the stains lift.

5. Cleaning Glass Tiles

If your pool has glass tiles, you’ll need to be more delicate to avoid scratching. Use a softer brush or sponge, and avoid abrasive cleaners. A tile cleaner specifically designed for glass is your best option here.

6. Final Rinse and Inspection

After scrubbing, thoroughly rinse the tiles with clean water to remove any remaining cleaner and debris. Inspect the tiles to ensure all stains and buildup have been removed. If necessary, repeat the cleaning process on any stubborn spots.

Water Vacuum Cleaner

Preventing Future Buildup

Regular pool maintenance is key to preventing future calcium deposits and mineral buildup. Here are some tips:

  • Monitor Pool Water Chemistry: Keep your pool water balanced by regularly testing and adjusting the pH and calcium hardness levels.
  • Regular Scrubbing: Incorporate regular tile scrubbing into your pool maintenance routine to prevent buildup.
  • Use a Tile Sealant: Consider applying a tile sealant to protect the tiles from future stains and buildup.

Cleaning pool tiles is an essential part of pool maintenance that should not be overlooked. Whether you’re dealing with calcium carbonate deposits, mineral deposits, or organic matter, the right tools and techniques will help you clean the tile effectively. By following this guide and using products available at home improvement stores, you can keep your pool tiles looking pristine and extend the life of your swimming pool.

Maintaining a clean pool is not just about aesthetics—it’s also about preserving the longevity of your pool and ensuring a safe and enjoyable swimming environment.

Is Luxury Vinyl Tile Flooring an Alternative to Traditional Floors

When considering flooring options for your home, durability, aesthetics, and affordability are key factors influencing your decision. Luxury Vinyl Tile (LVT) flooring has recently emerged as a popular alternative to traditional options like hardwood, ceramic tile, laminate, and sheet vinyl. In this blog, we’ll clearly define Luxury Vinyl Tile, delve into its numerous benefits, explore how it compares to traditional flooring options, including vinyl wood flooring, and help you determine if it’s the right choice for your home.

What is Luxury Vinyl Tile (LVT)?

Luxury Vinyl Tile, commonly known as LVT, is a modern flooring solution designed to replicate the look and feel of natural flooring materials like wood and stone. Unlike traditional vinyl flooring, LVT is manufactured in multiple layers, typically including a wear layer, design layer, vinyl core, and backing. This construction offers enhanced durability and improved visual appeal, closely mimicking authentic materials at a fraction of the cost.

Key Benefits of LVT Flooring

LVT flooring offers several notable benefits:

  1. Durability: LVT is highly resistant to scratches, stains, and dents, making it an excellent choice for high-traffic areas. Its robust wear layer ensures that it maintains its appearance over time, even under demanding conditions.
  2. Easy Maintenance: Compared to traditional flooring, LVT requires minimal upkeep. Regular sweeping and occasional damp mopping suffice to keep it looking pristine, a key reason homeowners choose this flooring solution.
  3. Waterproof: One significant advantage of LVT flooring is its waterproof nature. This feature makes it ideal for moisture-prone areas such as kitchens, bathrooms, and basements, where traditional wood flooring might deteriorate.
  4. Versatility in Design: LVT comes in a wide array of styles, colors, and textures, including realistic wood and stone finishes. Whether you desire the rustic charm of vinyl wood flooring or the elegance of marble, there’s an LVT option available to match your interior décor.
  5. Comfort and Warmth: Unlike ceramic or stone, LVT offers a warmer underfoot feel and added comfort, reducing fatigue when standing for long periods.
  6. Cost-Effectiveness: Luxury Vinyl Tile offers an affordable alternative to traditional hardwood and stone, without compromising aesthetic appeal or performance.

hardwood-flooring versus vinyl flooring

LVT vs Hardwood Flooring: How Do They Compare?

Comparing LVT vs hardwood flooring often involves several considerations:

  • Durability and Maintenance: Hardwood floors, while beautiful, are more susceptible to scratches, dents, and water damage. They also require periodic refinishing. In contrast, LVT’s resilient wear layer offers superior durability with significantly lower maintenance needs.
  • Cost and Installation: Hardwood floors typically require professional installation and incur higher upfront costs. Conversely, LVT flooring is generally less expensive and can often be installed as a DIY project due to its click-and-lock installation methods.
  • Aesthetics: While hardwood has a timeless beauty, modern LVT products closely mimic the natural look of wood, offering realistic textures and finishes. For those seeking the visual appeal of wood without the drawbacks, vinyl wood flooring in the LVT category is an excellent choice.
  • Environmental Factors: Hardwood is naturally sourced but requires more environmental resources for harvesting and processing. LVT, however, often incorporates recycled materials, providing a more eco-conscious option.

high-angle-shot-of-the-worker-installing-a-new-vinyl

LVT vs. Traditional Flooring Options

When evaluating LVT against other traditional flooring options such as ceramic tile, laminate, and sheet vinyl, several distinct advantages emerge:

  • Ceramic Tile: While ceramic tile is highly durable and moisture-resistant, it can be cold, hard, and uncomfortable to stand on for extended periods. LVT offers similar moisture resistance but adds warmth, comfort, and better sound absorption, making it more suitable for living spaces and bedrooms.
  • Laminate Flooring: Laminate can replicate wood flooring but lacks LVT’s water-resistant properties. Exposure to moisture can warp laminate, whereas LVT remains stable and intact, making it a superior choice for kitchens and bathrooms.
  • Sheet Vinyl: Sheet vinyl is affordable and water-resistant but doesn’t offer the same visual realism or resilience to heavy wear that LVT does. Additionally, sheet vinyl can be challenging to repair, while individual damaged tiles in LVT floors can be easily replaced without disturbing the entire flooring.

LVT is particularly advantageous in scenarios such as:

  • Bathrooms and Kitchens: The waterproof nature of LVT makes it perfect for moisture-prone areas.
  • Basements: LVT withstands basement conditions better than wood or laminate due to its resilience against humidity and potential flooding.
  • Rental Properties: LVT flooring provides durability and easy maintenance, making it ideal for rental properties where frequent tenant turnover may occur.

worker-installing-new-vinyl-tile-floor-2025

Is Luxury Vinyl Flooring Right for You?

Determining whether Luxury Vinyl Tile flooring is right for you depends on your specific needs and preferences. Consider LVT flooring if:

  • You need flooring that’s durable and easy to maintain.
  • You’re looking for a water-resistant solution suitable for kitchens, bathrooms, or basements.
  • You want the look of hardwood or natural stone without the associated costs and maintenance hassles.
  • You require flooring that offers warmth and comfort underfoot.
  • You’re aiming for an easy DIY installation process.

LVT flooring’s impressive combination of practicality, affordability, aesthetics, and durability makes it an outstanding alternative to traditional flooring options. Whether renovating your home or updating a rental property, LVT delivers both performance and style, ensuring your flooring investment pays off for years to come.

Guide in Choosing the Right Flooring Supplies

Selecting the right flooring supplies is an important first step when renovating or building a new space from the ground up. Not only does the flooring materials you choose contribute to the overall aesthetics of the space but it also plays a significant role in its functionality and durability. With a wide range of options available on the market, finding the perfect flooring types can be a daunting task. So, to help simplify the process, here is a comprehensive guide to assist you in choosing the best flooring materials for your needs. 

1. Consider lifestyle and usage

Here at Flooring Supply Shop, we believe the first step to selecting the right flooring materials is to consider your lifestyle ad how the space will be used. Different areas o your home or commercial space may require varied flooring supply installation. For example, high-traffic areas like entryways, hallways, and kitchens demand more durable and easy-to-clean flooring materials, such as ceramic tiles, vinyl planks, or laminate. Moreover, bedrooms and living rooms can benefit from the warmth and comfort of carpet or hardwood flooring


2. Assess maintenance requirements

Another important thing to consider is the maintenance and upkeep required for all of the flooring types. Some flooring materials, like natural stone or hardwood, require regular maintenance, such as sealing, polishing, or refinishing, to keep them looking great. Whereas, options like laminate or vinyl require very minimal maintenance. Before your flooring supply installation, assess your willingness and ability to maintain your chosen flooring, and be sure to choose a material that aligns with your preferences and lifestyle. 


3. Durability and longevity are key

We recommend opting for flooring materials that can withstand wear and tear, spills, and impacts, no matter which living space. While all flooring materials, if properly cared for, can last a long time, hardwood, vinyl, and ceramic tile are the top three flooring types known for durability and longevity. Additionally, you should consider the warranty offered by the manufacturer, as it can give you an indication of the expected lifespan and performance of the flooring. 


4. Evaluate moisture resistance 

Moisture resistance is crucial, particularly for places like the bathroom, laundry room, or basement. Since moisture can cause damage, warping, or mold growth in certain flooring materials, you need to select flooring types such as ceramic tiles, porcelain tiles, vinyl, or concrete for moisture-prone spaces. However, if you prefer the look of wood, there are types of specialized engineered wood that mimic the look but have better moisture resistance. 


5. Comfort and acoustics

While usually at the bottom of one’s list of considerations, the comfort underfoot and acoustics are especially important for areas like bedrooms and living rooms where you will be spending most of your time at home. Carpet and cork flooring are known for their softness and their ability to absorb sound, making them ideal flooring types for creating a cozy and comfy environment. Alternatively, if you prefer hard surfaces, it’s easy to select area rugs or have acoustic underlays put in during your flooring supply installation to improve comfort and reduce noise in a room. 


6. Have a budget in mind

At the end of the day, you can only select the flooring materials and types that meet your budget. So, before risking any sort of disappointment, determine how much you are willing to spend and explore the flooring options within that price range. Keep in mind that while materials range in price, there may also be additional costs incurred for installation, underlayment, and maintenance. 


7. Seek professional advice

If you are still unsure about what flooring materials are needed for your space, don’t hesitate to reach out and speak with a Flooring Supply Shop specialist. Our team is made up of flooring experts who can provide you with some valuable insight and recommendations based on their years in the business. They can also help you to navigate through various options, consider your specific needs and preferences, and guide you toward the most suitable flooring materials.


Choosing the right flooring supplies can make all the difference in your renovation project. Our infographic offers a clear, step-by-step guide to help you pick the best materials based on style, durability, and budget—making your flooring decision easier and smarter.

Guide in Choosing the Right Flooring Supplies

Easy Maintenance Tips for Underfloor Heating Systems

Have you ever walked on a floor and noticed that it feels warm and cozy? Chances are, it’s an underfloor heating system at work. Due to its cost-effectiveness and comfort, underfloor heating has become a popular choice for many homeowners and business owners. However, proper maintenance is needed to ensure its longevity and peak performance. 

In this article, we’ll share with you some tips and tricks you can do today to preserve the effectiveness of your floor heating systems that should keep you warm and cozy during the cold months.

Periodic Cleaning of Your Heating Systems

Regular cleaning is always crucial to maintain your underfloor heating system’s efficiency. Over time, dirt and debris can build up on the heating pipes, leading to diminishing performance. To prevent this, using a soft-bristled brush is highly recommended to sweep the pipes and remove any accumulated dirt. Doing so ensures that the heating pipes remain clean and unobstructed, allowing for efficient heat distribution throughout your home. Regular cleaning makes a huge difference in extending the lifespan of underfloor heating systems and lets you make the most out of your money’s worth.

Always Check the Pressure

Besides cleaning, regularly checking the pressure gauge is also advised to ensure the pressure is within the optimal range. Low pressure could also lead to a decline in performance, so it’s vital to refill the system if you notice the pressure dropping below the recommended level. By keeping an eye on the pressure gauge and refilling the system as needed, you’ll be able to ensure that your underfloor heating system operates at peak efficiency and lets you avoid any potential issues in the long run.

Bleeding the System

Another maintenance task that is often overlooked is bleeding the system. Trapped air can cause cold spots on the floor, and bleeding the system can remove any air bubbles. In this part, following the manufacturer’s instructions carefully is necessary to avoid damaging the system.

Inspect for Leaking Issues

flooring

Leaking is also a prevalent issue that can affect the performance of your underfloor heating system. Regularly inspecting the system for signs of leakage, such as damp patches on the floor is always a good idea to avoid unforeseen problems in the future. If you suspect a leak, immediately seek assistance from a technician, so they identify the source of the problem and make the necessary repairs. Ignoring a leak can further damage the system and even pose safety hazards, so it’s best to stay vigilant and address issues like leakage immediately.

Routine Servicing for Maintenance

A skilled technician can inspect the system’s components, such as the boiler, valves, and pipes, to identify any issues before they escalate. To keep your underfloor heating system in excellent condition and prevent any potential breakdowns, routine servicing is highly recommended. A well-maintained underfloor heating system is more efficient and can save you money in the long run by reducing the need for costly repairs.

Consider the Compatibility of Thermostat

Choosing a compatible thermostat for your underfloor heating system is also crucial. Different thermostats are designed for specific heating systems, so make sure to choose one that is compatible with your underfloor heating system. The thermostat should also be located in a suitable location, away from any heat sources or drafts.

Seek Expert Advice On Flooring Types

The type of flooring above your underfloor heating system can also affect its performance. Certain types of flooring, such as thick carpets or vinyl, can restrict the heat flow and reduce the system’s efficiency. Therefore, consulting your underfloor heating system’s manual for advice on suitable flooring types can help ensure maximum performance.

Home Improvements

It’s crucial to be cautious while performing home improvements to prevent any damage to the underfloor heating system. Whenever you’re planning to drill into the floor or carry out any renovation work, ensure that you take the necessary precautions to avoid damaging the underfloor heating system.

If you’re not sure about how to proceed, it’s always advisable to seek guidance from a qualified technician who can help you with the necessary steps to ensure the safety of your heating system. Remember, taking care of your underfloor heating system is essential to ensure its longevity and efficient functioning, and any damage can lead to costly repairs.

Final Thoughts

Bottomline, underfloor heating systems are excellent heating solution that provides comfort and cost-effectiveness. However, proper maintenance is paramount to ensure its efficient operation and longevity. Regular cleaning, bleeding, servicing, checking the pressure and looking for leaks are all important maintenance tasks. By following these tips, you can enjoy and make the most out of the benefits of underfloor heating for many years to come.

Have you found these underfloor heating maintenance tips helpful? Leave a comment down below and share us your thoughts.

Home Improvement General | Flooring Supply Shop Blog - Part 2