Satisfaction guaranteed. Call us anytime at 323-731-8453.
Radiant Floor heating | Flooring Supply Shop Blog - Part 3

How to Properly Tile a Roof Deck

roof deck tile design

When installing ceramic tile on roof decks, the most important single thing to remember is that a roof deck is just that, a roof – a barrier against the elements and especially water.

“It’s only a roof deck!” Did you ever hear that statement? When and if you do, be prepared for problems, and very possibly big ones. Where roof decks and concerned, roof is the most important word. When it comes to keeping water out, how the roof deck is constructed is at least as important as the balance of the roof itself, since both must satisfy the same requirement to keep the rooms and equipment below them dry.

SOME BAD EXAMPLES

A roof deck was leaking badly. Upon investigation, it was found that the installation had been made using one of the methods described in the Handbook for Ceramic Tile Installation. Why, then, the leakage? The method selected was one involving a cleavage membrane, and it had been chosen even though some of the other methods contained in the Handbook called for a waterproof membrane. The purpose of the cleavage membrane, as you will recall, is to isolate the tile floor from the structure, not to serve as a waterproof membrane.

Another somewhat similar project was purposely installed over a cleavage membrane consisting of a single layer of roofing paper. Those responsible for the installation thought the horizontal tile were waterproof, and therefore did not need a waterproof membrane. But while ceramic tile floors do not disintegrate when wet, they are not waterproof. A good waterproof membrane like Composeal Gold Crack Isolation Waterproof Membrane  is the only insurance against water damage in the rooms under a roof deck.

Two residences came close to taking the prize for most water damage. Built by the same contractor for two sisters, the houses faced each other, with a street in between them. The houses were already completed, with carpets, furniture and kitchen equipment in place, but before anyone could move in, the rains came – heavy rains. The resulting damage to ceilings, walls, furniture and carpets made the homes impossible to occupy. Much of the water came down in the kitchens, where cabinets were soaked, discolored and warped out of shape. What had happened? Each house had a rear, exterior, second story, tile deck which sloped the wrong way, toward the house, with nothing to prevent the water from going through the metal sill of the large sliding doors and into the structures.

Yet another common shortcoming in deck construction is the improper placement of flashing, or even its complete lack, at the junction of the walls and floor. A number of leaky decks have been found in which the lack of flashing has been the cause of the leakage.

Recently, an owner was having problems with leaks in a tiled deck. It started with leaks in the first deck to be installed; after the first deck was replaced, the new deck also leaked. The owner called for advice on how to make sure a third deck would not leak. She was advised on how the deck should be constructed, and was also urged to water – test the Composeal Gold Waterproof Membrane before installing the ceramic tile. The water test had to be stopped immediately because of the torrent of water that flowed into the room below. It is hard to understand how workmen can be so careless or lacking in knowledge as to allow such a membrane to be water- tested. The roofer had terminated the waterproof membrane *” short of membering up with the roofed-over part of structure, and the builder had done nothing to flash and waterproof that joint prior to the water test.

SLOPE ON STRUCTURE

In 1956, working with the International Association of Plumbing and Mechanical Officials, sponsors and authors of the Uniform Plumbing Code, tiled shower floor receptors were at last properly engineered and made part of the Uniform Plumbing Code.

The important part of this engineering called for pre-sloping the floor of the shower prior to placement of the waterproof membrane. The waterproof membrane was then placed in the pre-sloped surface so that the membrane itself sloped- – *” per foot minimum, *” per foot maximum- – to the weep holes in the bottom portion of the floor drain.

Prior to this, it had been customary to place the membrane flat, thus allowing seepage water to accumulate with no way to reach the weep holes and go down the drainpipe.

Shower floors are smaller than roof decks, but the same engineering principles apply. Slope the structure and Composeal Gold Waterproof Membrane to the weep holes in the floor drains; if there are no floor drains, slope to the open scuppers, with nothing in the bottom of the scuppers to prevent the free flow of seepage water.

FLAT DECK STRUCTURES

No matter how hard we try to spread the word about sloping them, structures continues to be built flat. The point of sloping the structure, which in turn slopes the membrane placed upon it, is to eliminate seepage water via the weep holes or open scuppers. The tile trade uses dry-pack floor mortar, and when this is placed on the flat waterproof membrane, the slope is only on the top surface of the dry pack. The dry pack is pumped out by the hot sun, leaving the salts of efflorescence on the tile. At least one company’s remedy for flat roof construction is to pre-float the roof deck with the dry pack mortar, which is then cover-cured. A waterproof membrane, designed to be used with a thin-set bonding system, is bonded to the mortar bed and fastened into the clamp-style floor drain. A compatible bonding mortar is then used to bond the tile to the membrane.

A SEEPAGE CHANNEL

In the design of roof decks, an effort has been made not only to slope the roof deck, but to create a channel which makes it easy for seepage water to flow toward the drain and into the weep holes. Until quite recently, the standard channel consisted of a layer of crushed rock over the waterproof membrane. A layer of cloth, such as burlap, was then placed over the crushed rock to prevent the mortar from filling up the voids in the crushed rock when the mortar bed was installed.

Now we have matting to provide that channel. The matting comes with a flannel – like cloth covering, which is installed cloth side up to prevent the mortar from filling in the extruded nylon and black spinnerette fibers. This type of matting has a long history of successful use in providing weep channels under concrete in drainage ditches and in similar situations.

An installation showing the use of the channel to promote water runoff is contained in the Handbook of Tile Installation. Even though this is the recommended way to install tile on roof decks, in actual practice, the channel is not always used. No matter what is done, however, positioning the waterproof membrane on a slope to the weep holes, or open scuppers, is the most important requirement for roof deck construction.

WATER ACCUMULATION

If the walls surrounding the roof deck are properly flashed at the juncture of deck and walls, and drip screeds are used, some water is going to drain across the tiled deck in addition to the rain which falls upon it naturally. However, it is best to not use the deck as a collection basin for water drainage; on the contrary, as much water should be kept off the roof decks as possible.

Directing water to the drains or scuppers takes some planning as to the positioning of those structures. Getting the water to move requires a slope of *” per foot. One – eighth of an inch per foot will drain the water, but will take much longer to do it; *” per foot, on a long run, may not be achievable because of the thickness build-up from the furthermost distance from the drain to the drain. To prevent problems, planning is needed as to the placement of the drains, as well as the height of the tracks for doors and sliding doors. Many, many times we have received calls describing situations in which only *” is available at the doorway to install a 2″ thick tile installation, and there is no way to drain the deck.

SUMMARY

“It’s only a roof deck!” As can be seen from the foregoing, construction of a roof deck takes planning. It is not difficult; it just has to be planned. It can also be seen that proper planning and execution require the cooperation of several trades working together.

Technical Data

COMPOSEAL 30 and 40 meet the engineering requirements of the American Society for Testing and Materials (ASTM) and the Ceramic Tile Institute (CTI). ASTM D4551 is the test standard established by ASTM

“for PVC flexible sheeting which is used with mastic, bedding or coating for construction of concealed water-containment membranes in applications where there is potential for costly secondary damage from water leakage and very long term reliable performance is essential. The tests are intended to ensure quality and performance.”

COMPOSEAL 30 and 40 meet and surpass these ASTM standards.

COMPOSEAL 30 and 40 also meet the CTI requirements for waterproof membranes.

TESTED MATERIAL

CERAMIC TILE INSTITUTE OF AMERICA

These tests were conducted by the United States Testing Co., Test Report No. LA 63554, Smith Emery Co., Test No. T-88-122A-B, and Truesdail Laboratories, Report # 24371-1.

Tile work shall comply with recommendations of “Handbook for Ceramic Tile Installation” published by the Tile Council of America, Inc., P.O. Box 2222, Princeton, N.J. 08543

* These drawings based on sketches in “Handbook for Ceramic Tile Installation.”

Engineering Properties ASTM D 4551 SpecGrade 30 ASTM D 4551 SpecGrade 40 Composeal Test Results .030 Composeal Test Results .030
Thickness, inches 0.30″ 0.40″ 0.31″ 0.42
Tensile Strength. lbs/in. width 60-lb min. 80-lb min. 89-lb (2870 psi) 113-lb (2700 psi)
Tensile Strength. at 100% elongation 30-lb min. 40-lb min. 43-lb 57-lb
Ultimate elongation before breaking 300% Min 300% Min 400% + 400% +
Tear Resistance. lbs/in width 185-lb min. 250-lb min. 260-lb 263-lb
Pinholes None None None None
Micro-Organism Resistance (fungus, mildew, mold) No Growth No Growth No Growth No Growth
Chemical Resistance:
Distilled H2O % wt. change* 1% max 1% max + 0.4% + 0.4%
Soapy H2O % wt. change* 2% max 2% max + 0.5% + 0.3%
Alkali, pass/fail (hydrostatic) Pass Pass Pass Pass
Shrinkage, dimension change at 158 F ASTM 1204 5% max 5% max 1.3% 2.9%
Volatility, % loss at 158 F after aging 1.5% max 1.5% max None None
Hydrostatic pressure (to test water penetration):
Original Condition Pass Pass Pass Pass
After Folding test (cold crack, 4hrs @ 0F) Pass Pass Pass Pass
After Puncture test Pass Pass Pass Pass
After Indentation test Pass Pass Pass Pass

No evidence of surface wetness or other signs of water penetration was detected on any of the tested specimens.

Additional Test :

Seam, (lap joint) strength ASTM D751 CTI Standard – 8 lbs./in. min. / Composeal 30 – 69 lbs./inch / Composeal 40 – 85 lbs./inch

Specific Gravity: 1.29 @ g/cm3

Cold Crack: passed @ 53 F

ASTM Standard D1004, d 412 d1790, e 96 and FHA Spec. 4900.1 are also met by Composeal

*Measure of water/ chemical surface absorption

Made in USA – 100% American Labor and Materials.

Composeal Gold Installation Instructions

Composeal Blue Vinyl Shower Pan Membrane How to Install

Benefit and used of Radiant Towel Warmer

Radiant Towel Warmer

Benefits and Uses of Radiant Towel Warmer

Towel warmer, heated towel rails, not only offer visual appeal but serve as a multi-functional accessory. Once marketed only to upscale spas and hotels, homeowners on any budget can now afford the luxury of owning a towel warmer.

Towel warmers are designed to warm and dry bath linens faster than air drying, It is a sustainable and more energy efficient to reduce laundry loads with the added benefit of keeping ‘damp’ towels from becoming mildewed and insanitary, Moreover, in colder temperatures, most towel warmers also serve as space heaters. Stainless steel towel warmers have proven to be more sustainable and resistant to corrosion and flaking than those that are chrome plated or powder coated.

Save Energy – Much Cheaper to use than A Clothes Dryer

On average, Towel warmer use between 35 -100 watts pf e;electricity (compared to dryers that on average use 4,900 watts). You can really save on unnecessary loads by keeping your towels dry and fresh between uses. Use your Towel Warmer instated of dryer and make some real energy saving!

Towel warmers now come in wide range of shapes, sizes and finishes. Most models are designed to run continuously, however, towel warmers are extremely energy efficient. Towel warmers use less electricity than several light bulbs and may add a thermostat and or timer and accessories.

Towel Warmer can be used in a variety of ways:

Bathroom

Not only do towel warmers warm and dry damp towels, they generate radiant warmth that can double as an alternative source of heat in the bathroom. Towel warmers also prevent mold from creating and are child friendly as well. Towel warmers reduce laundry loads!

Laundry Room

Radiant Towel warmers are great for drying damp clothes like socks and mittens. They are also ideal for drying delicate garment like lingerie and sweaters. As an added bonus, hang dry pants to De-wrinkle.

Spas and Pools

Anyone who owns a pool or spa can benefit from towel warmer. They are wonderful for keeping towels and bathing suits dry. Towel warmers also combat the damp humidity that is enclosed in pool areas.

Mud rooms

Mud rooms can quite possibly be the most important room in a home, serving as rear or side entrance used by residents, Towel warmers are great for kid’s damp cloths and helps keep moisture of the air making floors slip-resistant. Great for drying and warming ski equipment and jacket.

Hotels

An incredible luxury and major asset to any hotel bathroom, Towel Warmers complete the relaxing, memorable experience found in any resort. Also reduces laundry cycles, great for drying bathing suits and ski equipment.

Basement

An appropriate size towel warmer installed in a basement can remove dampness and provide radiant heat, keeping your basement dry and warm. Towel Warmers custom range is ideal for these spaces.

Radiant Towel warmers, heater towel rails, not only offer visual appeal but serve as a multi-functional accessory. Once marketed only to upscale spas and hotels, homeowners on any budget can now afford the luxury of owning a towel warmer.

Towel Warmers Installation and care instructions

Copyright © 2010 FlooringSupplyShop.com

Warm Home in Cold Winters with Radiant Floor Heating

electric floor heating, radiant heat flooring, radiant floor heating, under floor heating, electrical floor heating, floor heating, SunTouch, warm your floors, sun touch heating system, Heated floor mat, heat mat, radiant floor heat mat, radiant floor heating supply, radiant floor mat, tile heating, heated floors

Warm Home in Cold Winters with SunTouch Radiant Floor Heating

Solar heating technology has come a long way, with energy being tapped and utilized more effectively. There are innumerable uses of solar energy in households and commercial set-ups, which is conventionally converted to thermal energy and used for heating water, heating home or pool. However, solar heating activities depend on the amount of solar radiation received by the surface area and surface reflectance. Moreover, other factors such as surface emissivity, ambient temperature and thermal convection from wind also play significant part in solar heating.

SunTouch Radiant Floor Heating option is an excellent solution, worth consideration while planning for cold winter months. The method has several advantages, most notable being energy saver, reduced utility costs and clean energy. A radiant floor heating system is viable with solar energy, due to relatively low temperature of hot water that solar systems produce very efficiently. There are several radiant floor heating systems, such as masonry heater and gas boiler, which accept heat energy from sun.

electric floor heating, radiant heat flooring, radiant floor heating, under floor heating, electrical floor heating, floor heating, SunTouch, warm your floors, sun touch heating system, Heated floor mat, heat mat, radiant floor heat mat, radiant floor heating supply, radiant floor mat, tile heating, heated floors

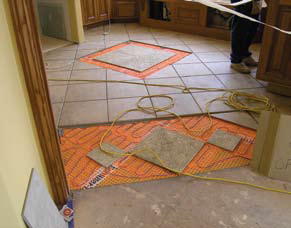
The advanced dual-wire technology of SunTouch Radiant Floor Heating allows homeowners to install mats that end at preferred location. These mats are flexible option for heating, as mat can be positioned in various angles such as 90° and 180°. Entire section is heated thoroughly as wires can be fitted easily at any angle and into curves. However, open weave design of the wire mesh is recommended owing to strong bonding of the thinset to the surface, above as well as beneath the heating mat. For an ideal floor warming application, wire spacing limit is determined to be within 90°.

A heating cable, a foil radiator and a set of power leads for connection to the floor-sensing control are the integral components of the SunTouch Radiant Floor Heating Mats. The heating mats are Aramid reinforced and have ETFE high-temperature insulation along with oxygen-free copper alloys and XLPE (PEX) jacket. These heating mats are appreciated for easy installation, easy connection establishment, convenient management and safe usage.

To ascertain maximum safety, heating element mesh is woven beside the mat in a ring-like shielded jacket. The set-up facilitates power supply to the grounding wire within the junction box for the thermostat. Along with safety and intrinsic attributes, homeowners have appreciated SunTouch Radiant Floor Heating system for its aestheticism.

electric floor heating, radiant heat flooring, radiant floor heating, under floor heating, electrical floor heating, floor heating, SunTouch, warm your floors, sun touch heating system, Heated floor mat, heat mat, radiant floor heat mat, radiant floor heating supply, radiant floor mat, tile heating, heated floors

After continual research and development, solar floor heating systems have become immensely effective and efficient. Over the years, these systems have also provided architectural flexibility to the users and can be installed in any part of the house. Moreover, installation of SunTouch Radiant Floor Heating system reduces amount of air pollution by limiting greenhouse gases that are emitted using alternative fuels such as oil, propane and natural gas for heating. In case the solar system cannot meet heating requirements, back-up systems can be synchronized for heat supply.

For ensuring warm home in cold winters, one can choose SunTouch Radiant Floor Heating. However, planning the layout of the electrical floor heaters, budget and daily or yearly projections are some of the basics that need to be considered by homeowners before availing this solution.

Buy now at Flooring Supply Shop

Copyright © 2010 FlooringSupplyShop.com

The Facts about SunTouch Radiant Floor Heating

electric floor heating, radiant heat flooring, radiant floor heating, under floor heating, electrical floor heating, floor heating, SunTouch, warm your floors, sun touch heating system, Heated floor mat, heat mat, radiant floor heat mat, radiant floor heating supply, radiant floor mat, tile heating, heated floors

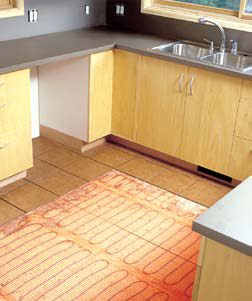
SunTouch Radiant Floor Heating is an underfloor heating system that aids in keeping the indoors as well as outdoors warm. A type of electric radiant floor heating, this low temperature heating system emits radiant heat from under the floor surface that heats the air; subsequently making the house warm. The twin, multi-stranded and oxygen-free copper heating elements form the heart of this system, augmenting its utilization and longevity. Furthermore, the strong synthetic Aramid fibers reinforce these heating wires and add to their longitudinal strength.

The dual-wire technology of SunTouch Radiant Floor Heating allows user to initialize the mat at the thermostat and end at any of the desired locations. Another benefit of this heating system is that the mat can be flipped and turned at 90° and 180°, so as to fill in virtually any shape. The wire can thus be easily released and fitted into angles or curves, leaving no gap. Moreover, the open weave design of the wire mesh facilitates strong bonding of the thinset to the surfaces, both above and below the heating mat. Typically, wire spacing is determined not to exceed 90° C for ideal floor warming application.

For maximum safety, the heating elements are woven to the underside of the mat, and are ringed by a fully shielded grounding jacket. This set up further extends the power lead to the grounding wire in the junction box for the thermostat. Besides the benefits provided by intrinsic features of the SunTouch Radiant Floor Heating, the system has also won accolades for its aestheticism. Unlike heat pumps and vents, this system is laid beneath the floor surface and is thus, completely invisible. Moreover, efficient installation of the floor heating system also avoids the risk of direct contact with the heating element.

electric floor heating, radiant heat flooring, radiant floor heating, under floor heating, electrical floor heating, floor heating, SunTouch, warm your floors, sun touch heating system, Heated floor mat, heat mat, radiant floor heat mat, radiant floor heating supply, radiant floor mat, tile heating, heated floors

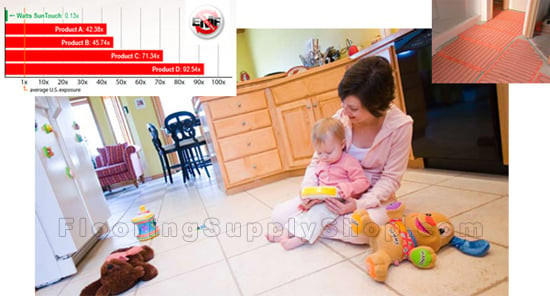
This system further delivers an even radiant heat across the whole floor surface; whilst, heating the home from the floor up. All one has to do is program the thermostat as per the lifestyle, and the rest is assured by the system itself. Optimization of energy costs due to rapid distribution of heat, easy regulation of temperature, and precise control of heating are other advantages of the system. Moreover, the uniform heat spread does not create heat droughts that lift up dust and allergens. Thus, the SunTouch Radiant Floor Heating enables user to achieve a uniformly heated home in a healthy way.

Owing to all these advantages, the SunTouch Radiant Floor Heating has rapidly replaced conventional heating systems like boilers and heat pumps, which are inefficient as well as expensive.

You can learn more when you visit www.flooringSupplyShop.com

Copyright © 2010 FlooringSupplyShop.com

Safety Tips for Shoveling Snow

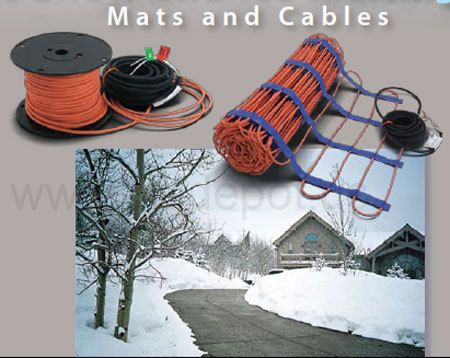
Suntouch snow melting system, radiant heat, electric radiant heat, snow melt systems, radiant floor heating, floor warming, electric floor warming, warm floors, warm floor

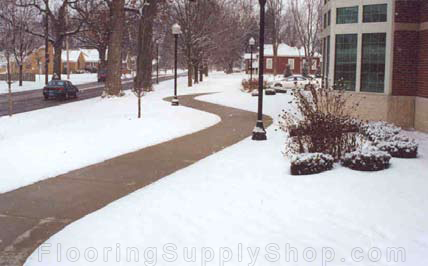
Most people love winter season, but one thing which everyone hates about winters is the snow menace. Shoveling snow is probably the most hated activity of the winter months that poses significant health risks. Snow shoveling is a daunting task and the overexertion caused by this activity can sometimes lead to health complications and even death. This demanding task puts pressure on the heart and can cause heart attack; especially at low temperatures, when blood vessels contract and the heart pumps faster to get blood to the extremities. Besides heart attack, there are various other problems that a person can face because of shoveling snow. Due to the repetitive lifting of heavy weight snow, one may put strain on the muscles and back. In order to avoid such complications, one needs to take preventive measures to stay safe.

Before you plan to shovel snow, you must consider your health condition. In case you have heart condition or back problem, you must certainly avoid snow shoveling. Even otherwise, do not jeopardize your health and check with your doctor if you are fit to shovel snow. Apart from health condition, also consider your physical condition. If you lead a sedentary lifestyle or are out of shape, you must proceed with caution. Before you start this physically challenging activity, you must stretch and warm-up like you would do before a strenuous activity. You must also drink some water to remain hydrated.

Suntouch snow melting system, radiant heat, electric radiant heat, snow melt systems, radiant floor heating, floor warming, electric floor warming, warm floors, warm floor

In case you are planning to shovel snow yourself, there are few simple things that you need to keep in mind. Foremost, avoid lifting snow-filled shovel as much as possible because it can be strenuous; instead try to push off the snow from the driveways, sidewalks or walkways. However, if it unavoidable and you do have to lift snow then you must face the direction in which you are lifting, but avoid twisting. On feeling sore or fatigued, you must stop shoveling for few minutes, take some rest and then start again. You must avoid over-exhausting yourself at all costs to avoid risk of heart attack. If it is extremely cold and you begin to feel its effects, stop shoveling and take rest, go inside for a while.

There are certain snow shoveling safety tips that you must always follow, such as you must never shovel immediately after you wake up. Lying down all night leads to build-up of fluid in the disc and a minor accident like fall increases risk of slipped disc injury. Dress in layers to keep yourself warm, and you can shed off layers as you become warm. Make sure to wear slip resistant boots and eye gear. In order to keep snow from sticking to the shovel, you can spray or rub some lubricant on it. It is advisable to keep the load lighter and take frequent breaks. Once you have cleared the snow, spread some rock salt to avoid icing.

Suntouch snow melting system, radiant heat, electric radiant heat, snow melt systems, radiant floor heating, floor warming, electric floor warming, warm floors, warm floor

In case you have a snow thrower, ensure to follow all the safety guidelines to avoid injuries. Even after shutting off, the augur blades can continue to rotate and one can reach into the snow thrower and suffer injuries. In such cases, people tend to break fingers or damage tendons, while some injuries are worst and can result in maiming or amputations. Hence, whether you shovel snow manually or with the help of high-powered snow thrower, be careful and take measures to avoid accidents or injuries.

Safety First!!!

Copyright © 2010 FlooringSupplyShop.com

Radiant Floor heating | Flooring Supply Shop Blog - Part 3