Satisfaction guaranteed. Call us anytime at 323-731-8453.
Tools for the Pro and DIY | Flooring Supply Shop Blog - Part 3

Dealing With Cracked Grouts

Grout Grabber, grout grabber adapter, Fein Grout removal tool, Grout, Caulking

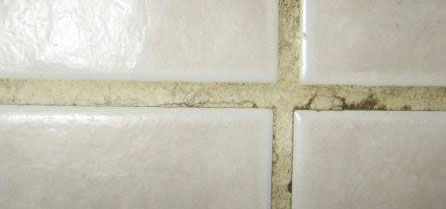
Dealing with cracked grouts is a common problem being faced by almost every homeowner these days. Cracked grout is a common issue associated with all kind of tiles, which gives a very bad look to the floor and walls.

Reasons for Grout Cracking

There are many reasons for grout to crack and most of these are because of poor installation methods. One of the reasons of this can be excessive use of water or polymer additive in the grout mixture. Another reason can be excessive evaporation of water content in the grout mixture which leaves behind pinholes that lead to grout cracking.

Grout cracking can also occur if thinset is not used sufficiently during the installation of tiles. This is because, if the layer is not thick enough, it will pull away from the tile, leaving behind gaps of air under the tile, which subsequently leads to the breakage of tiles.

Grout Grabber, grout grabber adapter, Fein Grout removal tool, Grout, Caulking

Repairing Cracked Grouts

Problem of grout cracking is an issue that can occur even in properly installed walls and tile floors. You can take up several measures to repair the cracked grouts, one of which is using grout caulk. Caulk is a substance that matches the color of the grout exactly and is available in the form of tube. One can squeeze the tube and apply it to the cracks to fill the gap. This method usually works on the cracks which are small in size, however, it is one of the easiest ways to get rid of the cracks.

Another option that one can opt for is to find the matching grout for the floor. It will be an easier option if one has some grout left over from the original installation. But, if this is not possible, then one should look for the same brand and color as the original installation.

Grout Grabber, grout grabber adapter, Fein Grout removal tool, Grout, Caulking

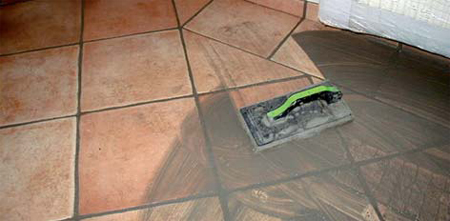
Next step is to mix the grout and apply it on the cracked area. For this, water and grout are mixed together in a bucket in proper proportion. An important thing to be kept in mind while preparing the mixture is that right quantity of water should be used in order to obtain the perfect consistency. After applying this to the crack, wipe off the excess grout present outside the grout line and leave it for drying.

In case, the grout doesn’t stick to the surface, then one should take a saw and remove the grout present between the tiles. While doing this, one should keep in mind that pressure should not be applied to the tile, else it will break. When the grout is removed, the mixture is applied to the cracked area using a sponge, which provides a uniform and clean look.

Grout Grabber, grout grabber adapter, Fein Grout removal tool, Grout, Caulking

Replacing the cracked grout can be another way of curing the cracks. It is the best way to overcome the problem of cracked grouts. Though it is an expensive procedure as compared to repairing the cracked grouts, but it ensures that the tiles will continue to serve well for a longer period of time. As a matter of fact, replacing grout will save you from the problem of re-tiling the floor and walls again.

Wrapping Up.

Depending upon your requirements, you can choose to either repair the cracked grouts or replace them to solve your problem. This would definitely add beauty to the interiors and would provide a clean look.

Copyright © 2010 FlooringSupplyShop.com
Before and After pictures of Polishing stone

Before and After picture using Cheetah Eco Friendly Stone Polishing Pad

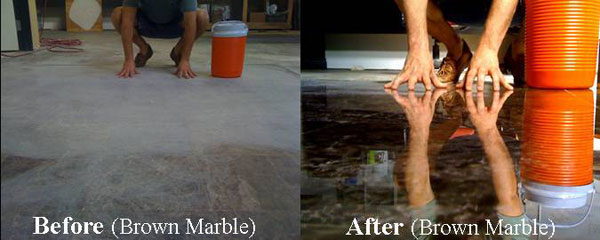
Marble floor polished with Cheetah pad

Before using Cheetah pad on Marble floor

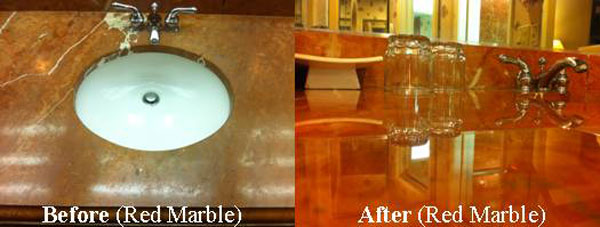
Marble Countertop polished with Cheetah pad

Marble countertop before polishingMarble countertop After picture

Bid Adios to Lippage with Tuscan Leveling System

tile, leveling, lippage, stone, marble, grout, ceramic, floor, flat, surfaces, granite, spacers, slab, stone, installation

Flooring is an integral part of every home that can alone change the entire look of the house. Homeowners generally opt for marble, ceramic, tiles and stone flooring that respectively have distinct advantages and disadvantages. However, one problem that majority of the homeowners face while installing these flooring options is lippage.

Lippage is a common problem wherein the leveling or flatness of the flooring is affected due to the difference in the elevation of the tiles. This not only affects the overall appearance of the room but also results in various problems, such as unevenness. The main cause of lippage is the installation of the flooring on subsurface which has not been leveled. An easy way of eliminating this problem is to make use of the Tuscan Leveling System which ensures a uniform surface.

tile, leveling, lippage, stone, marble, grout, ceramic, floor, flat, surfaces, granite, spacers, slab, stone, installation

This innovative product has changed the way flooring is installed as it completely eliminates lippage. This 2-piece system has revolutionized the tile installation by ensuring flatness and creating virtually lippage free flooring. It can be used for leveling of floor as well as walls, wherein the numerous tiles are interlocked to form one uniform even surface at the time of curing of the setting material.

This proves beneficial as the Tuscan Leveling System results in reduction of shrinkage as well as warping to a great extent. Furthermore, it also minimizes the instance of re-lifting the tiles for the addition of mud as well as shimming process of tiles. All this and more facilitate the process of installation, making it easy, effective and time-saving.

tile, leveling, lippage, stone, marble, grout, ceramic, floor, flat, surfaces, granite, spacers, slab, stone, installation

Homeowners can learn to use the hassle-free Tuscan Leveling System in just a few minutes. Irrespective of the skill level of the homeowner, the DIY Tuscan Leveling System Kit can be used by anyone and everyone. With the help of this leveling system installation process becomes fast and the tiles do not move while drying. Use of this system not only eliminates lippage due to its interlocking design, but also reduces fatigue and stress of the homeowners. This leveling system is considered ideal for tiles 300mm or more. Besides, the caps can be used several times.

Simply following the Tuscan Leveling System installation guidelines, homeowners can ensure a single flat and uniform surface. There are certain measures that the homeowners can take to ensure best results. One such simple step to be taken before installation is to soak the straps in water, which can be lukewarm (for two hours) or hot (30 minutes). This helps in increasing the elastic strength of the straps which is turn renders maximum tension to them for better installation.

tile, leveling, lippage, stone, marble, grout, ceramic, floor, flat, surfaces, granite, spacers, slab, stone, installation

The thinset and mortar having consistency similar to that of a thinner also facilitate better results. At the time of insertion of caps and straps, these should not be placed at the corners of the tiles. This precaution is necessary to ensure proper installation as well as to avoid breaking the corners of the tiles.

These simple measures, complemented with adherence to the instructions to use the Tuscan Leveling System, help homeowners achieve a perfectly flat flooring surface that is aesthetically appealing.

Click Here to View Action Video

Copyright © 2010 FlooringSupplyShop.com
The Must-Have Flooring Tools


Best Flooring tools for sale

There has been an increasing trend among homeowners to opt for the ‘Do it Yourself’ task regarding home renovation. Some of these DIY home renovation tasks include flooring, painting and grouting, among many others. These DIY tasks not only demand homeowners to possess a particular skill set, but also require them to have requisite tools.

Possessing adequate tools is necessary to accomplish the task properly. Having necessary tools not only reduce the efforts and stress, but also ensure perfection in job. Moreover, a badly done home renovation defeats the sole purpose of doing DIY, which is to save money. This is so because a badly done DIY task would result in incur of expenses for repair and correction. Hence, homeowners who wish to indulge in DIY home tasks should have all the necessary tools required for successful completion of the job.

One of the most commonly chosen DIY tasks by homeowners is flooring and that too tiling of the floor in particular. While installing tiles at home, one of the most common problems faced by them is lippage. This problem occurs when the tiles are not uniformly set to form one flat surface. As a result, the aesthetics of the house is adversely affected and also lippage may result in cracking or breaking of the tiles. For this, homeowners can opt for the Tuscan Leveling System which ensures that the tiling is done perfectly without any lippage. This leveling system has been designed for DIY enthusiasts and can be used by homeowners with any skill set. Another tool that proves useful while tiling is the tile spacer that facilitates straight grout lines. The uniform finish renders a neat look which enhances the appearance of the place.

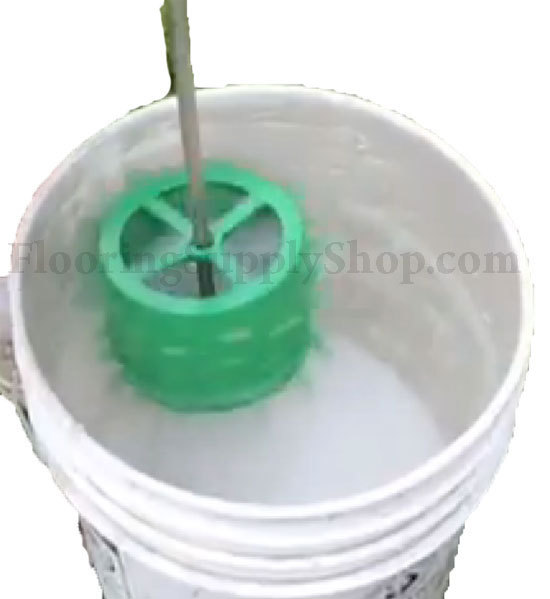
In addition, homeowners can also purchase the Primo Bucket Brush, which takes the hard work and mess out of cleaning buckets, saving a lot of time, money, and water.The Bucket Brush is designed to use a ½” portable drill to provide the power. Not only does the Bucket Brush save time, it saves the environment. Mixing buckets can now be used over and over again before they ever end-up in landfills.

Homeowners doing flooring on their own must also possess tools like tile cutters, tile saws, diamond hole saws and undercut saws. In addition, they can purchase straight edges, trowels, grout floats, diamond blades and stone fabrication products. The grout grabber tool, polishing pads and Montgomery degree pitch level tool are few of the other tools that homeowners should have.

Tuscan Leveling System, Raimondi tile leveling system, RLS wedges, RLS spacers, RLS-KIT, tile, leveling, lippage, flat surfaces, spacers, installation

Besides these specific tools, there are several other tools that the homeowners must possess to ensure proper completion of DIY flooring tasks. The most important among them is the safety gear, which includes knee pads, gloves, eye gear and respiratory mask, among others.

Homeowners should ensure that they possess all the tools before initiating any DIY project. However, before going on a shopping spree to purchase flooring tools, homeowners should first make an itinerary of the tools that are actually required. This would help avoid purchasing something that is not required and also ensure buying tools that are necessary.


Click Here to View Action Video

Copyright © 2010 FlooringSupplyShop.com
Cheetah Pads Free Training Class new Dates

Cheetah Pad, Eco Friendly Stone Polishing, EcoPads, EcoStone, earth day, eco stone, Eco-friendly, energy conservation, Environmentally friendly flooring

Free 8 hours training class event

Cheetah Pads Are Being Hailed As

“The Most Important Breakthrough For Stone Restoration In 20 Years”

Hurry, Act Now! Space is extremely limited!

It’s a No-Brainier!

GET ONE FULL-DAY OF HANDS-ON STONE RESTORATION TRAINING

ABSOLUTELY FREE!!!

Simply buy one set of 17″ or 20″ Cheetah Pads and we will spend 8 hours teaching you how to MAXIMIZE RESULTS AND PRODUCTIVITY by utilizing the fastest, most innovative, eco-friendly stone restoration system on the planet!

Get all the tips first hand from the inventor and mad-scientist himself, Dana Kothrade! Learn how to save time, save money, and go green! No boring power-points and lengthy classroom lectures!

Hurry, Act Now! Space is extremely limited, Free training class event to be held on NOVEMBER 4th and DECEMBER 9th!!!

FREE Lunch!

FREE Training Manual!

Cheetah Pad, Eco Friendly Stone Polishing, EcoPads, EcoStone, earth day, eco stone, Eco-friendly, energy conservation, Environmentally friendly flooring

Cheetah Pad, Eco Friendly Stone Polishing, EcoPads, EcoStone, earth day, eco stone, Eco-friendly, energy conservation, Environmentally friendly flooring

Top 5 Reasons Why You Should Try Cheetah Pads:

1. Cheetah Pads can reduce your labor costs by as much as 70%

2. Lower your material cost by up to 75% using Cheetah pads and water only! No expensive diamond disks or crystallizers ever needed!

3. 100% eco-friendly! With the Cheetah Pads you never have to worry about using any harsh chemicals around children, pets, and even yourself!

4. Achieve results better than factory finish in half the time!

5. Cheetah Pads make stone restoration easier than ever before. If you can count to 4 you can polish a floor!

GET YOUR SET TODAY!

Stone Restoration without 20 Years of Experience

The Fastest Stone Restoration System On The Planet!!!

Diamond Pads That Perform Stone Restoration in Half The Time

  • Very easy To Use
  • Up to 70% reduction in labor
  • As much as 75% lower cost
  • Work well on any floor buffer, orbital or planetary machine
  • No heavy duty equipment required
  • Extremely fast cutting
  • No chemicals used, only water
  • No acidic components
  • Extreme concentration of micro abrasives
  • Works incredibly well on ALL Marbles, Travertine, Limestone, Terrazzo and Polished Concrete
  • Chemical free Diamond pads are an Eco Friendly way to achieve a dull hone on Travertine, Marble, or Limestone Floors, countertops or walls.
  • Use on floors walls or countertops with little to no lippage (uneven tiles).
  • Pads remove wear and provide a variety of appearance levels from dull hone (no shine) to highly polished.
  • Safe on all stones and tile, will not damage any stone
  • Professional strength formula.

Environmentally Friendly

Cheetah Pad, Eco Friendly Stone Polishing, EcoPads, EcoStone, earth day, eco stone, Eco-friendly, energy conservation, Environmentally friendly flooring

Made in the U.S.A

Buy now

Eco Friendly Stone Polishing Pads Video’s

Tools for the Pro and DIY | Flooring Supply Shop Blog - Part 3