QuARTz Plus Linear Shower Drain Installation Guide
Available Sizes: 35.56″ (878mm) and 46.7″ (1186mm)
1. Shower Drain Placement
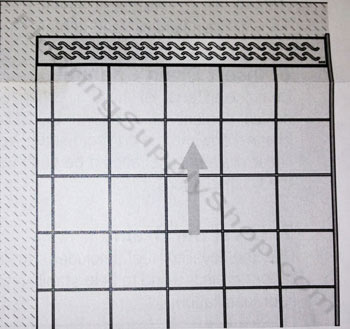
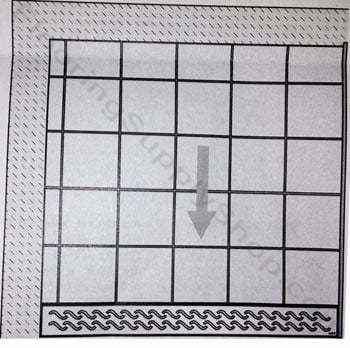
The placement of the QuARTz Plus Linear Shower Drain should be ideally at the end wall or at the threshold of the shower.
Installation against the end wall.
Installation at the shower threshold
2. Locate Pipework
Re-locate rough-in pipework if necessary to align with desired placement of linear drain. Cover with flooring mortar as necessary
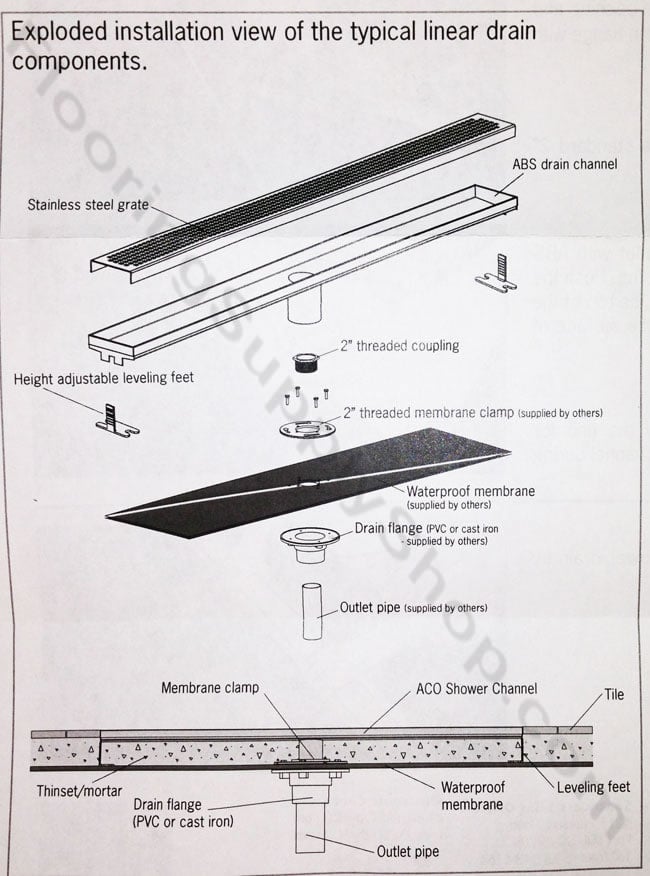
3. Install Drain Flange
Install a 2″ threaded drain flange with preferred method to the rough-in pipe. Note: drain flange not supplied: sold separately
4. Waterproof Floor
Install a waterproofing membrane over the floor and cut to size. Cut out an area for the drain flange opening and secure the membrane in place over the drain flange with the membrane clamp.
5. Install coupling
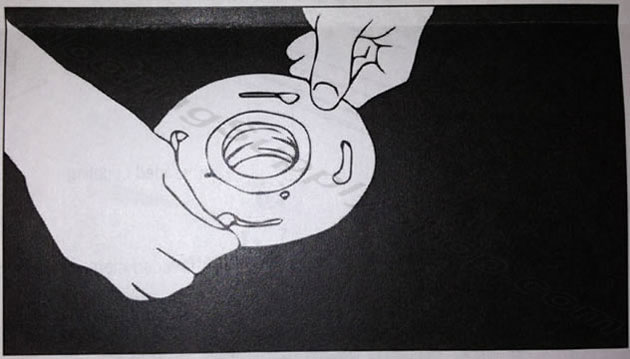
Thread the 2″ coupling (included) in to the standard 2: shower drain flange. Hand tighten
6. Insert Drain Channel
Coat the exterior of the drain channel outlet with ABS solvent cement and insert into the 2″ coupling. Push the channel down to the correct height. Note: the top of the linear drain channel should be flush with the surface of the finished floor.
7. Level the Drain
Use the leveling feet (included) to level the nit for proper drainage and to help stabilize the channel during floor installation.
8. Flooring
Complete the installation of the linear shower drain by installing the preferred flooring.
Features
- 2″ diameter central vertical outlet
- V-shape Channel
- Channel width: 2.75″
- ABS is a metallic gray color
- Grates are Passivated, not Electro-Polished (more of a mat finish)
- Plastic support feet aid installation
- Optional accessories: Debris strainer
Quartz Linear Drain Technical Product Support
Shower Channel Joisted Wood Floor Installation
