Kirb-Perfect
Perfect Shower Curbs with Kirb-Perfect
Kirb-Perfect is now available! Now you can quickly and easily build your shower curbs without the need for backerboard or a wire lathe. Kirb-Perfect creates a professional curb while saving you time and money.
Kirb Perfect Facts:
- • Top has built in pitch into shower.• Can be used with or without the presence of wood.
• Preserves the integrity of the liner.
• Simple to add lightweight mud to both sides of the pan material.
• Provides a cement backing for ceramic, porcelain or stone
Kirb-Perfect was designed to eliminate the need to attach cementatious backer board or wire lath to a vinyl wrapped, 2×4 stacked shower curb.
Kirb-Perfect will not puncture the top or inside of the pan membrane, thus reducing the risk of leakage and preserving the integrity of the liner.
Securing with nails on the outside wall of the curb is sufficient to hold Kirb-Perfect in place.
Also, Kirb-Perfect can be used without the presence of wood altogether; it will stand with the vinyl liner held up in the center of the cage, making it simple to add a light weight mud to both sides of the pan material while filling.
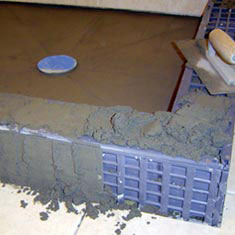
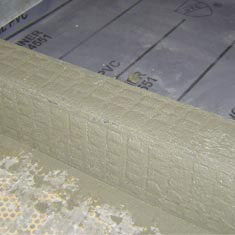
The top panel is then attached using the stainless screws provided. Kirb-Perfect is then screened full to provide a cement backing on which to adhere ceramic, porcelain or stone tile.
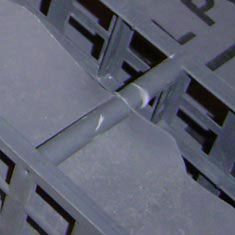
The Kirb-Perfect Shower Curb is a stay-in-place plastic form for building perfect shower curbs. Kirb-Perfect is designed to be used with a pan liner
It can be used with or without a 2 x 4 wood curb. With molded in dovetail connecting lugs, this curb can be used for multiple length installations.
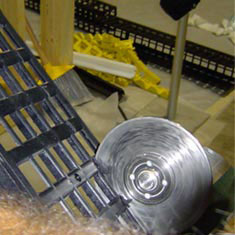
Each piece of the Kirb-Perfect Shower Curb is easily cut with a hacksaw, PVC cutters or angle grinder. Supplied with two (1-1/4″ long) and eight (3/4″ long) stainless steel self tapping screws and illustrated installation instructions.
Kirb-Perfect is 4-9/16″ wide x 30″ long and 5-1/2″ high.
Installing Kirb-Perfect
Installation for Membrane wrapped Curb
Be sure liner is installed according to all ANSI specifications and Plumbing codes.
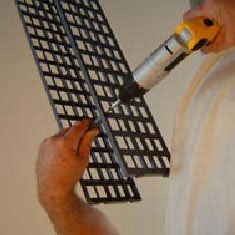
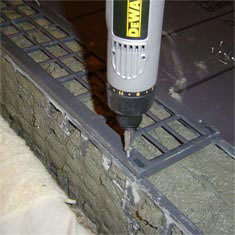
1. Assemble the 2 side panels with the (2) 1 1/4″ screws supplied.
(Be sure not to over tighten)
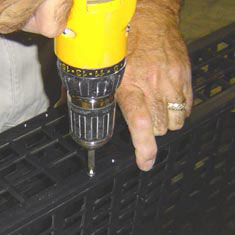
2. Attach top panel to assembled side panels using the (8) 3/4″ stainless self-tapping screws supplied.
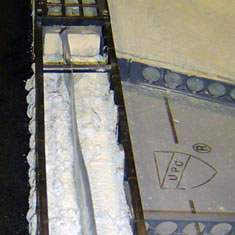
(Be sure the arrows on top panel are pointed to inside of the shower. Do not over tighten.)
3. Trim inside panel to allow for pre-pitch using snips, hacksaw or grinder.
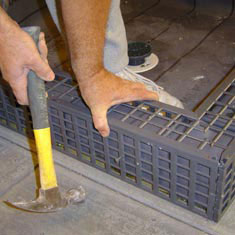
4. Fit assembled curb over membrane wrapped 2×4’s, attach with galvanized nails (not supplied) to the exterior only.
(Caution: Do not nail to inside of curb, doing so will jeopardize the integrity of the liner!)
5. Pack and fill side and top panels of attached curb with mud.
(We recommend a lightweight wall mud for ease of workability.)
6. Let curb dry over night and use a latex modified mortar to set tile.
(Note: We recommend a Liquid Waterproofing Membrane to be added to the surface of the curb for additional protection prior to the installation of tile.)
Installation for NON-Wood curb
Be sure liner is installed according to all ANSI specifications and Plumbing codes.
1. Trim inside panel to allow for pre-pitch using snips, hacksaw or grinder.
2. Hold liner up in center of curb and position between center posts. Screw together with the (2) 1 1/4″ screws supplied.
(Be sure not to over tighten.) Trim excess liner even with top of center post.
3. Fill curb with mud just short of top.
We recommend a light weight wall mud for ease of workability.
4. Install top panel using the (8) 3/4″ stainless, self tapping screws supplied.
(Be sure the arrows on top panel are pointed to inside of the shower. Do not over tighten).
5. Fill balance of curb with mud and screed top and sides.
6. in both Wood and Non Wood let curb dry over night and use a latex modified mortar to set tile.
(Note: We recommend a roll-on waterproofing membrane to be added to the surface of the curb for additional protection prior to the installation of tile.)
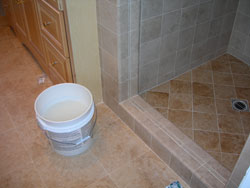
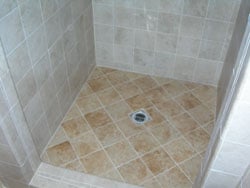
A shower built by FlooringSupplyShops using the Kirb perfect, Quick Pitch, Pre Pitch and StringA Level
Perfect Shower Curb Each Time, Every Time…
Frequently Asked Questions
Why should I use Kirb-Perfect?
Kirb-Perfect is designed to slide onto the membrane wrapped 2×4 curb. Nailed to the outside wall of the curb only Kirb-Perfect will preserve the integrity of liner by not puncturing it on the top or inside wall.
How long of a curb can I make?
Unlimited. Located on both ends of each 30 inch section of Kirb-Perfect are dovetail connectors. These lock the sections together before being filled with mud which makes Kirb-Perfect unlimited.
Can I trim Kirb-Perfect to make a shorter curb?
Yes, but keep in mind, the mud bed and tiled shower floor cannot be thinned. Code requires mud beds to be a minimum 1½ inches thick.
Is Kirb-Perfect pitched?
Yes. The top piece has the pitch built into it. Embossed arrows point in the direction of the fall.
What type of cement do I fill it Kirb-Perfect with?
Fill with the same Portland/sand mix used for Pre-Pitch.
Do I have to use 2×4’s with your curb?
We recommend it, although there is a way they can be eliminated by sandwiching the liner between the inside and outside wall pieces when screwing them together. Fill with Portland/sand mix for a solid cement curb. Check your local Plumbing Codes to assure this is an acceptable alternative method.
We at FlooringSupplyShop.com thank you for your purchase of Kirb Perfect and are confident you will be pleased with its performance.
More links about Quick Pitch System
Watch the Video – Pre Pitch English
Watch the Video – Pre Pitch Espanol
How to Install Pre Pitch System – Quick Pitch with Composeal Vinyl – Quick Pitch Specifications – How to Install Kirb Perfect – StringA Level – How to Install Handi-kirb – Quick Pitch System Estimator – Ebbe Square Drain with Quick Pitch – Quick Pitch with Roll-on or Vinyl
