Satisfaction guaranteed. Call us anytime at 323-731-8453.
installation | Flooring Supply Shop Blog

Raimondi Tile Spacer Leveling System

Raimondi tile leveling system, RLS wedges, RLS spacers, RLS-KIT, tile, leveling, lippage, flat surfaces, spacers, installation

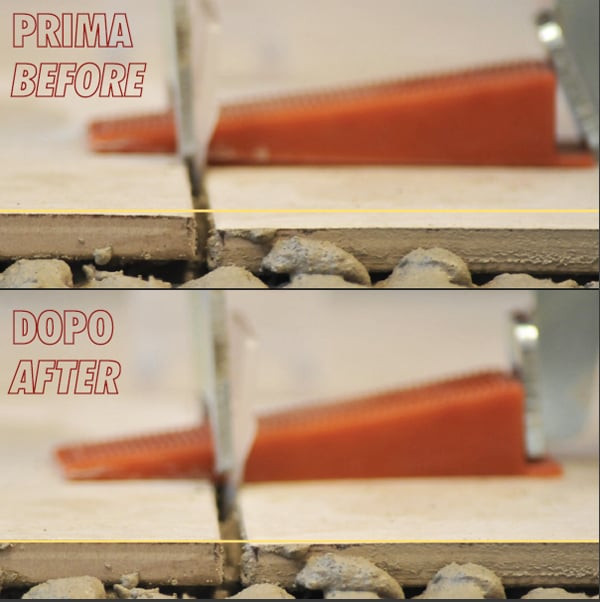
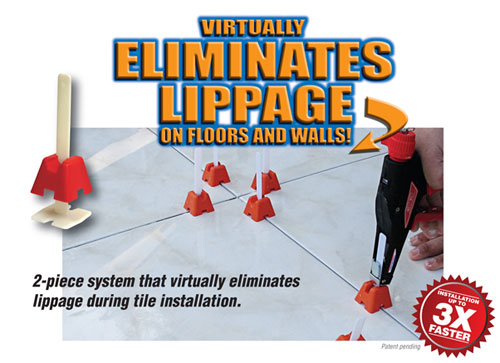
The most important as well as the most daunting aspect of setting tiles is to achieve perfect leveling. A common hindrance faced while setting larger format, thicker tiles as well as un gauged and thin tiles is the uneven floor foundation, which makes leveling all the more difficult. As a result, tiles that seemed leveled during installation often have unevenness in the height, once the thinset or adhesive cures, which is unappealing. This can, however, be overcome with the help of ‘Raimondi Tile Spacer Leveling System’ that ensures perfect leveling of the tiles. Fabricated using quality raw material, these spacers are durable, cost effective and easy to use. Not only does it result in proper leveling of the tiles, but also facilitate the tile setting process.

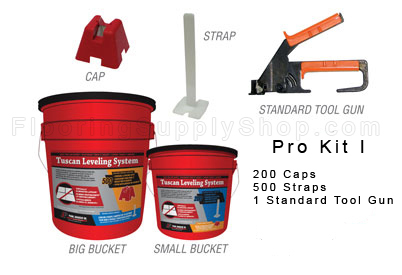
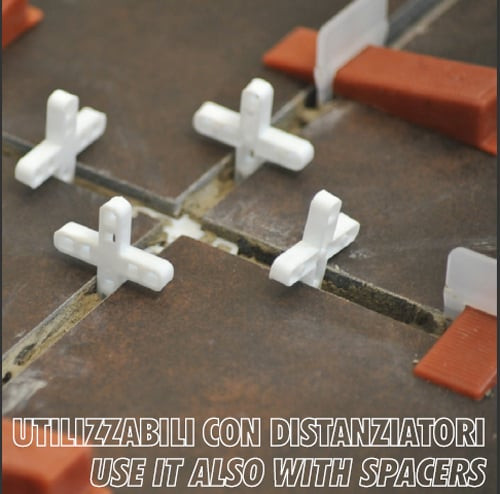
Achieving a smooth level surface, the Raimondi leveling spacers can be used for tiles with varied dimensions. For a tile thickness of minimum 1/8", maximum 1/2", a minimum 3/32" joint is required, which at times is difficult to achieve. However, with the help of the spacers it is no longer a daunting task and can easily be accomplished in just few minutes. Depending upon your requirement, you can select amongst the different Raimondi leveling system kits that include leveling wedges, spacer clips and installation pliers.

Raimondi tile leveling system, RLS wedges, RLS spacers, RLS-KIT, tile, leveling, lippage, flat surfaces, spacers, installation

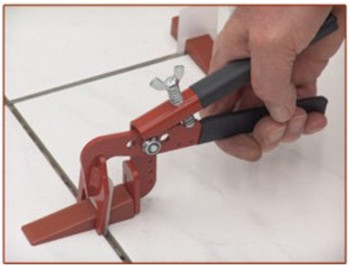
One does not have to be a well-qualified professional to use the Raimondi leveling spacers. These spacers are quick and easy to set & remove, and homeowners can do it on their own, without any professional guidance. In case you plan to install tiles on your own, you can make use of these spacers for proper leveling of the tiles. After spreading the tile adhesive, you need to insert the support underneath the tiles on all the sides. In case of larger and thicker tiles, it is advisable to use two support instead of one, on all four sides. Once properly done, set the tiles over the adhesive, and to strengthen the bond you can beat it with a rubber mallet. Next, you need to insert the wedges into the support, which can be easily done by using the special traction-adjustable pliers. However, you need to exercise caution not to pass the breaking point. After the tile adhesive sets and cures, the leveling support needs to be removed, which can be done with the help of special traction-adjustable pliers or rubber mallet. Instead of using these tools, you can easily remove these supports by simply kicking them with your feet, but make sure to beat parallel to the joint.

Raimondi tile leveling system, RLS wedges, RLS spacers, RLS-KIT, tile, leveling, lippage, flat surfaces, spacers, installation

Not only is the Raimondi leveling spacer easy to set and remove, but has various other features that have made it a preferred choice of many, especially tile installers. Consuming less time and effort, it holds the tiles firmly in place. One does not have to worry about the voids or coverage as the Raimondi leveling spacer enhances the adhesion of the thinset to the tiles. Rather than pulling tiles from the thinset, these are pushed into it, which is easier. Since it is quick and easy, it greatly improves the overall quality of the tile installing project.

Click Here to View Action Video

Copyright © 2010 FlooringSupplyShop.com
Do you have adequate tools to finish DIY task

tile, leveling, lippage, stone, marble, grout, ceramic, floor, flat, surfaces, granite, spacers, slab, stone, installation

A number of individuals undertake ‘Do It Yourself’ home renovation projects as a hobby. Some of the most popular DIY projects include painting, tiling and grouting. However, it is important to properly complete the job at hand. An improper home renovation job can result in significant repairs and maintenance expenses in the future.

One of the prerequisites for undertaking a DIY project is the availability of proper and effective tools for the job at hand. Having proper tools can significantly reduce the efforts involved in completing a home renovation project. Furthermore, the right tools can also ensure that the job is done properly the first time, so that there are no repairs and maintenance requirements in the future.

While tiling, one of the common problems faced by DIY enthusiasts is that of lippage. Lippage occurs when tiles are not set properly, and can affect the aesthetics of the tiled area. Furthermore, lippage can also cause the tiles to crack and break in the future. It is for this reason that you should consider using a tool such as the Tuscan Leveling System. Such tools are specially designed for DIY enthusiasts, and ensure that the tiles are set in a uniform manner.

tile, leveling, lippage, stone, marble, grout, ceramic, floor, flat, surfaces, granite, spacers, slab, stone, installation

Another tool that could help you in your tiling project is a tile spacer. The main purpose of a tile spacer is to ensure that all the tiles are set at equal distance apart. Tile spacers will also enable you to create straight grout lines, thereby ensuring a uniform finish.

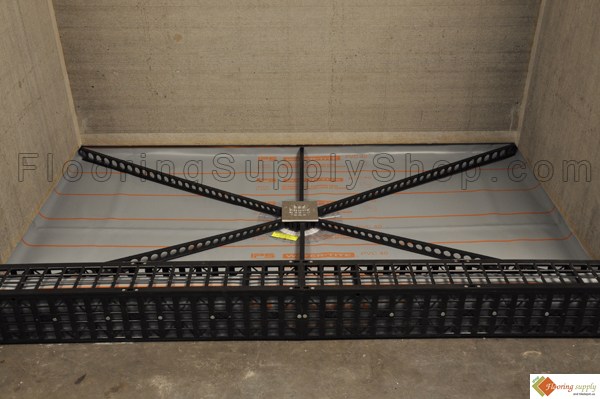
Most people generally call in a professional contractor when they need to design a shower area, but there are a number of tools that can enable you to complete this task by yourself. Quick pitch systems and ready to tile shower pans are two such tools that can enable you to create a custom designed shower area by yourself. These tools can ensure that a standard slope of 1/4” is created on the shower floor. Furthermore, a ready to tile shower pan can be tiled immediately after installation, thereby saving on the total construction time.

Certain projects such as plumbing, carpentry, roofing and landscaping require you to create a level slope for maximum effectiveness. It is in order to complete such projects in a proper manner that you require tools such as Montgomery degree pitch level. These tools are easy to use, and can enable you to effectively check the pitch or slope.

Finally, apart from the specific tools for particular projects you should ensure that you have adequate safety equipment. Some of the commonly used safety gear includes respiratory masks, knee pads, gloves and cleaning cloth.

Undertaking a DIY project offers a number of benefits over hiring a contractor for the job. Not only does a DIY project bring about a sense of accomplishment, but also results in significant cost savings. Therefore, it is important to have adequate tools and equipments in order to be properly prepared for the DIY project. This will ensure that your project is completed in a timely and a proper manner.

Copyright © 2010 FlooringSupplyShop.com
Effective tools for a DIY enthusiasts

tile, leveling, lippage, stone, marble, grout, ceramic, floor, flat, surfaces, granite, spacers, slab, stone, installation

Certain things are more comforting for a ‘Do It Yourself’ enthusiast than completing a home renovation project without any professional assistance. DIY lovers, although enthusiastic about completing a project all by themselves require proper tools and resources to effectively complete the job at hand. A trip to the local hardware store can get you access to a number of different tools and equipment; however, selecting the right ones can be a difficult job.

Bathroom renovation is one of the most complex DIY jobs since any complications in tiling or waterproofing can result in significant damage to the surrounding areas. It is for this reason that tools such as Pro Pan, ready to tile shower pans and Quick Pitch are widely used in a bathroom renovation job. Pro Pan and ready to tile shower pans come with a standard slope of 1/4” inch per foot, thereby ensuring a perfectly sloped shower floor. Further, Kirb perfect offers an easy solution to building a shower curb, thereby ensuring that water does not spill outside the shower area.

Tiling & grouting is another job that can create a problem for people who prefer to complete their home renovation job themselves without any professional help. Tiles have to be placed at an equal distance to smooth transitions. Further, the grouting job has to be completed in an effective manner so as to ensure proper sealing, and that the water does not seep through the grout. This job can be effectively completed by using tile spacers and grout caulk thinset. Further, DIY enthusiasts can also find a variety of tile trims that can add an appealing look to the tiling of a room.

Shower floor drainage, quick pitch, shower stall, shower slope, Pre pitch slope, shower drain, tile ready shower pan

One of the common problems faced by people while installing stone or ceramic tiles is that of lippage. This not only disrupts the aesthetics of the room but can also result in cracks in the tiled floor. This problem can be easily solved by using the revolutionary Tuscan leveling system. Using this system will ensure a perfectly level tiled floor and will also make the tiling job easy and convenient.

Be it a job for carpentry, landscaping, or plumbing, a number of DIY enthusiasts find it difficult to find that perfect level pitch. An effective slope level indicator can prove to be more than handy in measuring and correcting the slope level of a place. Such slope levels are ideal for use by roofers, contractors, carpenters, engineers and most importantly by ‘Do It Yourself’ enthusiasts.

Finally, safety is an issue that concerns most people before they embark on their DIY endeavor. Certain safety tools such as a face mask, gloves, knee pads and clean up bags are essential in order to successfully complete a home renovation project.

Therefore, it is prominent that there are a variety of choices of tools for a DIY enthusiast to select from in order to successfully complete a home improvement project. Proper tools and equipment will not only help in timely completion of a job but will also ensure that it is completed in an effective and proper manner.

Copyright © 2010 FlooringSupplyShop.com
Flooring: Adding the Finishing Touch

So, the floor is tiled, the grouting is done, now what? That is the question I have asked in the past after completely what seemed to be the monumental task of installing a new floor. Something still didn’t look right. I had these gaps where my floor met carpet or some other type of flooring. Something about the way the tile butted right up next to the wall didn’t seem right either. That is when a friend told me about trim and transitions. Now I’m going to be your friend and pass on this invaluable information.

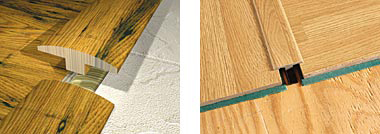
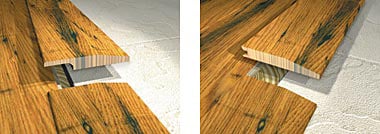
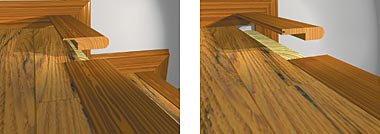
First off, we’ll cover transitions. Transitions are designed to make a smooth…wait for it…transition between different types of flooring. There are basically three types:

T-molding-T-molding is for joining two floors that are of the same height. This could be a tile floor to a different tile floor, or tile to a laminate floor of equal thickness. It is strictly for floors, so if you have twin children, it will not help you keep them together.

Transition molding pieces Hardwood floors, maple hardwood, Shaw Flooring, oak hardwood, white oak hardwood, mahogany hardwood, solid hardwood, Engineered Plank. Engineered hardwood, Hardwood care products,

Reducer-This wonderful product is designed to create a smooth look between a floor of a higher height down to carpet, or some other surface that sits lower. Unfortunately, it is not designed melt away the pounds, although that would be nice.

Transition molding pieces Hardwood floors, maple hardwood, Shaw Flooring, oak hardwood, white oak hardwood, mahogany hardwood, solid hardwood, Engineered Plank. Engineered hardwood, Hardwood care products,

Stair Nose-No, it’s not just a playground taunt. It a transition designed to join your new flooring with a staircase. It comes in several varieties including pig, pug, ski-slope, and Caesar. That last part was a joke.

Transition molding pieces Hardwood floors, maple hardwood, Shaw Flooring, oak hardwood, white oak hardwood, mahogany hardwood, solid hardwood, Engineered Plank. Engineered hardwood, Hardwood care products,

Okay, so now how about some trim? If you are really good, you can just cut the tile pieces along the wall edge so that they fit flush to the wall or leave a grout line equal to the other grout lines in the floor. I’m not that good, so I would typically add a base shoe of some type to the existing baseboard to cover those irregular cut edges. The most common base shoe is quarter-round, but in our home we took a fancier type of ceiling trim and used it as a base shoe. Maybe you want to try that. Another great alternative is removing the wooden baseboard and using some of the scrap tile pieces to make a matching tile baseboard to go with your project.

Transition molding pieces Hardwood floors, maple hardwood, Shaw Flooring, oak hardwood, white oak hardwood, mahogany hardwood, solid hardwood, Engineered Plank. Engineered hardwood, Hardwood care products,

Necessity is the mother of invention, so depending on how many boo boos you made and how big they were, you may need to get creative with your trim and transitions to give it the smooth look you desire. There are lots of options out there, and you can also create your own. I have had to do that a few times, but the floors look great now…no seriously!

Copyright © 2010 FlooringSupplyShop.com
Installing Hardwood Floors over Radiant Heated Sub Floors

Installing Hardwood Floors over Radiant Heated Sub Floors

Transition molding pieces Hardwood floors, maple hardwood, Shaw Flooring, oak hardwood, white oak hardwood, mahogany hardwood, solid hardwood, Engineered Plank. Engineered hardwood, Hardwood care products,

Installing Hardwood Floors over Radiant Heated Sub Floors

• Oak, Ash, Hickory, and Walnut species Engineered Hardwood products, > ½” thickness normally are approved for installation over radiant heated subfloors using either Adhered or Floating installation methods if applicable for the product.

• Nail or Staple Down installation methods are not recommended for Radiant Heated Sub Floors.

•  Engineered product constructions thinner than ½” will require review by the Hardwood manufacture before installation; along with a location registration and an acknowledgment letter, verifying that the project is approved and warranted. Continue reading “Installing Hardwood Floors over Radiant Heated Sub Floors”

installation | Flooring Supply Shop Blog