Satisfaction guaranteed. Call us anytime at 323-731-8453.
spacers | Flooring Supply Shop Blog

How to Achieve Lippage Free Tile Floors and Walls

ATR Tile Leveling Alignment System

How to Achieve Lippage Free Tile Floors and Walls

For many homeowners, once fall hits, it becomes prime time to shift their focus from the outdoors to indoors – primarily to their interior design, or lack of it, in some cases. With cooler weather, you’ll be spending more and more time inside, and who wouldn’t want to make their interiors as stylish and welcoming as possible when the weather outside is anything but? Plus, with all that time spent cooped up indoors, you might as well make the most of it and add value to your home at the same time!

A much overlooked aspect of almost every home is the floors. While they cover less area, and aren’t quite as visible or immediately noticeable as your walls, they make just as much of an impact on the overall look and feel of a home. They also take much more of a beating than walls do, particularly in heavily trafficked areas like an entryway or the kitchen. That’s why more and more homeowners are looking to implement stable, stylish, and durable materials for their flooring in these areas, such as tile. With tile, you don’t have the same concerns as you would with carpet or hardwood, and the floors will be significantly easier to clean and care for.

ATR Tile Leveling Alignment System

However, many homeowners view the installation of an attractive tile floor as a costly and labor intensive practice, particularly if they’re doing it on their own. That’s where the ATR Tile Leveling system comes in handy. Not only does it help you to get the job done easily, it requires no additional tools, and it uses only 1/3 of the spacer a normal system would take in order to do the same job. The system also cuts the installation time by 75 percent when compared to more traditional methods. For those who want a relatively quick project that isn’t going to take weeks upon weeks to complete, but had previously counted tile out, your answer is in the ATR Tile Leveling system.

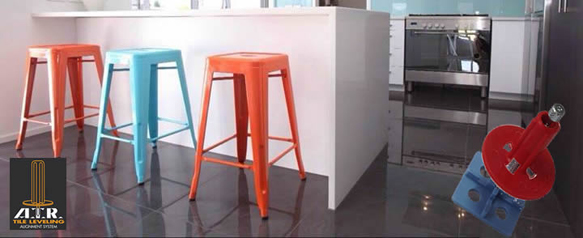
The ATR system allows you to not only get the tile floors or walls you want, but makes it much easier and quicker to do so. It only takes three easy steps and afterwards, you’re done! The first step is to spread the mortar over the area you want to tile, then put the tile in place. After this, you’ll need to screw the provided spindle into the spacing plate, which you’ll then need to slide under the tile before placing the adjacent tiles down. From there it’s as easy as screwing in the spindle until all the tiles are aligned and level. Afterwards, you simply let the mortar dry before you screw it out. (For a visual demonstration of this straightforward process you can check out this video).

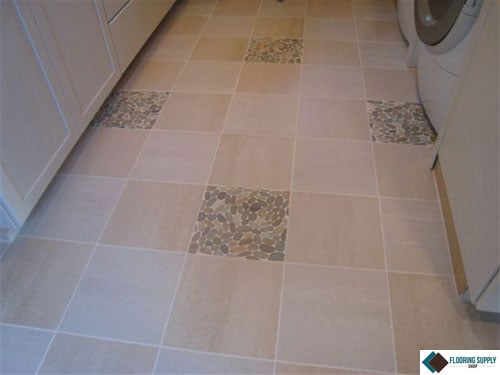
Think of all the possibilities and looks you can create by easily installing tile. This glossy glass tile would create a fantastic backsplash in a modern kitchen, particularly since it’s moisture impervious, resists fading, and is fire resistant. And these aqua pebble glass mosaic tiles would give any bathroom a tranquil, spa-like atmosphere. For a chic and classic entryway, the classic (but far from boring) tumbled travertine octagonal tiles make the right statement to welcome guests to your home. The possibilities are really endless with such an easy, cost efficient, and time saving installation system at your disposal.

Spencer Blohm is a freelance lifestyle and pop culture blogger for www.albertaenergyproviders.ca. When he’s not busy working he’s usually plotting his next home improvement project.

Copyright © 2014 FlooringSupplyShop.com
ATR Leveling System – Upcoming update Feb 1st 2014

ATR Leveling System -Upcoming update Feb 1st 2014

We at ATR are excited and glad to announce after a long year of re-development, further testing and improvements, ATR will soon be introducing the new innovated Spindle and Spacing Plate designs

NEW Spindles

The new spindle features a new screw element with a larger head and grip element,4 segment viewing windows for easier viewing access and much more robust which means you will get more uses and will save you long term expenses

NEW Spacing Plates – available by the end of March 2014

Soon to be released the new 3mm Spacing plate. This 3mm spacing plate design may also be substituted for the use of laying on Floors and Walls. Available in Cross plates, T shape plates and Edge plates. The new spacing plate features a dome look effect to the underside for tightening spindle to it’s desired strength locked position and to eliminate anymore future concerns of the screw tip penetrating through! This was never the situation but more of an allusion.

This unique innovated ATR patent system will work with any type of tile, thickness up to 18mm excluding un-even stone type like Slate or as such composites, for more handy information on any of our products visit www.atrleveling.com

atr_spindle

(latest video 04/07/2013) new video coming soon
Video taken by Professional Tile setter Salvatore DiBlasi

Bid Adios to Lippage with Tuscan Leveling System

tile, leveling, lippage, stone, marble, grout, ceramic, floor, flat, surfaces, granite, spacers, slab, stone, installation

Flooring is an integral part of every home that can alone change the entire look of the house. Homeowners generally opt for marble, ceramic, tiles and stone flooring that respectively have distinct advantages and disadvantages. However, one problem that majority of the homeowners face while installing these flooring options is lippage.

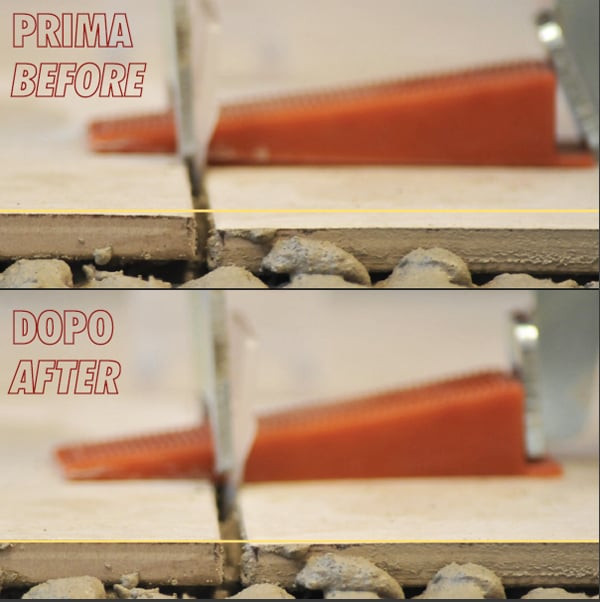
Lippage is a common problem wherein the leveling or flatness of the flooring is affected due to the difference in the elevation of the tiles. This not only affects the overall appearance of the room but also results in various problems, such as unevenness. The main cause of lippage is the installation of the flooring on subsurface which has not been leveled. An easy way of eliminating this problem is to make use of the Tuscan Leveling System which ensures a uniform surface.

tile, leveling, lippage, stone, marble, grout, ceramic, floor, flat, surfaces, granite, spacers, slab, stone, installation

This innovative product has changed the way flooring is installed as it completely eliminates lippage. This 2-piece system has revolutionized the tile installation by ensuring flatness and creating virtually lippage free flooring. It can be used for leveling of floor as well as walls, wherein the numerous tiles are interlocked to form one uniform even surface at the time of curing of the setting material.

This proves beneficial as the Tuscan Leveling System results in reduction of shrinkage as well as warping to a great extent. Furthermore, it also minimizes the instance of re-lifting the tiles for the addition of mud as well as shimming process of tiles. All this and more facilitate the process of installation, making it easy, effective and time-saving.

tile, leveling, lippage, stone, marble, grout, ceramic, floor, flat, surfaces, granite, spacers, slab, stone, installation

Homeowners can learn to use the hassle-free Tuscan Leveling System in just a few minutes. Irrespective of the skill level of the homeowner, the DIY Tuscan Leveling System Kit can be used by anyone and everyone. With the help of this leveling system installation process becomes fast and the tiles do not move while drying. Use of this system not only eliminates lippage due to its interlocking design, but also reduces fatigue and stress of the homeowners. This leveling system is considered ideal for tiles 300mm or more. Besides, the caps can be used several times.

Simply following the Tuscan Leveling System installation guidelines, homeowners can ensure a single flat and uniform surface. There are certain measures that the homeowners can take to ensure best results. One such simple step to be taken before installation is to soak the straps in water, which can be lukewarm (for two hours) or hot (30 minutes). This helps in increasing the elastic strength of the straps which is turn renders maximum tension to them for better installation.

tile, leveling, lippage, stone, marble, grout, ceramic, floor, flat, surfaces, granite, spacers, slab, stone, installation

The thinset and mortar having consistency similar to that of a thinner also facilitate better results. At the time of insertion of caps and straps, these should not be placed at the corners of the tiles. This precaution is necessary to ensure proper installation as well as to avoid breaking the corners of the tiles.

These simple measures, complemented with adherence to the instructions to use the Tuscan Leveling System, help homeowners achieve a perfectly flat flooring surface that is aesthetically appealing.

Click Here to View Action Video

Copyright © 2010 FlooringSupplyShop.com

The Must-Have Flooring Tools


Best Flooring tools for sale

There has been an increasing trend among homeowners to opt for the ‘Do it Yourself’ task regarding home renovation. Some of these DIY home renovation tasks include flooring, painting and grouting, among many others. These DIY tasks not only demand homeowners to possess a particular skill set, but also require them to have requisite tools.

Possessing adequate tools is necessary to accomplish the task properly. Having necessary tools not only reduce the efforts and stress, but also ensure perfection in job. Moreover, a badly done home renovation defeats the sole purpose of doing DIY, which is to save money. This is so because a badly done DIY task would result in incur of expenses for repair and correction. Hence, homeowners who wish to indulge in DIY home tasks should have all the necessary tools required for successful completion of the job.

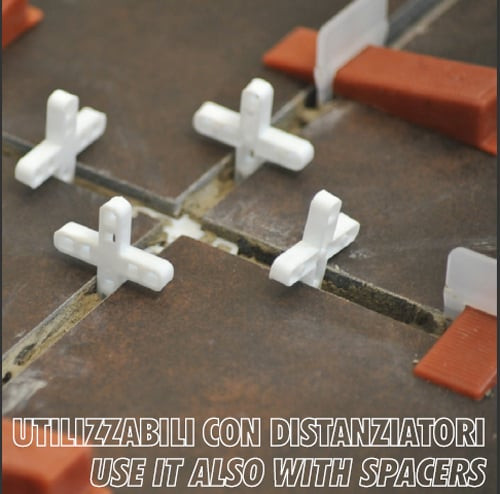
One of the most commonly chosen DIY tasks by homeowners is flooring and that too tiling of the floor in particular. While installing tiles at home, one of the most common problems faced by them is lippage. This problem occurs when the tiles are not uniformly set to form one flat surface. As a result, the aesthetics of the house is adversely affected and also lippage may result in cracking or breaking of the tiles. For this, homeowners can opt for the Tuscan Leveling System which ensures that the tiling is done perfectly without any lippage. This leveling system has been designed for DIY enthusiasts and can be used by homeowners with any skill set. Another tool that proves useful while tiling is the tile spacer that facilitates straight grout lines. The uniform finish renders a neat look which enhances the appearance of the place.

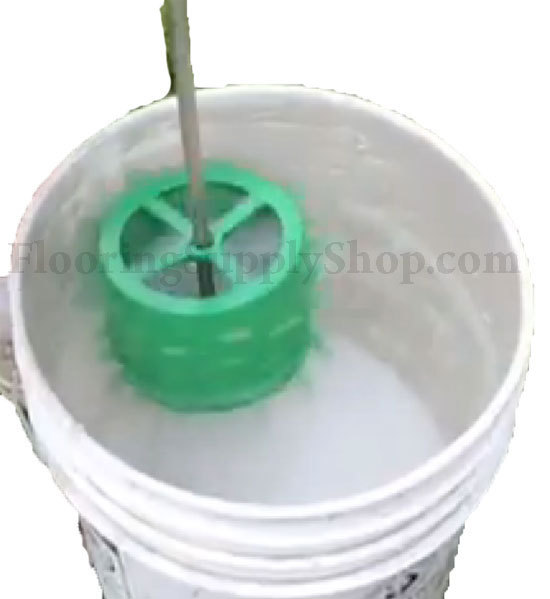
In addition, homeowners can also purchase the Primo Bucket Brush, which takes the hard work and mess out of cleaning buckets, saving a lot of time, money, and water.The Bucket Brush is designed to use a ½” portable drill to provide the power. Not only does the Bucket Brush save time, it saves the environment. Mixing buckets can now be used over and over again before they ever end-up in landfills.

Homeowners doing flooring on their own must also possess tools like tile cutters, tile saws, diamond hole saws and undercut saws. In addition, they can purchase straight edges, trowels, grout floats, diamond blades and stone fabrication products. The grout grabber tool, polishing pads and Montgomery degree pitch level tool are few of the other tools that homeowners should have.

Tuscan Leveling System, Raimondi tile leveling system, RLS wedges, RLS spacers, RLS-KIT, tile, leveling, lippage, flat surfaces, spacers, installation

Besides these specific tools, there are several other tools that the homeowners must possess to ensure proper completion of DIY flooring tasks. The most important among them is the safety gear, which includes knee pads, gloves, eye gear and respiratory mask, among others.

Homeowners should ensure that they possess all the tools before initiating any DIY project. However, before going on a shopping spree to purchase flooring tools, homeowners should first make an itinerary of the tools that are actually required. This would help avoid purchasing something that is not required and also ensure buying tools that are necessary.


Click Here to View Action Video

Copyright © 2010 FlooringSupplyShop.com

Raimondi Tile Spacer Leveling System

Raimondi tile leveling system, RLS wedges, RLS spacers, RLS-KIT, tile, leveling, lippage, flat surfaces, spacers, installation

The most important as well as the most daunting aspect of setting tiles is to achieve perfect leveling. A common hindrance faced while setting larger format, thicker tiles as well as un gauged and thin tiles is the uneven floor foundation, which makes leveling all the more difficult. As a result, tiles that seemed leveled during installation often have unevenness in the height, once the thinset or adhesive cures, which is unappealing. This can, however, be overcome with the help of ‘Raimondi Tile Spacer Leveling System’ that ensures perfect leveling of the tiles. Fabricated using quality raw material, these spacers are durable, cost effective and easy to use. Not only does it result in proper leveling of the tiles, but also facilitate the tile setting process.

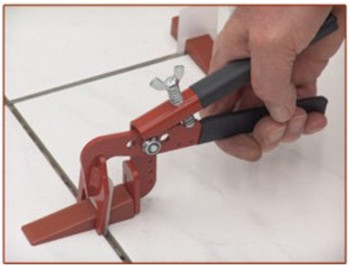
Achieving a smooth level surface, the Raimondi leveling spacers can be used for tiles with varied dimensions. For a tile thickness of minimum 1/8", maximum 1/2", a minimum 3/32" joint is required, which at times is difficult to achieve. However, with the help of the spacers it is no longer a daunting task and can easily be accomplished in just few minutes. Depending upon your requirement, you can select amongst the different Raimondi leveling system kits that include leveling wedges, spacer clips and installation pliers.

Raimondi tile leveling system, RLS wedges, RLS spacers, RLS-KIT, tile, leveling, lippage, flat surfaces, spacers, installation

One does not have to be a well-qualified professional to use the Raimondi leveling spacers. These spacers are quick and easy to set & remove, and homeowners can do it on their own, without any professional guidance. In case you plan to install tiles on your own, you can make use of these spacers for proper leveling of the tiles. After spreading the tile adhesive, you need to insert the support underneath the tiles on all the sides. In case of larger and thicker tiles, it is advisable to use two support instead of one, on all four sides. Once properly done, set the tiles over the adhesive, and to strengthen the bond you can beat it with a rubber mallet. Next, you need to insert the wedges into the support, which can be easily done by using the special traction-adjustable pliers. However, you need to exercise caution not to pass the breaking point. After the tile adhesive sets and cures, the leveling support needs to be removed, which can be done with the help of special traction-adjustable pliers or rubber mallet. Instead of using these tools, you can easily remove these supports by simply kicking them with your feet, but make sure to beat parallel to the joint.

Raimondi tile leveling system, RLS wedges, RLS spacers, RLS-KIT, tile, leveling, lippage, flat surfaces, spacers, installation

Not only is the Raimondi leveling spacer easy to set and remove, but has various other features that have made it a preferred choice of many, especially tile installers. Consuming less time and effort, it holds the tiles firmly in place. One does not have to worry about the voids or coverage as the Raimondi leveling spacer enhances the adhesion of the thinset to the tiles. Rather than pulling tiles from the thinset, these are pushed into it, which is easier. Since it is quick and easy, it greatly improves the overall quality of the tile installing project.

Click Here to View Action Video

Copyright © 2010 FlooringSupplyShop.com

spacers | Flooring Supply Shop Blog