Satisfaction guaranteed. Call us anytime at 323-731-8453.
waterproofing membrane | Flooring Supply Shop Blog

Composeal Gold and Radiant Heat Flooring Systems

Composeal Gold and Radiant Heat Flooring Systems.

Flexible Crack Isolation Waterproofing and Heat Fused for Floors – Walls – Roof Deck / Terraces – Under “thick bed” Tile Installations

Heat Fused, floor heating underlayment, cork insulation, heating insulation, Composeal Gold, Crack Isolation, composeal blue, Pan Liner, sheet membrane, waterproofing membrane

Buy Now

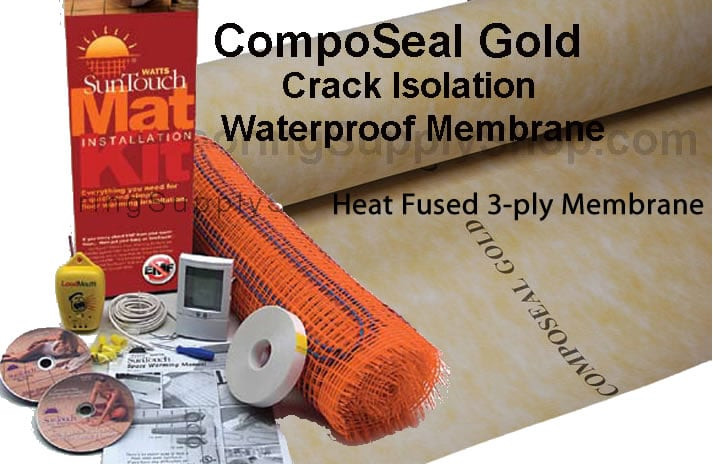
Many of our customers have been asking us how Radiant Floor Heating Systems should be installed when using COMPOSEAL GOLD. When it comes to installing radiant floor heating, we go through a process called the “installation sandwich.”

As you go through the process of installing Radiant Floor Heating Systems, you can see that the flooring consists of a variety of layers. Like a sandwich, these layers stack on top of one another in order to function properly.

So what is COMPOSEAL GOLD?

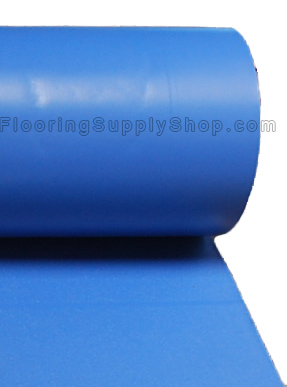
COMPOSEAL GOLD is a direct bond membrane made up of a high-density PVC, with non-woven polyester scrim laminated on either side of the 40 mil sheet membrane, for direct bonding to the substrate as well as the ceramic tile or marble above. It does not rot and is highly resistant to solutions containing salts, acids, and alkalis, as well as many organic solvents, alcohols, and oils. COMPOSEAL GOLD is used as a concealed crack isolation (anti-fracture) and/or waterproof membrane under thin-set installations of ceramic tile and marble, terrazzo and brick; for new construction, remodeling or repair, residential and commercial, in kitchens, restaurants, resident entries, steam rooms, radiant heated flooring, shopping malls, etc.

Negligible shrinkage at extreme temperatures, -20° F to 212° F, makes COMPOSEAL GOLD especially ideal for Radiant Heated Flooring Systems. Its scrim is designed specifically for direct bonding on both sides of the “sandwich” in ceramic tile and dimension stone installations. This serves as a Crack-Isolation (uncoupling) membrane that provides adequate support/load distribution for your tile covering, and allows the heat from the system below to radiate up through the installation into the room.

*Always consult with the manufacturer of the radiant heating system for their specific installation instructions for installing radiant heating under ceramic tile.

Step 1: Expose the Subfloor

Remove the old carpet, leaving the subfloor exposed. If necessary, use a scraper to separate the carpet from the floor. Remove excess glue from the cement subfloor with scrapers and an appropriate solvent, making sure to follow the solvent directions.

Step 2: Apply a Crack-Suppression Membrane (COMPOSEAL GOLD)

Following the manufacturer’s instructions, apply adhesive to the concrete subfloor and lay down the crack-suppression membrane. Apply the adhesive in sections and unroll the membrane onto the floor, using a floor roller to press it flat and work out any air bubbles. Since concrete expands and contracts as the temperature changes, this membrane will help support the floor and prevent cracks in the tiles or grout.

Step 3: Install the Grids for the Radiant Heating System

Install the plastic grids that will hold the radiant-heat wires, using hot glue to adhere the grids to the subfloor. Follow the manufacturer’s instructions, and space the grids uniformly over the floor to prevent hot and cool patches.

Step 4: Snap the Cables into the Grids

Snap the radiant-heat cables into the grids, keeping them evenly spaced to prevent hot and cool patches in the floor. Check the manufacturer’s instructions for guidance on how far apart to space the cables.

Step 5: Mix and Spread the Thinset Mortar

Use a heavy-duty drill with a paddle bit to mix Thinset mortar according to the package instructions. Use a straight-edge trowel to apply a layer of mortar over the electrical cables. When mixed to the correct consistency, the mortar will stick and mound on the trowel without falling off. Make sure to hold the trowel at a consistent angle throughout the job so the mortar bed will have a uniform thickness. Allow the mortar to dry thoroughly before proceeding. Wet or cold weather will slow down the drying process, and below-freezing temperatures can keep the mortar from curing properly. Consult the manufacturer’s instructions for guidance.

Step 6: Power the Radiant-Heat Floor

The best way to power the radiant-heat floor is to hire a licensed electrician to run a dedicated circuit from the home’s main electrical panel to the correct room. The electrician also can install the control panel/heating sensor in the wall.

Step 7: Determine the Layout

Dry-fit a vertical row of tiles and a horizontal row, leaving space for grout, to determine the best layout. The ideal layout will use as many full tiles as possible. The tiles against the wall should be a half-tile wide or wider.

Step 8: Spread Mortar and Lay the Tiles

Spread mortar on the floor, using the notched edge of the trowel to create deep grooves in the mortar. Press each tile into the mortar, wiggling it gently to seat it. Check the tiles for level and adjust as needed. Use tile spacers to keep an even grout line. Use a wet saw to cut tiles as needed for the perimeter of the floor.

Safety Alert: Always wear safety glasses and use caution when working with a wet saw.

Step 9: Mix and Apply the Grout, and Apply Sealant

After the mortar is dry, mix the tile grout according to the package instructions and apply with a grout float. Use a diagonal motion to apply the grout, working it into the spaces between the tiles. Let the grout dry slightly, then wipe the excess off the tiles with a damp sponge using a diagonal motion.

Let the grout dry completely before sealing. Once the grout sealant is dry, move the furniture back into the room. Let the mortar cure for four weeks before using the radiant-heat system.

CODES, CERTIFICATION

COMPOSEAL 30 and 40 comply with the three major plumbing codes: UPC-IAPMO, SBCCI and BOCA. COMPOSEAL has separate municipal approval where required, e.g. City of Los Angeles, City of Philadelphia (40 mil), Metropolitan Dade County and Commonwealth of Massachusetts. (Approval is no longer required in New York City for concealed PVC waterproof membrane).

COMPOSEAL also complies with the Corps of Engineers specs for PVC shower pan material (para 5.8.3.2 15 p1-18) and meets the requirements of FHA Publication 4900.1.

WARRANTY: COMPOSEAL 30 and 40 are warranted against failure for any reason, and in the event of failure, replacement material will be supplied at no charge. This warranty applies only to the membrane itself and not to the manner of installation over which we have no control, and it does not extend to consequential damage or other implied responsibility. COMPOSEAL should last the life of the building.

Made in USA – 100% American Labor and Materials.
Composeal Gold Installation Instructions

Composeal Blue Vinyl Shower Pan Membrane How to Install

How to Properly Tile a Roof Deck

roof deck tile design

When installing ceramic tile on roof decks, the most important single thing to remember is that a roof deck is just that, a roof – a barrier against the elements and especially water.

“It’s only a roof deck!” Did you ever hear that statement? When and if you do, be prepared for problems, and very possibly big ones. Where roof decks and concerned, roof is the most important word. When it comes to keeping water out, how the roof deck is constructed is at least as important as the balance of the roof itself, since both must satisfy the same requirement to keep the rooms and equipment below them dry.

SOME BAD EXAMPLES

A roof deck was leaking badly. Upon investigation, it was found that the installation had been made using one of the methods described in the Handbook for Ceramic Tile Installation. Why, then, the leakage? The method selected was one involving a cleavage membrane, and it had been chosen even though some of the other methods contained in the Handbook called for a waterproof membrane. The purpose of the cleavage membrane, as you will recall, is to isolate the tile floor from the structure, not to serve as a waterproof membrane.

Another somewhat similar project was purposely installed over a cleavage membrane consisting of a single layer of roofing paper. Those responsible for the installation thought the horizontal tile were waterproof, and therefore did not need a waterproof membrane. But while ceramic tile floors do not disintegrate when wet, they are not waterproof. A good waterproof membrane like Composeal Gold Crack Isolation Waterproof Membrane  is the only insurance against water damage in the rooms under a roof deck.

Two residences came close to taking the prize for most water damage. Built by the same contractor for two sisters, the houses faced each other, with a street in between them. The houses were already completed, with carpets, furniture and kitchen equipment in place, but before anyone could move in, the rains came – heavy rains. The resulting damage to ceilings, walls, furniture and carpets made the homes impossible to occupy. Much of the water came down in the kitchens, where cabinets were soaked, discolored and warped out of shape. What had happened? Each house had a rear, exterior, second story, tile deck which sloped the wrong way, toward the house, with nothing to prevent the water from going through the metal sill of the large sliding doors and into the structures.

Yet another common shortcoming in deck construction is the improper placement of flashing, or even its complete lack, at the junction of the walls and floor. A number of leaky decks have been found in which the lack of flashing has been the cause of the leakage.

Recently, an owner was having problems with leaks in a tiled deck. It started with leaks in the first deck to be installed; after the first deck was replaced, the new deck also leaked. The owner called for advice on how to make sure a third deck would not leak. She was advised on how the deck should be constructed, and was also urged to water – test the Composeal Gold Waterproof Membrane before installing the ceramic tile. The water test had to be stopped immediately because of the torrent of water that flowed into the room below. It is hard to understand how workmen can be so careless or lacking in knowledge as to allow such a membrane to be water- tested. The roofer had terminated the waterproof membrane *” short of membering up with the roofed-over part of structure, and the builder had done nothing to flash and waterproof that joint prior to the water test.

SLOPE ON STRUCTURE

In 1956, working with the International Association of Plumbing and Mechanical Officials, sponsors and authors of the Uniform Plumbing Code, tiled shower floor receptors were at last properly engineered and made part of the Uniform Plumbing Code.

The important part of this engineering called for pre-sloping the floor of the shower prior to placement of the waterproof membrane. The waterproof membrane was then placed in the pre-sloped surface so that the membrane itself sloped- – *” per foot minimum, *” per foot maximum- – to the weep holes in the bottom portion of the floor drain.

Prior to this, it had been customary to place the membrane flat, thus allowing seepage water to accumulate with no way to reach the weep holes and go down the drainpipe.

Shower floors are smaller than roof decks, but the same engineering principles apply. Slope the structure and Composeal Gold Waterproof Membrane to the weep holes in the floor drains; if there are no floor drains, slope to the open scuppers, with nothing in the bottom of the scuppers to prevent the free flow of seepage water.

FLAT DECK STRUCTURES

No matter how hard we try to spread the word about sloping them, structures continues to be built flat. The point of sloping the structure, which in turn slopes the membrane placed upon it, is to eliminate seepage water via the weep holes or open scuppers. The tile trade uses dry-pack floor mortar, and when this is placed on the flat waterproof membrane, the slope is only on the top surface of the dry pack. The dry pack is pumped out by the hot sun, leaving the salts of efflorescence on the tile. At least one company’s remedy for flat roof construction is to pre-float the roof deck with the dry pack mortar, which is then cover-cured. A waterproof membrane, designed to be used with a thin-set bonding system, is bonded to the mortar bed and fastened into the clamp-style floor drain. A compatible bonding mortar is then used to bond the tile to the membrane.

A SEEPAGE CHANNEL

In the design of roof decks, an effort has been made not only to slope the roof deck, but to create a channel which makes it easy for seepage water to flow toward the drain and into the weep holes. Until quite recently, the standard channel consisted of a layer of crushed rock over the waterproof membrane. A layer of cloth, such as burlap, was then placed over the crushed rock to prevent the mortar from filling up the voids in the crushed rock when the mortar bed was installed.

Now we have matting to provide that channel. The matting comes with a flannel – like cloth covering, which is installed cloth side up to prevent the mortar from filling in the extruded nylon and black spinnerette fibers. This type of matting has a long history of successful use in providing weep channels under concrete in drainage ditches and in similar situations.

An installation showing the use of the channel to promote water runoff is contained in the Handbook of Tile Installation. Even though this is the recommended way to install tile on roof decks, in actual practice, the channel is not always used. No matter what is done, however, positioning the waterproof membrane on a slope to the weep holes, or open scuppers, is the most important requirement for roof deck construction.

WATER ACCUMULATION

If the walls surrounding the roof deck are properly flashed at the juncture of deck and walls, and drip screeds are used, some water is going to drain across the tiled deck in addition to the rain which falls upon it naturally. However, it is best to not use the deck as a collection basin for water drainage; on the contrary, as much water should be kept off the roof decks as possible.

Directing water to the drains or scuppers takes some planning as to the positioning of those structures. Getting the water to move requires a slope of *” per foot. One – eighth of an inch per foot will drain the water, but will take much longer to do it; *” per foot, on a long run, may not be achievable because of the thickness build-up from the furthermost distance from the drain to the drain. To prevent problems, planning is needed as to the placement of the drains, as well as the height of the tracks for doors and sliding doors. Many, many times we have received calls describing situations in which only *” is available at the doorway to install a 2″ thick tile installation, and there is no way to drain the deck.

SUMMARY

“It’s only a roof deck!” As can be seen from the foregoing, construction of a roof deck takes planning. It is not difficult; it just has to be planned. It can also be seen that proper planning and execution require the cooperation of several trades working together.

Technical Data

COMPOSEAL 30 and 40 meet the engineering requirements of the American Society for Testing and Materials (ASTM) and the Ceramic Tile Institute (CTI). ASTM D4551 is the test standard established by ASTM

“for PVC flexible sheeting which is used with mastic, bedding or coating for construction of concealed water-containment membranes in applications where there is potential for costly secondary damage from water leakage and very long term reliable performance is essential. The tests are intended to ensure quality and performance.”

COMPOSEAL 30 and 40 meet and surpass these ASTM standards.

COMPOSEAL 30 and 40 also meet the CTI requirements for waterproof membranes.

TESTED MATERIAL

CERAMIC TILE INSTITUTE OF AMERICA

These tests were conducted by the United States Testing Co., Test Report No. LA 63554, Smith Emery Co., Test No. T-88-122A-B, and Truesdail Laboratories, Report # 24371-1.

Tile work shall comply with recommendations of “Handbook for Ceramic Tile Installation” published by the Tile Council of America, Inc., P.O. Box 2222, Princeton, N.J. 08543

* These drawings based on sketches in “Handbook for Ceramic Tile Installation.”

Engineering Properties ASTM D 4551 SpecGrade 30 ASTM D 4551 SpecGrade 40 Composeal Test Results .030 Composeal Test Results .030
Thickness, inches 0.30″ 0.40″ 0.31″ 0.42
Tensile Strength. lbs/in. width 60-lb min. 80-lb min. 89-lb (2870 psi) 113-lb (2700 psi)
Tensile Strength. at 100% elongation 30-lb min. 40-lb min. 43-lb 57-lb
Ultimate elongation before breaking 300% Min 300% Min 400% + 400% +
Tear Resistance. lbs/in width 185-lb min. 250-lb min. 260-lb 263-lb
Pinholes None None None None
Micro-Organism Resistance (fungus, mildew, mold) No Growth No Growth No Growth No Growth
Chemical Resistance:
Distilled H2O % wt. change* 1% max 1% max + 0.4% + 0.4%
Soapy H2O % wt. change* 2% max 2% max + 0.5% + 0.3%
Alkali, pass/fail (hydrostatic) Pass Pass Pass Pass
Shrinkage, dimension change at 158 F ASTM 1204 5% max 5% max 1.3% 2.9%
Volatility, % loss at 158 F after aging 1.5% max 1.5% max None None
Hydrostatic pressure (to test water penetration):
Original Condition Pass Pass Pass Pass
After Folding test (cold crack, 4hrs @ 0F) Pass Pass Pass Pass
After Puncture test Pass Pass Pass Pass
After Indentation test Pass Pass Pass Pass

No evidence of surface wetness or other signs of water penetration was detected on any of the tested specimens.

Additional Test :

Seam, (lap joint) strength ASTM D751 CTI Standard – 8 lbs./in. min. / Composeal 30 – 69 lbs./inch / Composeal 40 – 85 lbs./inch

Specific Gravity: 1.29 @ g/cm3

Cold Crack: passed @ 53 F

ASTM Standard D1004, d 412 d1790, e 96 and FHA Spec. 4900.1 are also met by Composeal

*Measure of water/ chemical surface absorption

Made in USA – 100% American Labor and Materials.

Composeal Gold Installation Instructions

Composeal Blue Vinyl Shower Pan Membrane How to Install

Waterproof Flooring Safe and Hassle free

waterproofing membrane, composeal blue, Pan liner, sheet membrane, liquid waterproofing, blanke aqua shield, C-Cure Pro red 986 waterproofing membrane

Choosing the right flooring for your home is an important decision which needs to be made wisely. You need to select a practical and affordable flooring option, which suits your requirements as well as budget. Moreover, different areas of the house require different types of flooring. For example, if you are planning to install flooring in your bathroom, patio or by the pool side; then the material chosen must be waterproof.

If the flooring in these parts of your home is not water resistant, it can lead to quite a few problems. One of the biggest concerns is that the floor becomes slippery, which can lead to accidents. It can also result in water logging, seepage, mold growth and other such problems, which can be dangerous and unhygienic, and may also adversely affect the look of the place. In order to avoid such inconveniences, you should consider installing waterproof flooring in areas with high exposure to water or moisture.

waterproofing membrane, composeal blue, Pan liner, sheet membrane, liquid waterproofing, blanke aqua shield, C-Cure Pro red 986 waterproofing membrane

There are numerous waterproof flooring options available in the market. Linoleum, which is a ‘green’ flooring option, is quite popular with homeowners for its water resistant properties. This waterproof flooring option is available in a wide range of designs, colors and thicknesses. In addition, this easy to install flooring is also easy to maintain; you only have to wipe it with a damp cloth to remove different kind of stains.

Another waterproof flooring option that more and more homeowners are opting for is tiles. These are available in different sizes, colors, patterns, and designs; which suit diverse requirements of different homeowners. Further, the tiles are available in various kinds, such as porcelain tiles that are appreciated for their precise measurement. You can even choose natural tiles, which add to the aesthetic appeal by rendering a natural look to the room. Another great option is the ceramic tiles, which are available in assortment of colors, designs, and sizes. You can choose different colored tiles to create unique patterns that enhance the look of your home.

Vinyl, another waterproof flooring option, is durable, tough and affordable. The versatile material beautifully imitates the look of various expensive flooring options like wood and ceramic tiles, without having to deal with their drawbacks. Though it is water resistant, some vinyl floors can however become slippery. Hence, make sure that the vinyl you select is slip resistant, along with being water resistant. Furthermore, you have the option to select either single or roll flooring; where the latter proves a better option as it leaves less gaps and seams for water penetration.

waterproofing membrane, composeal blue, Pan liner, sheet membrane, liquid waterproofing, blanke aqua shield, C-Cure Pro red 986 waterproofing membrane

You can also opt for cork flooring, which is appreciated for its resilience and flexibility. This natural, biodegradable as well as recyclable material is hypoallergenic as well as anti-static. Further, you can also select floating laminate flooring, which is not attached to the underlying surface, rather floats over it; thereby leaving no room for water to seep through.

With so many waterproof flooring options available, it can become daunting for homeowners to select the right one. Hence, while selection keep certain things, like durability, cost, and maintenance into consideration. Choose the flooring that meets your requirements, without making a dent in your pocket.

Copyright © 2010 FlooringSupplyShop.com

Vinyl composeal waterproofing vs. fabric Schluter and Blanke

Pan liner, waterproofing membrane, Composeal waterproofing membrane, Blanke Aqua Shield, liquid waterproofing, C-Cure Pro red Seal Guard, Schluter kerdi

A leaky ceiling or wet basement is a huge problem which, a lot of homeowners are facing these days. It can cause damage to furniture, walls and floors. In addition the dampness also attracts wood rot and termites which can aggravate the damage caused. Since home is probably a person’s most expensive investment, it is important that homeowners take adequate measures to prevent damages to their house. Waterproofing is an important measure you can take to prevent water from damaging your house, eventually safeguarding your investment as well as the house. Some of the popular waterproofing options you can use include vinyl (composeal) and fabric (Schluter and Blanke). These can be used for basement, foundation, floors, walls, leaking ceiling and other sections of the building structures.

Whether you are building or remodeling your home, you should install waterproofing system to prevent penetration of water. Vinyl (composeal) waterproofing system is quite popular with homeowners as it is long-wearing and lasts for decades. Along with durability, it is easy to assemble and very affordable. The Composeal vinyl fabric provides protection against common shrinkage cracks, common in houses and prevents moisture migration as well as water damage. Moreover, it has an excellent bonding strength and can be easily installed on terraces, roof decks or any kind of flooring, including marbles, tile, stone or brick. In addition, it also provides excellent resistance against chemicals. Only drawback is that the place should be well ventilated as this fabric does not breathe, and if the underside of the fabric gets wet then it might lead to mildew growth.

Pan liner, waterproofing membrane, Composeal waterproofing membrane, Blanke Aqua Shield, liquid waterproofing, C-Cure Pro red Seal Guard, Schluter kerdi

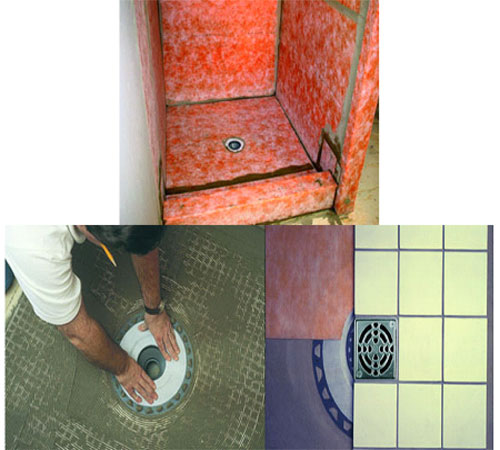
You can even opt for the Schluter fabric waterproofing which is reliable, durable and easy to install. This bonded waterproof membrane is appropriate for ceramic tiles and other kinds of floor as it does not give moisture a chance to penetrate. In addition, it also has crack bridging capabilities and also acts as a vapor block. Moreover, it does not constitute any hazardous wastes and is physiologically safe. It can be easily installed using a dry-set hydraulic adhesive without requiring any waiting period.

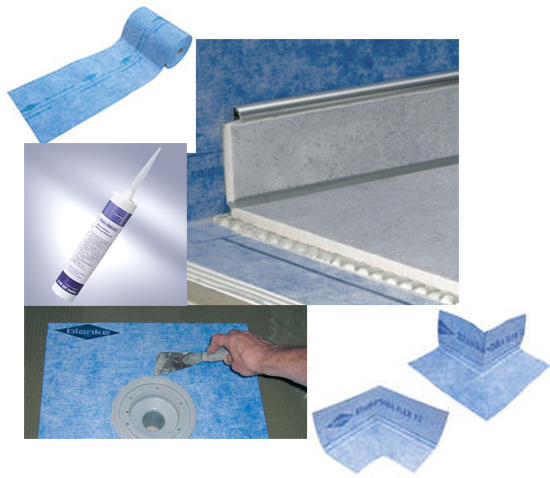
Another popular option being used at residential and commercial buildings is the Blanke waterproofing fabric. These are durable and be installed easily on most of the surfaces that are flat, dry and structurally sound, with help of thinset. In addition, it is ideal for steam rooms as it provides a vapor barrier. It also provides a long lasting barrier against moisture and is effective even in areas such as bathrooms and shower stalls which have continuous moisture penetration. Even the tiles can be installed directly on it without any need for cure time, which is generally required for liquid applied products. Furthermore, the Blanke fabric also offers resistance to mold growth, UV destabilization as well as adverse effects of chemicals. Hence, Blanke waterproofing fabric proves to be a convenient option, which is durable, cost-effective and easy to install.

Pan liner, waterproofing membrane, Composeal waterproofing membrane, Blanke Aqua Shield, liquid waterproofing, C-Cure Pro red Seal Guard, Schluter kerdi

Before opting for a flooring option, you need to make a detailed study of the choices available. Along with that you also need to assess your waterproofing requirements and accordingly make the decision.

Copyright © 2010 FlooringSupplyShop.com

The Flooring Supply Shop and Compotite Are Joining Forces

The Flooring Supply Shop and Compotite Are Joining Forces

The Flooring Supply Shop’s Newest Supplier is an Innovator in The Shower Business

Atlanta, GA-July 12, 2010- The Flooring Supply Shop is excited to announce it’s partnership with Compotite.

The Flooring Supply Shop is known for its savvy research team that chooses only the best products on the market to distribute. After doing their homework, they have chosen to add Compotite to their list of distinguished suppliers.  Compotite is an innovator in the shower-building industry.  They were the first to create a waterproofing substitute for lead shower pans, way back in 1938.  As times have changed, so has Compotite.  They now offer a number of top-notch products for your shower construction needs including:

Composeal-A membrane made from PVC resin that is strong, waterproof, and resistant to punctures, chemicals, and mildew.  It meets or exceeds the standards for all three plumbing codes.

Composeal Gold-The industry’s first heat fused 3-ply membrane. Gives unsurpassed double-protection against common shrinkage cracks found in residential and commercial construction, and prevents water damage and moisture migration.

Composeal White Gold-This product controls sound transmission in tile flooring and prevents substrate cracks and moisture.

Composeal Sky Blue- One of Compotite’s newest products.  It protects countertops, sub-flooring, framing, and rafters from moisture and mold growth.

These and other great Compotite products will be available both individually, and as part of our shower system kits.  We look forward to our partnership with Compotite and a bright future together.

About The Flooring Supply Shop

The Flooring Supply Shop is the online presence for the International Flooring Center in Los Angeles, CA.  The International Flooring Center has been providing a broad selection of Tile, Tools, Setting Material, equipment and accessories to contractors and DIY homeowners for over 18 years.  For more information, stop by http://www.flooringsupplyshop.com/.

waterproofing membrane | Flooring Supply Shop Blog