Duk Liner Specification
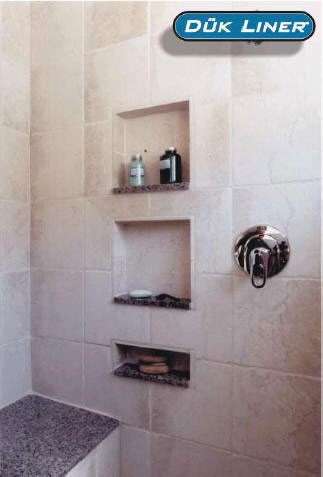
Duk Liner - Recess and Niches
The Custom Niche in 20 Minutes
Specifications and How to Install
Ideal for
-
• Soap dishes
• Ladies shower "shaving step"
• Small toiletry shelves
• Turned sideways, a narrow shampoo shelf
• Recessed hose bibs
• Inset irrigation & shut-off valves
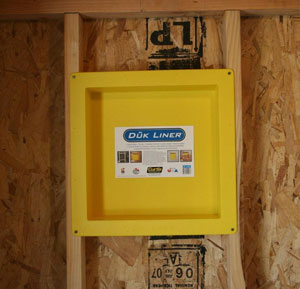
Step 1
Add Nailing Blocks

Step 2
Nail to studs on premarked spots
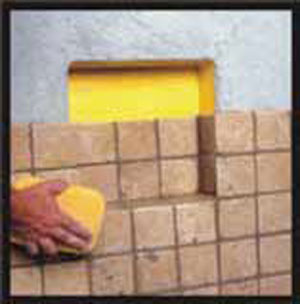
Step 3
Nail to studs on premarked spots
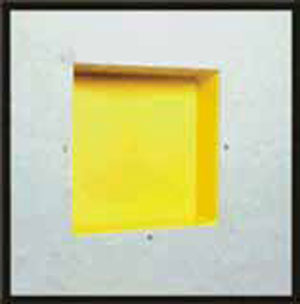
Step 4
Ready To Tile
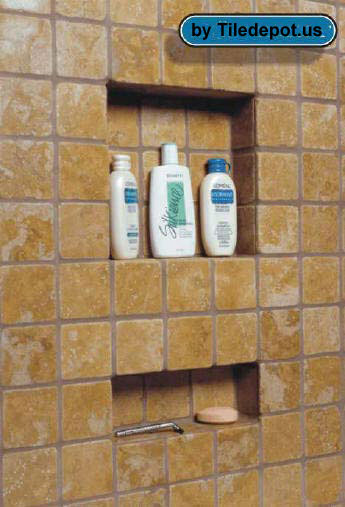
Finished Niche
FAQ's Duk Liner Products:
What are the advantages of using this product?
Duk Liner™ saves labor, turning a three hour burdensome project into a 20 minute task. In addition, Duk Liner™ will prevent call backs due to leaks.
How long does the installation typically take?
Approximately 20 minutes.
Do I have to drill pilot holes on the flange?
No, simply mount the liner with galvanized nails.
We provide starter indentations to prevent the nail from slipping; these do not have to be drilled through. The liner flange is very strong and will not crack.
Does the interior of Duk Liner have to be lined with paper or backer board?
No, you tile directly onto the liner surface.
Is the Duk Liner specifically designed as a bathroom niche?
While the Duk Liner™ is ideally suited for bathroom installations, contractors have found a variety of uses for the Duk Liner™.
They include recessed hose bibs, uniform niches for artwork, pictures, and collectibles,irrigation valve and control panels; use your imagination . . .


