Satisfaction guaranteed. Call us anytime at 323-731-8453.
Flooring Supply Shop Blog | Flooring and Floor Heating Supply

How to clean a Shower Drain?

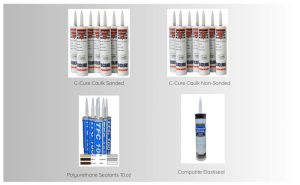
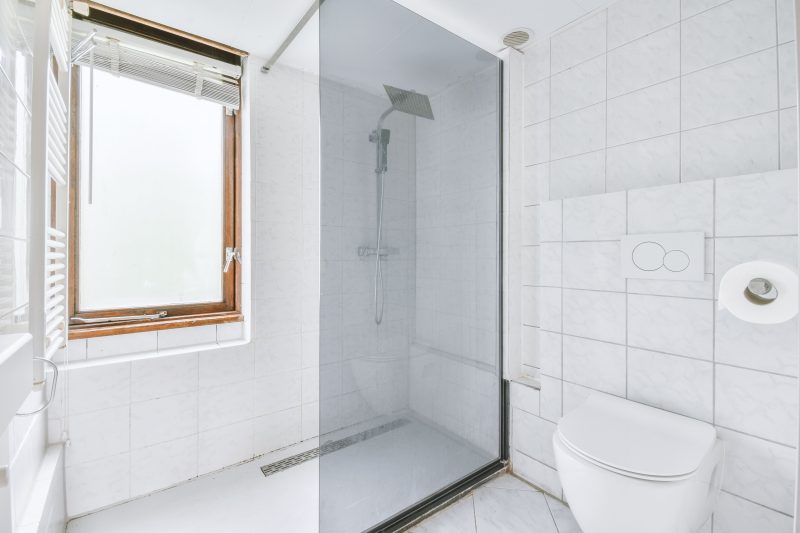
Maintaining a spotless shower drain is vital for preventing clogs and ensuring your bathroom remains a clean, inviting space. At the Flooring Supply Shop, we specialize in providing high-quality products like the quartz linear shower drain with brushed stainless-tile insert and many more products designed to facilitate easy and effective cleaning. Incorporating key maintenance steps and the right products, such as drain plugs and drain cleaners, can significantly simplify the task of cleaning your shower. Here’s how you can achieve a pristine shower drain using our expert advice.

How to Clean Your Shower Drain: A Guide from Flooring Supply Shop

Step 1: Preparation is Key

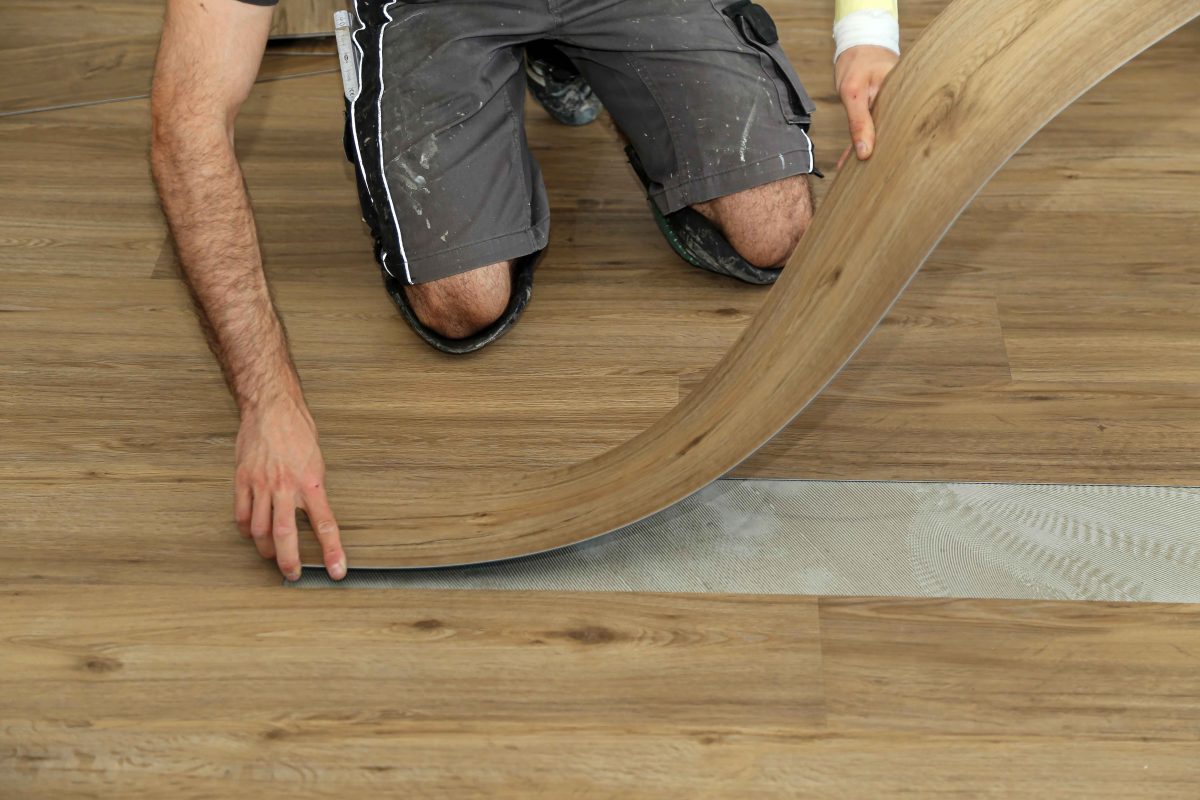
Starting your mission to unclog that pesky shower drain? First off, do you have the right toolkit at hand? Picture this: you, geared up with protective gloves to shield your hands from anything yucky or harmful. Got them? Great! Now, how about a screwdriver? You might need one to tackle the shower drain cover. If it’s something like the Quartz Linear Shower Drain Brushed Stainless – Tile Insert 28, you’re in luck because it’s made for hassle-free access.

But what about the stubborn clogs lurking beneath? That’s where a trusty plunger and a drain snake come into play, ready to dive deep and wrestle those clogs into submission. And let’s not forget our trio of cleanliness: white vinegar, baking soda, and boiling water. These aren’t just for your kitchen; they’re your chemical cleaning squad for blasting through blockages.

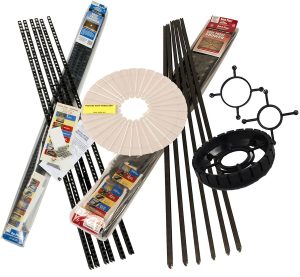
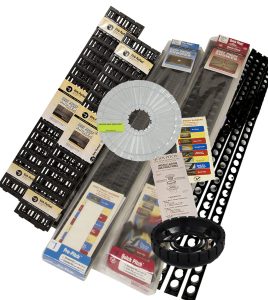
Feeling a bit overwhelmed? Don’t worry! Flooring Supply Shop has got your back with shower drainage kits that bundle everything you need. Why juggle tools when you can get it all in one go? So, ready to turn this clogged drain adventure into a victory story?

Step 2: Remove the Drain Cover

Gaining access to the clog involves removing the shower drain cover, which may be secured with screws. The design of our Quartz Linear Shower Drain facilitates easy removal, ensuring that you can get to the task without fuss. Ensure the area around the drain is clean to avoid any slipping hazards as you work.

Step 3: Eliminate Visible Debris

With the cover off, it’s time to address the visible debris clogging your drain. Hair and soap scum are often the main offenders. Don protective gloves and use a bent wire hanger or a drain snake to extract these materials carefully. This manual removal is crucial for alleviating immediate blockage and allowing any liquid solutions to penetrate deeper into the drain.

Step 4: Boil Water for a Hot Water Flush

Boiling a kettle of water and pouring it down the drain serves as an initial effort to melt away grease or soap that’s lining the pipes. This step is simple but effective, utilizing the natural solvent power of hot water to start the unclogging process and pave the way for more intensive cleaning.

Step 5: Deploy the Baking Soda and Vinegar Mixture

Introduce a cup of baking soda directly into the drain, followed by an equal measure of white vinegar. The reaction between these two household ingredients produces a vigorous fizzing action, helping to dislodge any residual debris clinging to the pipes. Allow this mixture to sit for about 10 minutes, giving it ample time to break down the blockages.

Step 6: Final Flush with Boiling Water

Following the chemical reaction, another round of boiling water acts as a thorough rinse. Pour it carefully down the drain to wash away the loosened debris and cleaning solution. This step is critical for ensuring that the clog is completely cleared and that water can flow freely once again.

Step 7: Proactive Prevention

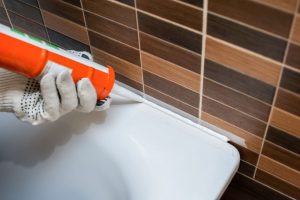
Preventing future clogs is just as important as clearing the existing ones. A simple yet effective measure is to install a drain plug that catches hair and other potential clog-causing debris before they enter the drain. Regular maintenance, including periodic cleaning with the above steps, will keep your shower drain functioning properly and reduce the likelihood of slow draining or the need for professional plumbing services.

How To Easily Unclog a Clogged Shower Drain?

Unclogging a clogged shower drain can often be done with simple household items, avoiding the immediate need to call a plumber. Start by removing the shower drain cover, which may require unscrewing or simply lifting off, to access the drain. Once open, visually inspect for any visible debris, such as hair or soap scum, that can be manually removed. Wear gloves, and use a bent wire hanger or a small drain snake to fish out the blockage. This can be surprisingly effective at removing the bulk of the clog.

Next, prepare a natural but powerful solution by pouring a cup of baking soda directly down the drain, followed by an equal amount of white vinegar. The mixture will fizz and bubble, working to dissolve any remaining grease or buildup. Allow this reaction to work for about 10-15 minutes, then flush the drain with boiling water. The hot water helps to rinse away the loosened debris and any residual cleaning solution, often clearing the clog completely.

For persistent or recurrent clogs, repeating the process or using a plunger to apply pressure and dislodge the blockage might be necessary. If these steps don’t resolve the issue, it may be time to call a professional plumber to assess and fix the problem.

How To Keep Your Shower Drains Clean?

Keeping your shower drain clean is essential for preventing clogs and ensuring the water flows freely, which helps maintain a hygienic and pleasant bathroom environment. Here are effective steps to keep your shower drain clean:

1. Regular Flushing with Hot Water

Flush your shower drain with hot water once a week to prevent clogs caused by soap residue and oils. The heat can dissolve minor accumulations before they become bigger issues.

2. Baking Soda and Vinegar Routine

To maintain cleanliness and clear minor blockages in your drain, use a natural cleaning solution of baking soda and vinegar every month. Pour half a cup of baking soda and half a cup of vinegar down the drain. Cover the drain to keep the reaction contained and wait for 10-15 minutes. Then, flush the drain with boiling water to clear out the loosened debris.

3. Use a Hair Catcher

A significant cause of shower drain clogs is hair. Installing a hair catcher over the drain can capture hair and other debris before they enter the drain. Clean the catcher regularly to ensure it continues to protect your drain effectively.

4. Clean the Drain Cover Regularly

Clean your shower drain cover monthly with a brush and mild cleaning solution to prevent blockages and odors. This also helps you visually inspect the drain for any problems.

5. Avoid Chemical Drain Cleaners

Chemical drain cleaners can damage plumbing over time due to their harsh chemicals, which can corrode pipes. Natural alternatives, like baking soda and vinegar, are safer.

6. Professional Inspection

It might be time for a professional inspection if you notice slow draining despite regular maintenance. Plumbers can identify and resolve deeper issues that are inaccessible or easily fixed with home remedies.

7. Educate Household Members

Teach your household to avoid putting excessive soap bits, hair, and small objects down the shower drain. This reduces the risk of clogs.

How long does Caulk take to dry?

Caulk is a flexible material used to seal gaps in various structures and surfaces, ensuring they are waterproof, dustproof, and sometimes even air-tight. The drying time for caulk can vary widely depending on the type used, the conditions under which it is applied, and the specifics of the job. Understanding these variables can help ensure the best results for any caulking project.

Caulk Sealant Products

Types of Caulk and Their Drying Times

Silicone Caulk applying to a door

  1. Silicone Caulk
    Silicone caulk is favored for its strong adhesion and flexibility. It’s particularly useful in areas exposed to extreme temperatures and moist environments, making it ideal for bathrooms and kitchens.
  • Skinning Time: Silicone caulk typically begins to skin over in about 10 to 20 minutes.
  • Curing Time: Full cure can take anywhere from 24 to 48 hours. The caulk must not be exposed to water or manipulated during this time.

Acrylic latex caulk product

  1. Acrylic Latex Caulk
    Also known as painter’s caulk, acrylic latex is easier to work with and paint over than silicone, making it a good choice for sealing gaps in windows, doors, and baseboards.
  • Skinning Time: This caulk will skin over in about 15 to 30 minutes.
  • Curing Time: It usually takes 1 to 2 hours for acrylic latex caulk to become dry to the touch, but a full cure might take up to 24 hours.

Polyurethane Foam Caulk

  1. Polyurethane Foam Caulk
    This type of caulk is best used for filling larger gaps. It expands after application, providing excellent insulation and sealing properties.
  • Skinning Time: Polyurethane foam begins to skin in about 5 to 10 minutes.
  • Curing Time: It can take 12 to 24 hours to fully cure, depending on humidity and temperature.

Butyl Rubber Caulk

  1. Butyl Rubber Caulk
    Butyl rubber is highly durable and best suited for outdoor conditions. It is often used to seal metal, masonry, and roofing materials.
  • Skinning Time: This caulk skins over in about 2 to 24 hours.
  • Curing Time: Full curing can take up to two weeks, particularly in cooler or less humid conditions.

Caulk Drying Time

Factors Influencing Drying Time

Temperature and Humidity

Higher temperatures and higher humidity levels can accelerate the curing process, whereas lower temperatures and lower humidity will slow it down. Most caulks are best applied when the temperature is between 40°F and 80°F.

Application Thickness

Thicker applications of caulk will take longer to cure. It’s important to apply caulk in thin, even lines unless the job specifically requires a thicker bead.

Air Circulation

Good ventilation can help reduce the drying time. Air movement around the caulked area helps to dissipate moisture and accelerates the curing process.

Tips for effective caulking

Tips for Effective Caulking

  1. Surface Preparation: Ensure surfaces are clean, dry, and free of old caulk or paint for the best adhesion.
  2. Correct Application: Cut the tip of the caulk tube to match the size of the gap you are filling. Apply smoothly and steadily.
  3. Tooling: Smooth the caulk with a wet finger or tool to ensure it fills the gap completely and provides a clean finish.
  4. Timing: Avoid exposing the caulk to moisture before it has fully cured. Respect the manufacturer’s instructions regarding skinning and curing times.

Understanding the characteristics of different types of caulk and the factors influencing their drying times is crucial for a successful sealing project. Whether you’re working indoors or outdoors, choosing the right caulk and applying it under optimal conditions will help achieve the best seal and finish.

Avoid doing to make caulk dry sealed

What are the things I should avoid doing to make the caulk dry faster?

When trying to dry caulk faster, there are several practices you should avoid to ensure the integrity and effectiveness of the seal:

  1. Do Not Use Heat Guns or Hair Dryers: Applying direct heat with devices like heat guns or hair dryers can cause the caulk to dry unevenly or crack. It may also compromise the adhesive properties of the caulk.
  2. Do Not Expose to Water: Especially relevant for silicone and other non-water-based caulks, exposing the caulk to water before it has fully cured can prevent it from setting properly, leading to weakened sealing.
  3. Do Not Apply in Extreme Temperatures: Avoid caulking in temperatures that are too cold or too hot, as most caulks have optimal application temperature ranges. Extreme temperatures can affect the curing time and final durability.
  4. Do Not Apply Thick Layers: While it might be tempting to apply caulk thickly to speed up the job, thicker layers take much longer to dry and can lead to uneven curing and potential cracking.
  5. Do Not Disturb the Caulk: Once applied, it’s important to allow the caulk to rest undisturbed during the curing process. Touching or pressing on the caulk can misshape it, break the seal, or extend drying times.

Frequently Asked Questions

Q: How long does silicone caulk take to dry?

A: Silicone caulk typically skins over within 10 to 20 minutes and fully cures in 24 to 48 hours. During the curing period, it is important not to expose silicone caulk to water or touch it to ensure optimal adhesion and waterproofing properties.

Q: Can I speed up the drying time of caulk?

A: To expedite caulk drying time, maintain a warm temperature and ensure good air circulation in the area. Using a fan or dehumidifier can help. However, it’s important not to rush the process beyond the manufacturer’s recommendations.

Q: Is it necessary to remove the old caulk before applying new caulk?

A: Yes, for the best results, you should remove all traces of old caulk before applying new caulk. This ensures that the new caulk adheres properly and provides a seamless, waterproof seal. Clean the surface thoroughly and let it dry completely before reapplying caulk.

How to Remove Silicone Caulking?

Silicone caulking is a versatile sealant used extensively in bathrooms, kitchens, and other moisture-prone areas. Over time, however, silicone caulking can deteriorate, become discolored, or lose its adhesion. Removing old silicone caulking and applying a fresh seal is crucial for maintaining these areas’ aesthetic and functional integrity. Here is a comprehensive, step-by-step guide on how to remove silicone caulking efficiently and effectively.

Tools and Materials You’ll Need

Before beginning, gather the following tools and materials:

  • Utility knife or razor blade
  • Caulk remover tool or scraper
  • Rubbing alcohol or commercial silicone caulk remover
  • Clean cloths or rags
  • Plastic putty knife
  • Painter’s tape
  • Protective gloves
  • Eye protection

removing caulk on the sink

Why One Should Remove Silicone Caulking

Silicone caulking is essential in maintaining a watertight and airtight seal in various parts of your home, particularly in moisture-prone areas like bathrooms and kitchens. However, there are several reasons why you might need to remove old silicone caulking:

1. Deterioration Over Time

Over time, silicone caulking can deteriorate due to exposure to moisture, temperature fluctuations, and general wear and tear. As it ages, it loses its elasticity, becomes brittle, and can crack or peel away from surfaces, compromising its effectiveness.

2. Mold and Mildew Growth

Old silicone caulking is susceptible to mold and mildew growth, especially in damp areas like bathrooms. Once mold and mildew take hold, they can spread rapidly, posing health risks and creating unsightly stains. Removing the old caulking is the only way to thoroughly clean and treat the affected area.

3. Discoloration and Staining

Silicone caulking can become discolored over time, turning yellow or brown due to exposure to water, soap, and cleaning products. This discoloration can make your bathroom or kitchen look dirty and unappealing, even if the surfaces are clean.

4. Loss of Adhesion

With prolonged exposure to water and cleaning agents, silicone caulking can lose its adhesion properties, causing it to pull away from the surfaces it was meant to seal. This can create gaps that allow water to seep through, leading to potential water damage and the growth of mold and mildew behind walls or under floors.

5. Renovation and Repairs

When undertaking renovation or repair projects, removing old silicone caulking is often necessary to ensure a clean, smooth surface for new materials. Removing old caulk is a crucial step in replacing tiles, installing new fixtures, or simply freshening up the look of a room.

6. Aesthetic Improvements

Even if the old caulking is still functional, it may not look good. Over time, caulk lines can become uneven or messy due to application errors or subsequent damage. Removing old caulking and applying a fresh, neat bead can significantly improve the appearance of your bathroom or kitchen.

7. Preventing Water Damage

Old, failing caulking can lead to water leaks that cause significant damage to your home’s structure. Water seeping through gaps in caulking can damage walls, floors, and cabinetry, leading to costly repairs. Regularly replacing silicone caulking helps maintain a strong seal and prevents these issues.

removing caulk window frame

Step-by-Step Guide to Removing Silicone Caulking

Removing silicone caulking might seem daunting, but with the right tools and a clear process, it can be straightforward and efficient. Follow these detailed steps to ensure you remove the old caulking completely and prepare the surface for a new application. Here’s a step-by-step guide to help you through the process.

Step 1: Prepare the Area

Clean the Area: Begin by cleaning the area around the silicone caulking. Use a mild cleaner to remove any dirt, grime, or mildew that might interfere with the removal process. Ensure the surface is dry before proceeding.

Protect Surrounding Surfaces: Use painter’s tape to cover adjacent surfaces that you don’t want to scratch or damage. This step is particularly important when working in tight spaces or near delicate materials like tile or glass.

Step 2: Cut the Caulk

Score the Caulk: Using a utility knife or razor blade, carefully score along the edges of the silicone caulking. Hold the knife at a shallow angle to avoid scratching the underlying surface. Make parallel cuts along both sides of the caulk line.

Create Lift Points: If the caulk line is long, make perpendicular cuts every few inches to create sections that are easier to remove.

Step 3: Remove the Caulk

Lift and Peel: After scoring, use a caulk remover tool or scraper to lift and peel away the silicone caulking. Start at one of the lift points you created and gently pry up the caulk. If the caulk is stubborn, use your knife to cut it into smaller pieces that are easier to manage.

Pull Slowly: Once you get a section started, pull slowly and steadily. Try to remove as much caulk as possible in one piece to minimize residue.

Step 4: Apply a Caulk Remover

Use a Chemical Remover: For any remaining caulk, apply a commercial silicone caulk remover or rubbing alcohol. These products soften the silicone, making it easier to remove. Follow the manufacturer’s instructions, typically applying the remover and letting it sit for 10-15 minutes.

Let it Soak: Allow the remover to penetrate and break down the silicone. This step is crucial for areas where the caulk is particularly stubborn or thick.

Step 5: Scrape Away Residue

Use a Plastic Putty Knife: Once the caulk remover has softened the silicone, use a plastic putty knife to scrape away the residue. Plastic tools are preferred to avoid scratching the surface.

Wipe Clean: Use a clean cloth or rag to wipe away the loosened silicone. You may need to repeat the application of the caulk remover and scraping process several times to remove all the residue.

Step 6: Clean the Surface

Final Cleaning: Clean the area thoroughly with rubbing alcohol or a mild cleaner to ensure all silicone residue is removed. This step is crucial for the adhesion of new caulking.

Dry Completely: Allow the surface to dry completely before applying a new caulk. Moisture can interfere with the adhesion of the new silicone.

Step 7: Inspect and Repeat if Necessary

Check for Remaining Caulk: Inspect the area closely to ensure all silicone is removed. Run your finger along the surface to feel for any remaining residue. If you find any, repeat the previous steps until the surface is completely clean.

Tips for a Successful Silicone Caulk Removal

  • Take Your Time: Removing silicone caulking can be a tedious process. Working slowly and carefully will yield the best results and prevent damage to surfaces.
  • Use the Right Tools: Investing in a quality caulk remover tool can make the job easier and more efficient.
  • Safety First: Always wear protective gloves and eye protection when working with sharp tools and chemical removers.
  • Follow Product Instructions: When using commercial caulk removers, always follow the manufacturer’s instructions for safe and effective use.

Is Luxury Vinyl Tile Flooring an Alternative to Traditional Floors

When considering flooring options for your home, durability, aesthetics, and affordability are key factors influencing your decision. Luxury Vinyl Tile (LVT) flooring has recently emerged as a popular alternative to traditional options like hardwood, ceramic tile, laminate, and sheet vinyl. In this blog, we’ll clearly define Luxury Vinyl Tile, delve into its numerous benefits, explore how it compares to traditional flooring options, including vinyl wood flooring, and help you determine if it’s the right choice for your home.

What is Luxury Vinyl Tile (LVT)?

Luxury Vinyl Tile, commonly known as LVT, is a modern flooring solution designed to replicate the look and feel of natural flooring materials like wood and stone. Unlike traditional vinyl flooring, LVT is manufactured in multiple layers, typically including a wear layer, design layer, vinyl core, and backing. This construction offers enhanced durability and improved visual appeal, closely mimicking authentic materials at a fraction of the cost.

Key Benefits of LVT Flooring

LVT flooring offers several notable benefits:

  1. Durability: LVT is highly resistant to scratches, stains, and dents, making it an excellent choice for high-traffic areas. Its robust wear layer ensures that it maintains its appearance over time, even under demanding conditions.
  2. Easy Maintenance: Compared to traditional flooring, LVT requires minimal upkeep. Regular sweeping and occasional damp mopping suffice to keep it looking pristine, a key reason homeowners choose this flooring solution.
  3. Waterproof: One significant advantage of LVT flooring is its waterproof nature. This feature makes it ideal for moisture-prone areas such as kitchens, bathrooms, and basements, where traditional wood flooring might deteriorate.
  4. Versatility in Design: LVT comes in a wide array of styles, colors, and textures, including realistic wood and stone finishes. Whether you desire the rustic charm of vinyl wood flooring or the elegance of marble, there’s an LVT option available to match your interior décor.
  5. Comfort and Warmth: Unlike ceramic or stone, LVT offers a warmer underfoot feel and added comfort, reducing fatigue when standing for long periods.
  6. Cost-Effectiveness: Luxury Vinyl Tile offers an affordable alternative to traditional hardwood and stone, without compromising aesthetic appeal or performance.

hardwood-flooring versus vinyl flooring

LVT vs Hardwood Flooring: How Do They Compare?

Comparing LVT vs hardwood flooring often involves several considerations:

  • Durability and Maintenance: Hardwood floors, while beautiful, are more susceptible to scratches, dents, and water damage. They also require periodic refinishing. In contrast, LVT’s resilient wear layer offers superior durability with significantly lower maintenance needs.
  • Cost and Installation: Hardwood floors typically require professional installation and incur higher upfront costs. Conversely, LVT flooring is generally less expensive and can often be installed as a DIY project due to its click-and-lock installation methods.
  • Aesthetics: While hardwood has a timeless beauty, modern LVT products closely mimic the natural look of wood, offering realistic textures and finishes. For those seeking the visual appeal of wood without the drawbacks, vinyl wood flooring in the LVT category is an excellent choice.
  • Environmental Factors: Hardwood is naturally sourced but requires more environmental resources for harvesting and processing. LVT, however, often incorporates recycled materials, providing a more eco-conscious option.

high-angle-shot-of-the-worker-installing-a-new-vinyl

LVT vs. Traditional Flooring Options

When evaluating LVT against other traditional flooring options such as ceramic tile, laminate, and sheet vinyl, several distinct advantages emerge:

  • Ceramic Tile: While ceramic tile is highly durable and moisture-resistant, it can be cold, hard, and uncomfortable to stand on for extended periods. LVT offers similar moisture resistance but adds warmth, comfort, and better sound absorption, making it more suitable for living spaces and bedrooms.
  • Laminate Flooring: Laminate can replicate wood flooring but lacks LVT’s water-resistant properties. Exposure to moisture can warp laminate, whereas LVT remains stable and intact, making it a superior choice for kitchens and bathrooms.
  • Sheet Vinyl: Sheet vinyl is affordable and water-resistant but doesn’t offer the same visual realism or resilience to heavy wear that LVT does. Additionally, sheet vinyl can be challenging to repair, while individual damaged tiles in LVT floors can be easily replaced without disturbing the entire flooring.

LVT is particularly advantageous in scenarios such as:

  • Bathrooms and Kitchens: The waterproof nature of LVT makes it perfect for moisture-prone areas.
  • Basements: LVT withstands basement conditions better than wood or laminate due to its resilience against humidity and potential flooding.
  • Rental Properties: LVT flooring provides durability and easy maintenance, making it ideal for rental properties where frequent tenant turnover may occur.

worker-installing-new-vinyl-tile-floor-2025

Is Luxury Vinyl Flooring Right for You?

Determining whether Luxury Vinyl Tile flooring is right for you depends on your specific needs and preferences. Consider LVT flooring if:

  • You need flooring that’s durable and easy to maintain.
  • You’re looking for a water-resistant solution suitable for kitchens, bathrooms, or basements.
  • You want the look of hardwood or natural stone without the associated costs and maintenance hassles.
  • You require flooring that offers warmth and comfort underfoot.
  • You’re aiming for an easy DIY installation process.

LVT flooring’s impressive combination of practicality, affordability, aesthetics, and durability makes it an outstanding alternative to traditional flooring options. Whether renovating your home or updating a rental property, LVT delivers both performance and style, ensuring your flooring investment pays off for years to come.

What is a Shower Slope Kit and Why it is Important?

When undertaking bathroom remodeling projects, ensuring proper water drainage is paramount. One essential element that helps achieve this effectively is a shower slope kit. This specialized system ensures the shower floor is properly sloped, allowing water to drain efficiently and preventing water accumulation and potential damage. Here’s everything you need to understand about shower slope kits, including why they’re crucial, available types, selection tips, and purchase options.

What is a Shower Slope Kit?

A shower slope kit is a specifically designed system used during shower floor installations to create the perfect slope required for effective water drainage. It typically consists of pre-pitch sticks or float sticks, crafted from materials such as high-impact plastic with a reinforcing design, to establish a precise gradient directing water toward the drain. These kits eliminate the guesswork often associated with manually forming slopes, providing a foolproof solution even for those without advanced skills in bathroom installations.

Common components of shower slope kits include pitch sticks, extended sticks, and detailed instructions to facilitate easy installation. Most pitch sticks are lightweight and non-rotting, ensuring long-lasting performance. They often come molded of high-impact plastic, reinforcing their durability and efficiency in moisture-rich environments.

extended shower slope kit

Why is a Shower Slope Kit Important?

Proper water drainage in showers is critical to prevent water pooling, mold growth, and structural damage. Without a properly sloped shower floor, water tends to accumulate, creating slippery surfaces and increasing the risk of water seeping into walls and subflooring.

A shower slope kit creates the proper slope needed without requiring extensive plumbing or construction skills. This system significantly simplifies the installation process, making it accessible even for DIY enthusiasts. With built-in pitch forms, these kits ensure consistent and accurate slopes every time, significantly reducing installation errors.

A shower slope kit also protects bathroom integrity by preventing moisture-related issues. Efficient drainage keeps surfaces dry, minimizes mold and mildew growth, and extends the longevity of bathroom materials.

shower slope kit

Types of Shower Slope Kits

Several types of shower slope kits are available, each designed to suit different installation requirements:

1. Pre-Pitch Shower Kits:

These kits come with pitch sticks and reinforcing plastic structures used beneath the shower pan liner. Their purpose is to form an initial slope under the liner, ensuring water moves toward the drain effectively. Pre-pitch sticks are typically sold 4 per package and are easy to handle, being lightweight and non-rotting.

2. Quick Pitch Kits:

Quick pitch kits feature pitch sticks installed above the pan liner and beneath the shower flooring material. These sticks typically have built-in slopes, which quickly create an accurate gradient. Quick pitch systems are straightforward to use, reducing installation complexity, and require no advanced skills.

extended slope kit

3. Extended Sticks Kits:

Extended sticks are ideal for larger showers requiring longer slope gradients. These kits include elongated pitch sticks, tapered x 36 inches, capable of accommodating more extensive shower floor areas effectively.

Each of these kits comes complete with instructions included, ensuring an easy and precise installation process regardless of the chosen type.

How to Choose the Right Shower Slope Kit

Choosing the ideal shower slope kit involves considering several key factors:

Shower Size and Shape:

The dimensions and design of your shower area significantly impact your choice. Smaller showers benefit from standard quick pitch kits, while larger areas may require extended sticks to manage drainage across wider surfaces properly.

Installation Complexity:

Evaluate your installation experience and comfort level. If you’re not skilled in plumbing or construction tasks, opt for quick pitch kits featuring built-in slopes and comprehensive instructions. These kits offer straightforward installations, minimizing errors.

Material Durability:

Ensure the pitch sticks are molded of high-impact plastic, providing longevity and resistance to moisture and damage. Kits made from durable, lightweight, and non-rotting materials are superior for bathroom environments where moisture exposure is constant.

Compatibility:

Verify that the chosen kit aligns with your shower pan liner and flooring materials. Compatibility ensures seamless integration, optimal performance, and maximum water drainage efficiency.

By assessing these factors, you can confidently select the perfect shower slope kit that meets your specific project requirements and ensures durable, effective water management in your bathroom.

flooring supply logo

Where to Buy a Shower Slope Kit?

Selecting a trusted retailer is crucial when purchasing your shower slope kit to guarantee product quality, accurate guidance, and superior customer service. Flooring Supply Shop stands out as an exceptional choice for acquiring reliable shower slope kits and accessories.

Flooring Supply Shop offers an extensive range of shower slope kits, including pre-pitch, quick pitch, and extended stick varieties. Each product is constructed from high-quality materials such as reinforced lightweight plastics, ensuring both durability and ease of use. The kits sold here include comprehensive installation instructions, facilitating easy setups for both DIY enthusiasts and professional contractors.

By choosing Flooring Supply Shop, you gain access to expert advice and a robust selection of bathroom remodeling products that will significantly enhance your shower installation experience. Their kits are specifically designed to create the perfect slope effortlessly, ensuring a professional-quality result every time.

For optimal shower drainage and a reliable installation experience, visit Flooring Supply Shop at to browse and select the ideal shower slope kit for your needs.

Investing in a shower slope kit is a wise decision for any bathroom renovation project. It simplifies installation, ensures efficient water drainage, and significantly reduces potential moisture-related issues. Whether opting for pre-pitch, quick pitch, or extended stick kits, each offers unique benefits tailored to various shower designs and installation complexities.

Understanding these kits, their importance, the types available, and how to select the appropriate one ensures your bathroom remains both functional and aesthetically pleasing for years to come. For quality shower slope kits and excellent customer support, trust Flooring Supply Shop as your reliable partner in bathroom remodeling.

Flooring Supply Shop Blog | Flooring and Floor Heating Supply