Satisfaction guaranteed. Call us anytime at 323-731-8453.
Flooring Supply Shop Blog | Flooring and Floor Heating Supply - Part 2

How to Clean Laminate Floors: Best Tips for Streak-Free Shine

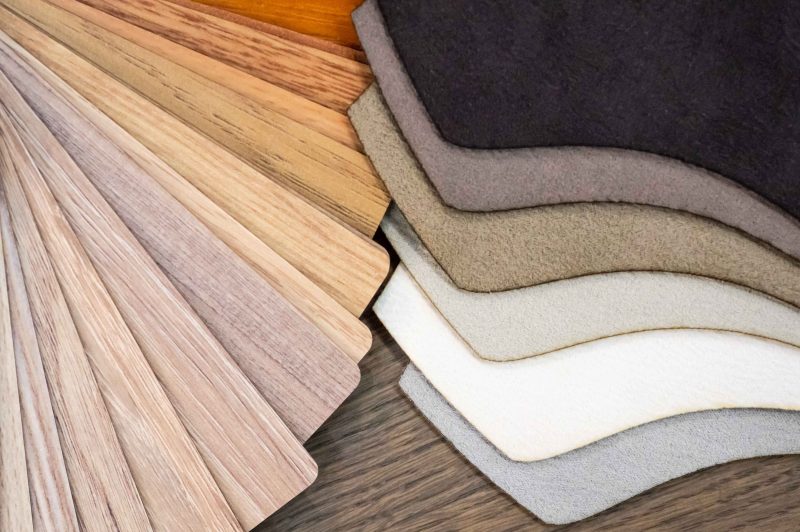
Laminate flooring is popular due to its durability, sleek appearance, and easy maintenance. However, knowing how to clean laminate floors properly is essential for keeping them in top condition without causing damage. Whether you’re dealing with dust, dirt, or tough stains, using the right techniques and products will ensure your floors stay pristine. This guide will walk you through effective and safe methods to clean laminate floors, ensuring long-lasting beauty and performance.

Sweep and Dry Mop Regularyly

1. Sweep and Dry Mop Regularly

Dirt, dust, and debris can act like sandpaper on laminate floors, gradually causing scratches and wear over time. To prevent this, regular sweeping is crucial. Use a soft-bristled broom or, even better, a dry mop equipped with a microfiber cloth. Microfiber is ideal because it traps dust and small particles without scratching the surface. Regularly sweeping your floors, especially in high-traffic areas, will prevent debris buildup that could otherwise damage your laminate.

For those who prefer a vacuum, ensure you use one designed for hard floors or with a setting that avoids the use of a beater bar, as this can scratch the laminate. This initial cleaning step prepares the floor for deeper cleaning without risking damage from particles being dragged across the surface.

Avoid excess water

2. Avoid Excess Water

One of the most important things to remember when cleaning laminate flooring is that excess water is its enemy. Unlike some types of wood or tile flooring, laminate is not designed to withstand large amounts of water. Too much moisture can seep between the planks and cause them to warp, buckle, or swell over time, leading to costly repairs.

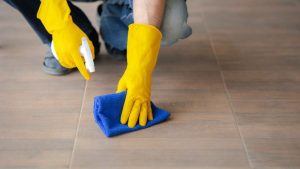
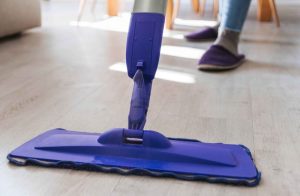
To avoid this, always use a slightly damp mop. After sweeping, lightly dampen the mop with a laminate-friendly solution or water. A damp mop removes surface dirt and stains while ensuring the flooring is not saturated. After mopping, it’s essential to go over the floor with a dry mop or cloth to pick up any excess moisture. This keeps the floor clean while preventing damage from prolonged contact with water.

Use the Right Laminate Floor Cleaner

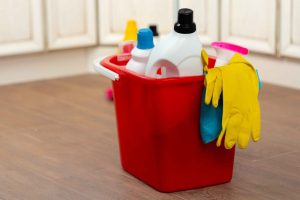
3. Use the Right Laminate Floor Cleaner

Using the right cleaning products is essential to maintaining the beauty of your laminate flooring. While there are many commercial laminate floor cleaners available, you can also create an effective, budget-friendly solution at home. A mixture of white vinegar and water in equal parts is a great option. Vinegar is a natural cleaner that effectively cuts through grime and kills bacteria without leaving behind any streaks or residue.

If you prefer store-bought options, look for a cleaner specifically designed for laminate flooring. Avoid using products that contain bleach, ammonia, or harsh chemicals, as they can strip the protective coating on your laminate. When using a cleaner, spray it onto the mop or cloth rather than directly onto the floor to control the amount of moisture.

Tackle Stubborn Stains with Rubbing Alcohol

4. Tackle Stubborn Stains with Rubbing Alcohol

For more difficult stains from laminate floors, such as paint, ink, or marker, rubbing alcohol is your best bet. It evaporates quickly, reducing the risk of moisture damage to the laminate. Simply apply a small amount of rubbing alcohol to a soft cloth and gently rub the stained area.

Be careful not to scrub too aggressively, as this could scratch the surface. A gentle rubbing motion should be sufficient to lift the stain. Once the stain is gone, wipe the area with a slightly damp cloth to remove any residue. This method works well for isolated spots and avoids the need for heavier, chemical-based cleaners.

Use Dish Soap for Grease and Oil Stains

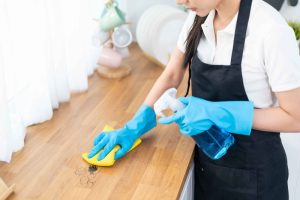
5. Use Dish Soap for Grease and Oil Stains

Grease and oil can sometimes end up on your floors, especially in areas like the kitchen. Dish soap, known for cutting through grease, can effectively solve these types of stains. Add a few drops of dish soap to warm water and dip a clean cloth or slightly damp mop into the solution. Gently clean the affected area until the grease or oil is removed.

Prevent scratches

6. Prevent Scratches

Preventing scratches on your laminate wood floors is key to their longevity. Avoid using steel wool or other abrasive materials, as they can scratch the surface. Instead, opt for a microfiber cloth or soft mop head for gentle cleaning. Place rugs in high-traffic areas and attach furniture pads to the legs of chairs and tables to further protect your floors.

Removing Scuffs and Heel Marks

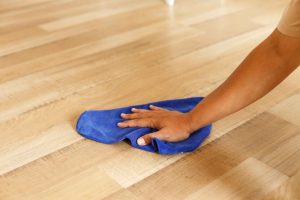
7. Removing Scuffs and Heel Marks

Scuffs and marks left by shoes can be a nuisance. A microfiber cloth and a little elbow grease can usually remove these, but for more persistent marks, try using a pencil eraser or a small amount of rubbing alcohol. Gently rub the mark until it lifts away.

Avoid Harsh Chemicals

8. Avoid Harsh Chemicals

Avoid using harsh chemicals like bleach or ammonia when cleaning laminate floors, as they can damage the protective layer and dull the surface over time. Although strong cleaners may seem effective for tough stains, they pose a risk to your floor’s longevity. Instead, opt for gentler solutions such as white vinegar mixed with water or a laminate floor cleaner specifically designed for this type of flooring. These options are safer for both the laminate and the environment, ensuring that your floors remain clean without causing long-term damage. Always prioritize mild, non-abrasive cleaners for the best results.

Maintain your Mop

9. Maintain Your Mop

A clean mop head is essential for effective cleaning. If your mop head is dirty or overly wet, it can leave streaks on your floor. After each cleaning session, rinse and dry your mop head thoroughly, and replace it regularly to ensure it continues to clean effectively.

Handling Pet Messes

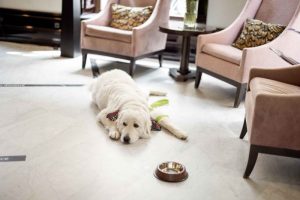
10. Handling Pet Messes

Pets, from accidents to muddy paws, can sometimes leave a mess on your floors. A quick solution of dish soap and water can help clean up any messes without harming your laminate. Afterward, use a dry cloth to avoid any lingering moisture.

Bonus Tips

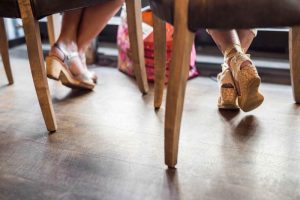
Avoid Scratches from Furniture

Furniture legs can cause damage if they’re not protected. To avoid scratching your laminate, place protective pads on the bottom of furniture legs. This is especially important for chairs and tables that get moved frequently.

Also, avoid overly damp mops to keep your laminate floors shining, as they can leave streaks. Always finish by wiping the floor with a dry mop or a clean microfiber cloth to ensure it’s completely dry.

Can you put Vinyl flooring over tile?

What is vinyl tile flooring?

Vinyl tile flooring is a type of resilient flooring made from synthetic materials designed to mimic the appearance of natural materials like stone or wood. It comes in individual tiles or planks and is known for its durability, ease of maintenance, and water resistance. Vinyl tile flooring is also often chosen for its affordability, making it a super common material used for both residential and commercial applications.

Can you put vinyl flooring over tile?

Putting vinyl flooring over tile is a method that’s quickly becoming more popular among home and business owners. This is because it’s cheaper, transforming, and possesses minimal disruption. Simply clean, dry, and level the existing tile surface and it’s ready for vinyl flooring installation.

Types of vinyl flooring

Vinyl flooring comes in various styles, including patterns that mimic natural materials like wood and stone, with options such as luxury vinyl tile flooring for a high-end finish. For enhanced performance, you might consider waterproof vinyl tile flooring, which is ideal for moisture-prone areas like kitchens and bathrooms. Additionally, adhesive floor vinyl tiles can provide a secure bond, ensuring durability and longevity. All of these options provide a wide range of design possibilities so that you can explore your aesthetic preferences.

Benefits of covering floor tiles

Covering floor tiles with new flooring offers several benefits. Vinyl floor tiles, for instance, can provide an updated look and improved functionality without the need for extensive demolition.

Moreover, opting for vinyl tile flooring patterns allows you to enhance your space using a variety of designs. With adhesive floor vinyl tiles simplifying the installation process and luxury vinyl tile flooring offering a high-end appearance, your space will feel refreshed regardless of what you choose. Additionally, waterproof vinyl tile flooring is particularly advantageous in moisture-prone areas, so this will add long-term protection as a top-feature.

Fitting Vinyl Tiles on Floor Tiles

How to perfectly fit vinyl floor tiles to fit the room

Fitting vinyl floor tiles perfectly requires precision and careful preparation to ensure a seamless and durable installation.

Follow these steps to achieve a flawless result:

  1. Prepare the surface: Clean the floor thoroughly, removing any debris. Ensure it’s also dry.
  2. Measure and plan: Measure the room to determine how many vinyl floor tiles you need. This will allow you to better plan the layout to ensure symmetry.
  3. Cut the tiles: Using a utility knife or tile cutter, carefully cut the vinyl floor tiles to fit your dimensions. Make sure the cuts are straight for that snug fit.
  4. Apply adhesive: Apply adhesive evenly onto the floor surface.
  5. Lay the tiles: Begin laying the tiles according to your planned layout. Press each tile firmly in place.
  6. Seal the edges: After all tiles are in place, seal the edges with a waterproof sealant to prevent water infiltration.

Cleaning Vinyl Floor Tiles

Maintenance tips after laying vinyl floor tiles over a tile

After laying vinyl floor tiles over existing tile you will use your new flooring as expected. However, we recommend that you clean your floor regularly, avoid harsh chemicals, use floor mats or rugs to minimize wear and tear, and address spills promptly. All of the above suggestions will ensure the longevity of your new floor.

Frequently Asked Questions

1. How to clean vinyl floors?

To clean vinyl floors, use a soft broom or vacuum followed by a damp mop with a mild detergent. We also recommend that you avoid using any harsh chemicals or the use of excessive water when cleaning vinyl flooring.

2. How to install vinyl plank flooring?

To install vinyl plank flooring, prepare the subfloor, lay out and fit the planks in your desired pattern, and secure them in place—usually this is done via click-lock or adhesive method.

3. Can you lay vinyl flooring over tile?

Yes, you can lay vinyl flooring over tile by ensuring the tile surface is clean, dry, and level to provide a stable base for the new vinyl.

4. How to cut vinyl floor tiles?

To cut vinyl floor tiles, measure and mark the designed cut line, then use a utility knife or a vinyl tile cutter to score the tile along the line.

5. How to polish vinyl floor tiles?

To polish vinyl floor tiles, first clean the floor thoroughly, then apply a vinyl floor polish using a clean mop. Allow it to dry for that glossy finish.

6. Does vinyl flooring scratch easily?

Vinyl flooring is generally resistant to scratches, but it can still be scratched by sharp and/or heavy objects. Be sure to use protective pads under your furniture and avoid dragging heavy items across your floors.

7. Where to buy vinyl flooring tiles online?

You can buy vinyl flooring tiles online at Flooring Supply Shop, which offers a diverse selection of styles and prices to suit various applications and aesthetics.

How to Clean Tile in Swimming Pool?

Maintaining a sparkling and inviting swimming pool goes beyond just skimming the surface and balancing the water. Over time, swimming pool tiles can become dull and stained due to the accumulation of calcium deposits, mineral buildup, and organic debris. These unsightly marks not only detract from the beauty of your pool but can also cause long-term damage if not properly addressed. Regular cleaning of your pool tiles is essential to preserve their appearance and prolong their lifespan.

This guide will walk you through the step-by-step process of how to clean tile in a swimming pool, using a variety of methods and materials that cater to different types of stains and buildups. Whether you prefer eco-friendly natural cleaners or more robust chemical solutions, you’ll find the right approach to keep your tiles looking pristine. With the right tools and techniques, you can restore the gleam to your swimming pool tiles and ensure that your pool remains a beautiful and safe place for everyone to enjoy.

Cleaning Swimming Pool Tiles

Disclaimer

This article offers thorough cleaning instructions, but be aware that some processes and chemicals, like muriatic and sulfamic acid, can be hazardous. Always use caution, wear protective gear, and work in a well-ventilated area. If you’re unsure or encounter difficulties, seek professional help. Additionally, consult local authorities to ensure chemical use complies with regulations. Prioritize safety by taking these precautions and considering professional assistance when needed.

Water in the City Swimming Pool

Understanding Pool Tile Stains and Buildup

Before diving into the cleaning process, it’s essential to understand the common types of stains and buildup that can occur on pool tiles:

  1. Calcium Deposits: Calcium carbonate and calcium silicate are the most common types of calcium deposits found on pool tiles. These appear as white, crusty layers on the tile surface.
  2. Mineral Deposits: Minerals in the pool water, such as magnesium and iron, can leave unsightly stains on tiles.
  3. Organic Matter: Leaves, algae, and other organic debris can stain and dirty pool tiles over time.

Swimming Pool Tile Materials for Cleaning

Tools and Materials You’ll Need

To effectively clean your pool tiles, gather the following tools and materials:

  • Pumice Stone: Ideal for scrubbing away calcium deposits and stubborn stains.
  • Scrub Brush (Stiff-Bristled): A stiff-bristled brush is necessary for scrubbing the tiles effectively, especially in tough-to-reach areas.
  • Muriatic Acid: A strong acid that can break down tough stains and buildup.
  • Sulfamic Acid: A safer alternative to muriatic acid, effective for removing mineral deposits.
  • Tile Cleaner: Available at most home improvement stores, these cleaners are specifically designed for pool tiles.
  • Natural Cleaners: Baking soda and a quarter cup of dishwashing liquid can be used as gentler, eco-friendly cleaning options.
  • Circular Motion: Using a circular motion when scrubbing ensures even cleaning and avoids damage to the tile surface.

A man cleaning swimming pool

Step-by-Step Guide to Cleaning Pool Tiles

1. Initial Rinse and Inspection

Start by lowering the water level in the pool so that the tiles are exposed. Use a hose to rinse off loose dirt and debris from the tile surface.

2. Choosing the Right Cleaner

  • For Calcium Buildup and Mineral Deposits: If you notice white, crusty layers on your tiles, it’s likely calcium buildup. Use a pumice stone to scrub away these deposits. For tougher stains, apply muriatic acid or sulfamic acid to the affected areas. Always wear gloves and follow the manufacturer’s instructions when using these acids.
  • For Organic Matter and Light Stains: Mix a quarter cup of dishwashing liquid with warm water and use a stiff-bristled scrub brush to clean the tiles. Natural cleaners like baking soda can also be effective for this type of cleaning.

3. Scrubbing the Tiles

Apply your chosen cleaner to the tile surface and begin scrubbing in a circular motion. This technique helps to lift stains evenly without scratching the tile. Pay special attention to any stubborn spots, and reapply cleaner as necessary.

4. Using Natural Cleaners

For those who prefer eco-friendly options, baking soda is an excellent choice. Create a paste by mixing baking soda with water, then apply it to the tiles using a stiff-bristled scrub brush. Scrub the tiles in a circular motion until the stains lift.

5. Cleaning Glass Tiles

If your pool has glass tiles, you’ll need to be more delicate to avoid scratching. Use a softer brush or sponge, and avoid abrasive cleaners. A tile cleaner specifically designed for glass is your best option here.

6. Final Rinse and Inspection

After scrubbing, thoroughly rinse the tiles with clean water to remove any remaining cleaner and debris. Inspect the tiles to ensure all stains and buildup have been removed. If necessary, repeat the cleaning process on any stubborn spots.

Water Vacuum Cleaner

Preventing Future Buildup

Regular pool maintenance is key to preventing future calcium deposits and mineral buildup. Here are some tips:

  • Monitor Pool Water Chemistry: Keep your pool water balanced by regularly testing and adjusting the pH and calcium hardness levels.
  • Regular Scrubbing: Incorporate regular tile scrubbing into your pool maintenance routine to prevent buildup.
  • Use a Tile Sealant: Consider applying a tile sealant to protect the tiles from future stains and buildup.

Cleaning pool tiles is an essential part of pool maintenance that should not be overlooked. Whether you’re dealing with calcium carbonate deposits, mineral deposits, or organic matter, the right tools and techniques will help you clean the tile effectively. By following this guide and using products available at home improvement stores, you can keep your pool tiles looking pristine and extend the life of your swimming pool.

Maintaining a clean pool is not just about aesthetics—it’s also about preserving the longevity of your pool and ensuring a safe and enjoyable swimming environment.

How to clean a Shower Drain?

Maintaining a spotless shower drain is vital for preventing clogs and ensuring your bathroom remains a clean, inviting space. At the Flooring Supply Shop, we specialize in providing high-quality products like the quartz linear shower drain with brushed stainless-tile insert and many more products designed to facilitate easy and effective cleaning. Incorporating key maintenance steps and the right products, such as drain plugs and drain cleaners, can significantly simplify the task of cleaning your shower. Here’s how you can achieve a pristine shower drain using our expert advice.

How to Clean Your Shower Drain: A Guide from Flooring Supply Shop

silver quartz linear

Step 1: Preparation is Key

Starting your mission to unclog that pesky shower drain? First off, do you have the right toolkit at hand? Picture this: you, geared up with protective gloves to shield your hands from anything yucky or harmful. Got them? Great! Now, how about a screwdriver? You might need one to tackle the shower drain cover. If it’s something like the Quartz Linear Shower Drain Brushed Stainless – Tile Insert 28, you’re in luck because it’s made for hassle-free access.

But what about the stubborn clogs lurking beneath? That’s where a trusty plunger and a drain snake come into play, ready to dive deep and wrestle those clogs into submission. And let’s not forget our trio of cleanliness: white vinegar, baking soda, and boiling water. These aren’t just for your kitchen; they’re your chemical cleaning squad for blasting through blockages.

Feeling a bit overwhelmed? Don’t worry! Flooring Supply Shop has got your back with shower drainage kits that bundle everything you need. Why juggle tools when you can get it all in one go? So, ready to turn this clogged drain adventure into a victory story?

Remove the Shower Drain and Wash it

Step 2: Remove the Drain Cover

Gaining access to the clog involves removing the shower drain cover, which may be secured with screws. The design of our Quartz Linear Shower Drain facilitates easy removal, ensuring that you can get to the task without fuss. Ensure the area around the drain is clean to avoid any slipping hazards as you work.

Water and Bubbles on the floor

Step 3: Eliminate Visible Debris

With the cover off, it’s time to address the visible debris clogging your drain. Hair and soap scum are often the main offenders. Don protective gloves and use a bent wire hanger or a drain snake to extract these materials carefully. This manual removal is crucial for alleviating immediate blockage and allowing any liquid solutions to penetrate deeper into the drain.

Silver Shower Drain

Step 4: Boil Water for a Hot Water Flush

Boiling a kettle of water and pouring it down the drain serves as an initial effort to melt away grease or soap that’s lining the pipes. This step is simple but effective, utilizing the natural solvent power of hot water to start the unclogging process and pave the way for more intensive cleaning.

Baking soda as shower drain cleaner

Step 5: Deploy the Baking Soda and Vinegar Mixture

Introduce a cup of baking soda directly into the drain, followed by an equal measure of white vinegar. The reaction between these two household ingredients produces a vigorous fizzing action, helping to dislodge any residual debris clinging to the pipes. Allow this mixture to sit for about 10 minutes, giving it ample time to break down the blockages.

Step 6: Final Flush with Boiling Water

Following the chemical reaction, another round of boiling water acts as a thorough rinse. Pour it carefully down the drain to wash away the loosened debris and cleaning solution. This step is critical for ensuring that the clog is completely cleared and that water can flow freely once again.

Bamboo Teak Shower

Step 7: Proactive Prevention

Preventing future clogs is just as important as clearing the existing ones. A simple yet effective measure is to install a drain plug that catches hair and other potential clog-causing debris before they enter the drain. Regular maintenance, including periodic cleaning with the above steps, will keep your shower drain functioning properly and reduce the likelihood of slow draining or the need for professional plumbing services.

Bronze Shower Drain

How To Easily Unclog a Clogged Shower Drain?

Unclogging a clogged shower drain can often be done with simple household items, avoiding the immediate need to call a plumber. Start by removing the shower drain cover, which may require unscrewing or simply lifting off, to access the drain. Once open, visually inspect for any visible debris, such as hair or soap scum, that can be manually removed. Wear gloves, and use a bent wire hanger or a small drain snake to fish out the blockage. This can be surprisingly effective at removing the bulk of the clog.

Next, prepare a natural but powerful solution by pouring a cup of baking soda directly down the drain, followed by an equal amount of white vinegar. The mixture will fizz and bubble, working to dissolve any remaining grease or buildup. Allow this reaction to work for about 10-15 minutes, then flush the drain with boiling water. The hot water helps to rinse away the loosened debris and any residual cleaning solution, often clearing the clog completely.

For persistent or recurrent clogs, repeating the process or using a plunger to apply pressure and dislodge the blockage might be necessary. If these steps don’t resolve the issue, it may be time to call a professional plumber to assess and fix the problem.

Styled Silver Shower Drain

How To Keep Your Shower Drains Clean?

Keeping your shower drain clean is essential for preventing clogs and ensuring the water flows freely, which helps maintain a hygienic and pleasant bathroom environment. Here are effective steps to keep your shower drain clean:

1. Regular Flushing with Hot Water

Flush your shower drain with hot water once a week to prevent clogs caused by soap residue and oils. The heat can dissolve minor accumulations before they become bigger issues.

2. Baking Soda and Vinegar Routine

To maintain cleanliness and clear minor blockages in your drain, use a natural cleaning solution of baking soda and vinegar every month. Pour half a cup of baking soda and half a cup of vinegar down the drain. Cover the drain to keep the reaction contained and wait for 10-15 minutes. Then, flush the drain with boiling water to clear out the loosened debris.

3. Use a Hair Catcher

A significant cause of shower drain clogs is hair. Installing a hair catcher over the drain can capture hair and other debris before they enter the drain. Clean the catcher regularly to ensure it continues to protect your drain effectively.

4. Clean the Drain Cover Regularly

Clean your shower drain cover monthly with a brush and mild cleaning solution to prevent blockages and odors. This also helps you visually inspect the drain for any problems.

5. Avoid Chemical Drain Cleaners

Chemical drain cleaners can damage plumbing over time due to their harsh chemicals, which can corrode pipes. Natural alternatives, like baking soda and vinegar, are safer.

6. Professional Inspection

It might be time for a professional inspection if you notice slow draining despite regular maintenance. Plumbers can identify and resolve deeper issues that are inaccessible or easily fixed with home remedies.

7. Educate Household Members

Teach your household to avoid putting excessive soap bits, hair, and small objects down the shower drain. This reduces the risk of clogs.

How long does Caulk take to dry?

Caulk is a flexible material used to seal gaps in various structures and surfaces, ensuring they are waterproof, dustproof, and sometimes even air-tight. The drying time for caulk can vary widely depending on the type used, the conditions under which it is applied, and the specifics of the job. Understanding these variables can help ensure the best results for any caulking project.

Caulk Sealant Products

Types of Caulk and Their Drying Times

Silicone Caulk applying to a door

  1. Silicone Caulk
    Silicone caulk is favored for its strong adhesion and flexibility. It’s particularly useful in areas exposed to extreme temperatures and moist environments, making it ideal for bathrooms and kitchens.
  • Skinning Time: Silicone caulk typically begins to skin over in about 10 to 20 minutes.
  • Curing Time: Full cure can take anywhere from 24 to 48 hours. The caulk must not be exposed to water or manipulated during this time.

Acrylic latex caulk product

  1. Acrylic Latex Caulk
    Also known as painter’s caulk, acrylic latex is easier to work with and paint over than silicone, making it a good choice for sealing gaps in windows, doors, and baseboards.
  • Skinning Time: This caulk will skin over in about 15 to 30 minutes.
  • Curing Time: It usually takes 1 to 2 hours for acrylic latex caulk to become dry to the touch, but a full cure might take up to 24 hours.

Polyurethane Foam Caulk

  1. Polyurethane Foam Caulk
    This type of caulk is best used for filling larger gaps. It expands after application, providing excellent insulation and sealing properties.
  • Skinning Time: Polyurethane foam begins to skin in about 5 to 10 minutes.
  • Curing Time: It can take 12 to 24 hours to fully cure, depending on humidity and temperature.

Butyl Rubber Caulk

  1. Butyl Rubber Caulk
    Butyl rubber is highly durable and best suited for outdoor conditions. It is often used to seal metal, masonry, and roofing materials.
  • Skinning Time: This caulk skins over in about 2 to 24 hours.
  • Curing Time: Full curing can take up to two weeks, particularly in cooler or less humid conditions.

Caulk Drying Time

Factors Influencing Drying Time

Temperature and Humidity

Higher temperatures and higher humidity levels can accelerate the curing process, whereas lower temperatures and lower humidity will slow it down. Most caulks are best applied when the temperature is between 40°F and 80°F.

Application Thickness

Thicker applications of caulk will take longer to cure. It’s important to apply caulk in thin, even lines unless the job specifically requires a thicker bead.

Air Circulation

Good ventilation can help reduce the drying time. Air movement around the caulked area helps to dissipate moisture and accelerates the curing process.

Tips for effective caulking

Tips for Effective Caulking

  1. Surface Preparation: Ensure surfaces are clean, dry, and free of old caulk or paint for the best adhesion.
  2. Correct Application: Cut the tip of the caulk tube to match the size of the gap you are filling. Apply smoothly and steadily.
  3. Tooling: Smooth the caulk with a wet finger or tool to ensure it fills the gap completely and provides a clean finish.
  4. Timing: Avoid exposing the caulk to moisture before it has fully cured. Respect the manufacturer’s instructions regarding skinning and curing times.

Understanding the characteristics of different types of caulk and the factors influencing their drying times is crucial for a successful sealing project. Whether you’re working indoors or outdoors, choosing the right caulk and applying it under optimal conditions will help achieve the best seal and finish.

Avoid doing to make caulk dry sealed

What are the things I should avoid doing to make the caulk dry faster?

When trying to dry caulk faster, there are several practices you should avoid to ensure the integrity and effectiveness of the seal:

  1. Do Not Use Heat Guns or Hair Dryers: Applying direct heat with devices like heat guns or hair dryers can cause the caulk to dry unevenly or crack. It may also compromise the adhesive properties of the caulk.
  2. Do Not Expose to Water: Especially relevant for silicone and other non-water-based caulks, exposing the caulk to water before it has fully cured can prevent it from setting properly, leading to weakened sealing.
  3. Do Not Apply in Extreme Temperatures: Avoid caulking in temperatures that are too cold or too hot, as most caulks have optimal application temperature ranges. Extreme temperatures can affect the curing time and final durability.
  4. Do Not Apply Thick Layers: While it might be tempting to apply caulk thickly to speed up the job, thicker layers take much longer to dry and can lead to uneven curing and potential cracking.
  5. Do Not Disturb the Caulk: Once applied, it’s important to allow the caulk to rest undisturbed during the curing process. Touching or pressing on the caulk can misshape it, break the seal, or extend drying times.

Frequently Asked Questions

Q: How long does silicone caulk take to dry?

A: Silicone caulk typically skins over within 10 to 20 minutes and fully cures in 24 to 48 hours. During the curing period, it is important not to expose silicone caulk to water or touch it to ensure optimal adhesion and waterproofing properties.

Q: Can I speed up the drying time of caulk?

A: To expedite caulk drying time, maintain a warm temperature and ensure good air circulation in the area. Using a fan or dehumidifier can help. However, it’s important not to rush the process beyond the manufacturer’s recommendations.

Q: Is it necessary to remove the old caulk before applying new caulk?

A: Yes, for the best results, you should remove all traces of old caulk before applying new caulk. This ensures that the new caulk adheres properly and provides a seamless, waterproof seal. Clean the surface thoroughly and let it dry completely before reapplying caulk.

Flooring Supply Shop Blog | Flooring and Floor Heating Supply - Part 2